I need to finish this image. I like the streaks of light though, and for once am struggling to produce an image I can be happy with.
Today this ends!!!!
Back to the edit in Lightroom.
First thing I did was go to the Transform Panel and apply a vertical correction of -21 to straighten the tress a bit. I did not constrain the crop as I might need to add in some of the edges.I did. Slight rotation to straighten up the central tree.
Now back to the basic panel. I want to start again so I hit press Alt on the keyboard then press the Tone and Presence buttons to set them back to zero.
Ooh flat dull and horrible.
White balance I leave as is, on Daylight.
I tried a few sliders then thought – why am I doing this? I surely just need to go back to the original HDR image and work from that.
Hmmm. No point doing all this again now is there? And I can adjust anything after the HDR Merge, which is basically everything but the HDR Merge.
Ok that’s better – I am now woking on the HDR full edit before the further work in Lightroom and Photoshop.
Another virtual copy created.
And now the crop, which was the same crop. I deselected Constrain to Image so I could add in edges in Photoshop after – I knew I would be going into Photoshop so not a problem.
I reduced the exposure from +2.05 down to 0. Then down again to -0.48. Yes I darkened the image in seconds by 2 ½ stops!
Amazing what you can do in Lightroom.
OK so now the image is really dark.
Next thing was to go to the HSL Panel and reset the previous changes, by pressing Alt on the keyboard and clicking on saturation, which changed to Reset Saturation when I pressed the Alt key, and did the same for luminance.
I wanted these adjustments to be very specific.
I lightened the green and yellows in the ground, and darkened the tiny amount of blue in the sky.
Next is the critical thing I need to do to this image, using one of my favourite tools.
Dodge and burning (just made a note to write a separate post about this).
When I selected dodging (lightening) I saw three pins in the images, where the previous adjustments had been made. I clicked and deleted these.
This is what I have done, if the addition of the screen dump works.
All the red is areas that I have painted with the brush, using the dodge setting, which increases the exposure by 0.3 of a stop.
Next I deselect Show Selected Mask Overlay, and now I can play with the sliders and see what they do to the image.
This is the main point of the processing of this image.
I increased the exposure in the painted areas to 0.95, the shadows to 55 and added clarity of 45.
And then looked at the image and it just wasn’t working.
Back to the final HDR image, another virtual copy, and I had a think.
I did not like the highlights in the ground. I had overdone them.
All I need to do then is go back and just them surely?
Yes that’s all. I selected the brush, and refined the selection, removing overpainting and adding in more to bits I had missed. Basically I just did the job properly this time.
I added back the vignette and that was that – this is the last work on this image. Actually I did darken the image a bit more, making the light on the ground pop out a bit more. And then I added a graduated filter to darken the top half of the image. And got rid of that as well.
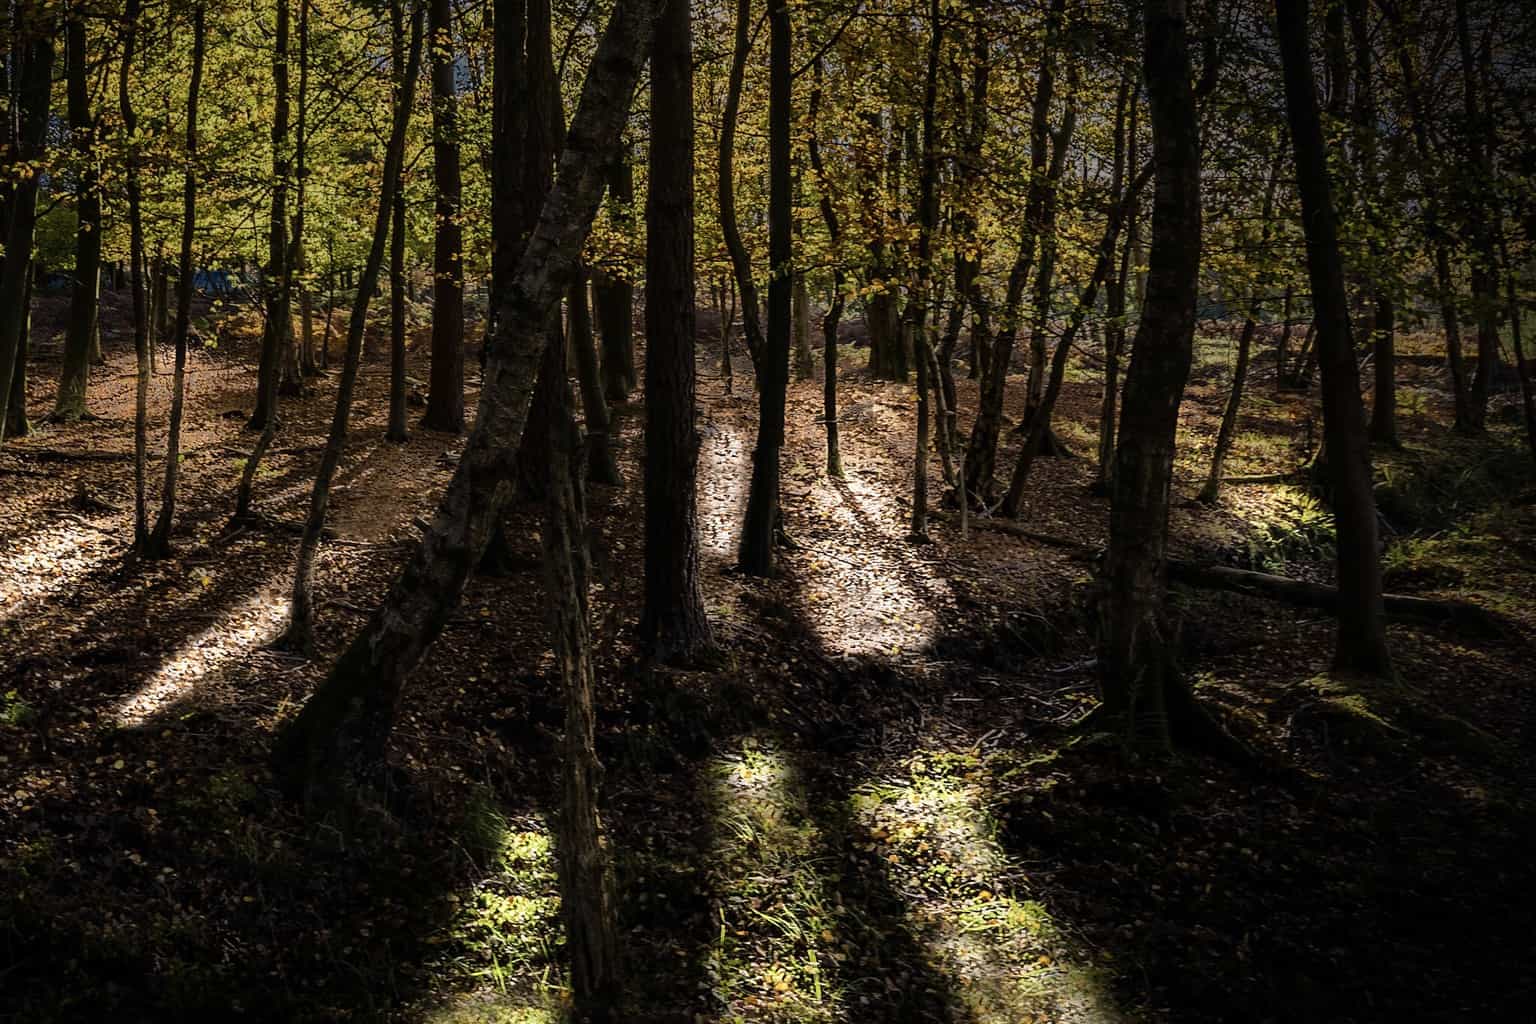
To finish off I did a crop. Another crop. I wanted to centralise the three shafts of light in the front of the image.
Now I will stop. Job done.
OK there is a black and white version which I will produce in the morning.
Rick McEvoy Photography Blog
Monday 21st November 2016