Lightroom is software that you can use to organise and edit photos.
In this post I am going to give you 15 practical tips to help you work faster in Lightroom Classic. I have used Lightroom since the very first version was released in 2007, so have 12 years experience working with Lightroom on a daily basis. And I have applied all this knowledge and experience to this post where I will give the best 15 tips that I wish I knew all those years ago!
A couple of points before I go on. I am based in England and am using a windows PC. The images I work on are all captured using my Canon 6D, and more recently my Olympus micro four thirds cameras. I take photographs in RAW, not Jpeg.
The photographs I take are architectural, landscape and travel images.
What is Lightroom?
As good a place as any to start.

Lightroom is an application for importing, managing, editing and exporting digital photographs.
Lightroom has a number of different modules for organising, developing, printing and sharing your photos.
I import all my photos into Lightroom, where they are organised in a single catalogue. I edit all my photos in Lightroom using the very powerful processing tools, only using Photoshop when I have to. Hold that thought – I only use Photoshop to do things I cannot do in Lightroom. If I do not need to use Photoshop I do not use it.
1 – Which version of Lightroom should I choose?
I use Lightroom Classic. The other version is called Lightroom CC. These names are not particularly helpful.
Lightroom Classic refers to the old version which has evolved from Lightroom 1. Lightroom CC is the newer, cloud-based version.
The main difference is that in Lightroom Classic you store the photos on your own hard drive/ media, but with Lightroom CC your photos are stored on the cloud.
I have over 70,000 images in my Lightroom Catalogue and store them on an external hard drive. I do not want all my stuff in the cloud (not yet anyway), and do not want to pay the additional cost, for the additional cloud-based storage.
Now I know that this will not make you work faster in Lightroom, but this knowledge will save you time if you are not sure which version of Lightroom to choose.
2 – Learn Lightroom properly
Once you have got Lightroom, learn it properly.
There is some really good training on Lightroom available. So much that it can appear daunting. If I were to recommend one product it would be this book

The Adobe Photoshop Lightroom Classic CC Book for Digital Photographers
This is an Amazon Affiliate link – if you buy this book from this link I do get a small commission. But here is a photo of my bookshelf, showing the books I have written by Scott Kelby.
I am not a big user of books, but these have been all been invaluable. So I am recommending a book that I bought an earlier version of myself which I used a lot, and still refer to every now and then.
Scott Kelby has sold the most books in Lightroom and Photoshop on the planet, and the books are very well written.
And I have never bought any other Lightroom tutorials. Well I have, but never used them.
If you do buy this book, or any book on Lightroom, work through that book. And most importantly, stick with this one book and you will be just fine. I bought about three books at the same time thinking I was doing the right thing and got nowhere!
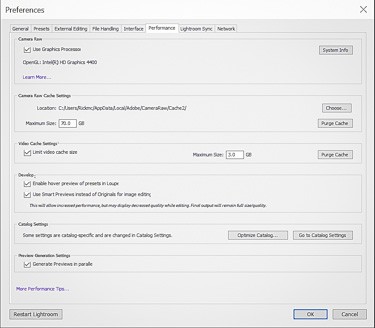
3 – Set up Lightroom correctly
This is a big-time saver, and something that will help you work faster every time you use Lightroom.
I will explain about import presets in a bit, but these are other things that you can do.
These are the settings I use to make Lightroom work for me.

Oh yes, and a side tip here – computer memory. I have 16GB of RAM in my PC. One recent major update to Lightroom advised that you need 12GB of RAM to make best use of the new version.
Ever since I doubled by RAM from 8GB to 16GB I have noticed significant speed improvements.
4 – Calibrate your monitor
Calibrate your monitor and keep it regularly calibrated. This is more for PC users than Mac users – apparently Mac screens are very similar to each other and need less calibrating. Don’t quote me on that as I am a PC user.

I calibrate my monitor regularly using a device called the Eye One Match 3. This cost me less than £100 about five years ago and works just fine. I have never felt the need to upgrade to the latest greatest device, even though bigger and better things are being released all the time.
At the end of the day what worked five years ago works now.
And how will this make me work more efficiently?
Having a correctly calibrated monitor helps me to make quick and accurate decisions about white balance. Correcting the white balance is (normally) the first thing I do when editing images. If my screen was not showing the correct colours I would not know if the image I was editing had the correct colours or not.
5 – File structure
This is a biggy. Seriously.
If you are starting out you can leave Lightroom to do this stuff for you. I did my own thing and got in a real old mess.
This is my file structure now.

First point. All my images are in one Lightroom Catalogue. According to Adobe there is no limit on the number of images that a single catalogue can contain.
Use one catalogue and one catalogue only. Everything in one place.
And if anyone tells you differently they are wrong.
OK?
Back to my file structure.
It is sub-divided. This is the Dorset folder, broken down by location. Add when I take more photos I just add to this folder.

And this is my worldwide folder.
These things do not need to be complicated – just think of how you organise photos in Lightroom like you would folders on your PC, documents and the like. It really is no different
And this file structure has served me well for 3 years now without me having to change anything.
6 – Import presets
There are some very important bits on the right when you import images into Lightroom.

Build Previews – select Embedded and Sidecar.
Don’t worry too much what they mean – all we need to know here is that if you select this option choosing and working with images will be a lot quicker.
Build Smart Previews – I always do this at the time of import.
Don’t Import Suspected Duplicates – keep this checked.
Make a second copy to – I make a second copy on import to my PC hard drive.
Add to collection – because of the way I work I do not check this box but suggest that you do if you are starting out in Lightroom. You can add a new collection, which means that the newly imported images will be available to view and edit in Lightroom Mobile, as long as you sync them. To do this right click on the collection you have created and select “Sync with Lightroom Mobile”.
There are also Develop presets that I add at the time of import. Here they are.


These are saved in a develop preset and are applied to every image on import.
7 – Choose the images that you want to work with.
Don’t edit everything, just the best images.
I narrow down the images from a shoot massively. I try to take one shot of a scene and move on, but obviously take more images than that over the course of a shoot/ trip.
For an architectural shoot for one regular client I never produce more than 10 images. For new clients I am working for I state on my quotes that I will be providing no more than 30 images, which puts a limit on expectations.
Sometimes I produce much less than 30 images which has never been a problem.
I spend a lot of time choosing the images I want to process. Processing can take time after all, and I only process the best of the best from a shoot or a trip.
From my dedicated photography trip to Santorini I edited 99 images – that is all from 5 days of shooting. You can view these at my website Photos Of Santorini.
I select the images I want to edit in Lightroom using the Library Module.
I go through the images and use the keyboard shortcut P (for Pick). Any outright rejects are selected with the key X (reject). After the first pass I use a filter to show the Picks only, and I go through them again.
I keep repeating this until I am down to a good selection. I then create a new sub-folder called Picks, and these are the photos I will work on. I delete all the rejects straight away.
And one more thing that I am going to do having written this post. Every month I am going to go through a folder and delete all the stuff I do not want. I will report back on how many images I manage to get rid of doing this, and how much hard drive space I am saving.
8 – Solo Mode
A really quick tip. At some point you will get fed up scrolling up and down the modules with them all open. Solo mode means when you select a module it closes the one that you were working in.
Seriously this is a great thing to do.
Just right click on the panel list and check the box – this is it here.

9 – Work through the modules
There are seven modules in Lightroom Classic
-
Library
This is where all the images are stored.
-
Develop
This is where the fun stuff is – this is where you edit images.
I use these two all the time. On every shoot.
-
Map
Where the photos were taken using the GPS built into my Canon 6D.
-
Book
-
Slideshow
-
Print
-
Web
I don’t use these last four modules at all.
And switch off the modules you do not use.
10 – Keyboard Shortcuts
Here are the keyboard shortcuts that I use all the time. I listed these out for another blog post without having Lightroom in front of me, that is how much I must use them!
E – brings up the loupe view (full size image)
D – takes me to the develop module from where I am.
Control G – adds images into a stack – I use this all the time
G – takes me straight to the grid view from wherever I am
R – brings up the crop dialogue box, which is the first thing I do when I am editing an image
O – this neat shortcut cycles through the overlays in the crop module which I find very helpful with my composition
P – P for Pick adds a white flag to an image to provide a positive selection
X – X for reject – ok does not work as well as the previous one but is the other shortcut I use to reject images I do not want to keep
Shift Tab – I use this to quickly hide all the side panels giving me a lovely big image that fills my screen
N – N intuitively stands for survey mode, where I can compare similar photos and select the one image of choice out of that selection
The post was called Very Quick Photography Tips – 105 Things Worth Knowing – this is the YouTube video for this post.
11 – File syncing
Another quick tip. In the develop module you can edit one image then apply those adjustments to all the other images.
Select the image you have edited, hit copy and choose what you want to add to the other images, then select all the other images and hit paste. Voila – instant editing!
And a great tip for metadata – select all the images and the keywords are added to all the images at the same time! This is great for the generic keywords such as location that I add to every image (see below).
You can copy and paste the same as you can with edit data.
12 – Stick with it until you know Lightroom inside out – don’t worry about Photoshop just yet
Learn Lightroom inside out. And you will get to a point where you need Photoshop.
All I ever use Photoshop for is removing stuff.
-
People
-
Loose gravel
-
Hose pipes
Annoying bits on the edges of an image
That is it. I do not understand layers, and only use Photoshop if I have to remove something.
That is how good Lightroom is – it really is all you need, certainly in the beginning.
I spent far too long trying to learn Lightroom, Photoshop and other editing software all at the same time, with the end result being that I learned none of them properly.
13 – Add metadata to images when you are doing something with them.
Adding all the metadata that you need to takes time. There are three fields into which you can add lots of good stuff.
-
Keywords
-
Title
-
Caption
I add copyright information on import automatically by the way.
Keywords was something that bothered my and I have numerous attempts at sorting out this issue.
That was until I had the realisation – the light bulb moment.
Do I need to add keywords to every image?
No. I need to add keywords to the images that I am going to be doing something with. For the images that never leave my computer there is absolutely no point.
So that is what I do. I add metadata just before exporting images out of Lightroom for issue to a client, publishing or sharing.
14 – Lightroom Mobile
Lightroom Mobile is great. It is a free App that I use on my iPhone and iPad. To do this you need to add images from Lightroom Classic into what are called collections. Sync them with Lightroom Mobile and boom there they are on your other devices.
I use Lightroom Mobile to go through sets of images and make my picks. It can be a more enjoyable experience to do this whilst reclining on a sofa!
And rating images is really quick too.
And I also use Lightroom Mobile to add images from Lightroom to my iPhone/ iPad camera roll – this gives me quicker access to images to add to social media.
And you can edit image in Lightroom Mobile too!
15 – Don’t aim for perfection
If you do you will fail. Do the best you can sure, but do not strive for perfection. Get the job done and move on.
I used to spend endless amounts of time tweaking this and that – there comes a point pretty quickly where further editing is not only unnecessary but is actually detrimental to an image.
I use the 80/20 rule – 80 percent now is better than 100% never. And rarely does that last 20% make much of a difference.
Summary

I hope that you have enjoyed my post where I give you 15 ideas for ways to help you work faster in Lightroom Classic. Please get back to me with any comments.
And also please check out the video for this post which you can find on my YouTube Channel. If you like this video please subscribe to my channel to be notified of my weekly videos.