Yesterday I wrote about the new Guided Upright feature in Adobe Lightroom CC. As an architectural photographer getting my verticals vertical is very important to me.
Today I am writing about an image selected at random that needed some correction to the verticals in it. The image I selected is a picture of Poole Joint Emergency Services Building, recently constructed, which I photographed for the architect.
The first image is the original file out of camera. I have stripped out all the pre-set develop stuff out of this, so this is the RAW file.
As ever I must digress quickly to a specific image capture point. The verticals in this shot are leaning, as I am looking up at the building. There are two solutions to eliminate this effect. One is to use a tilt shift lens, the other is to take the picture from a higher viewpoint.
Now I do the latter.
Or you can fix it in Lightroom!
Sorry the point I was going to make was that whatever you do, get the central vertical line as vertical as you can – this helps with later processing of the image.
I will write a separate post about this subject and the correct capture of verticals.
Which I didn’t do here…….
So back to the subject in hand…
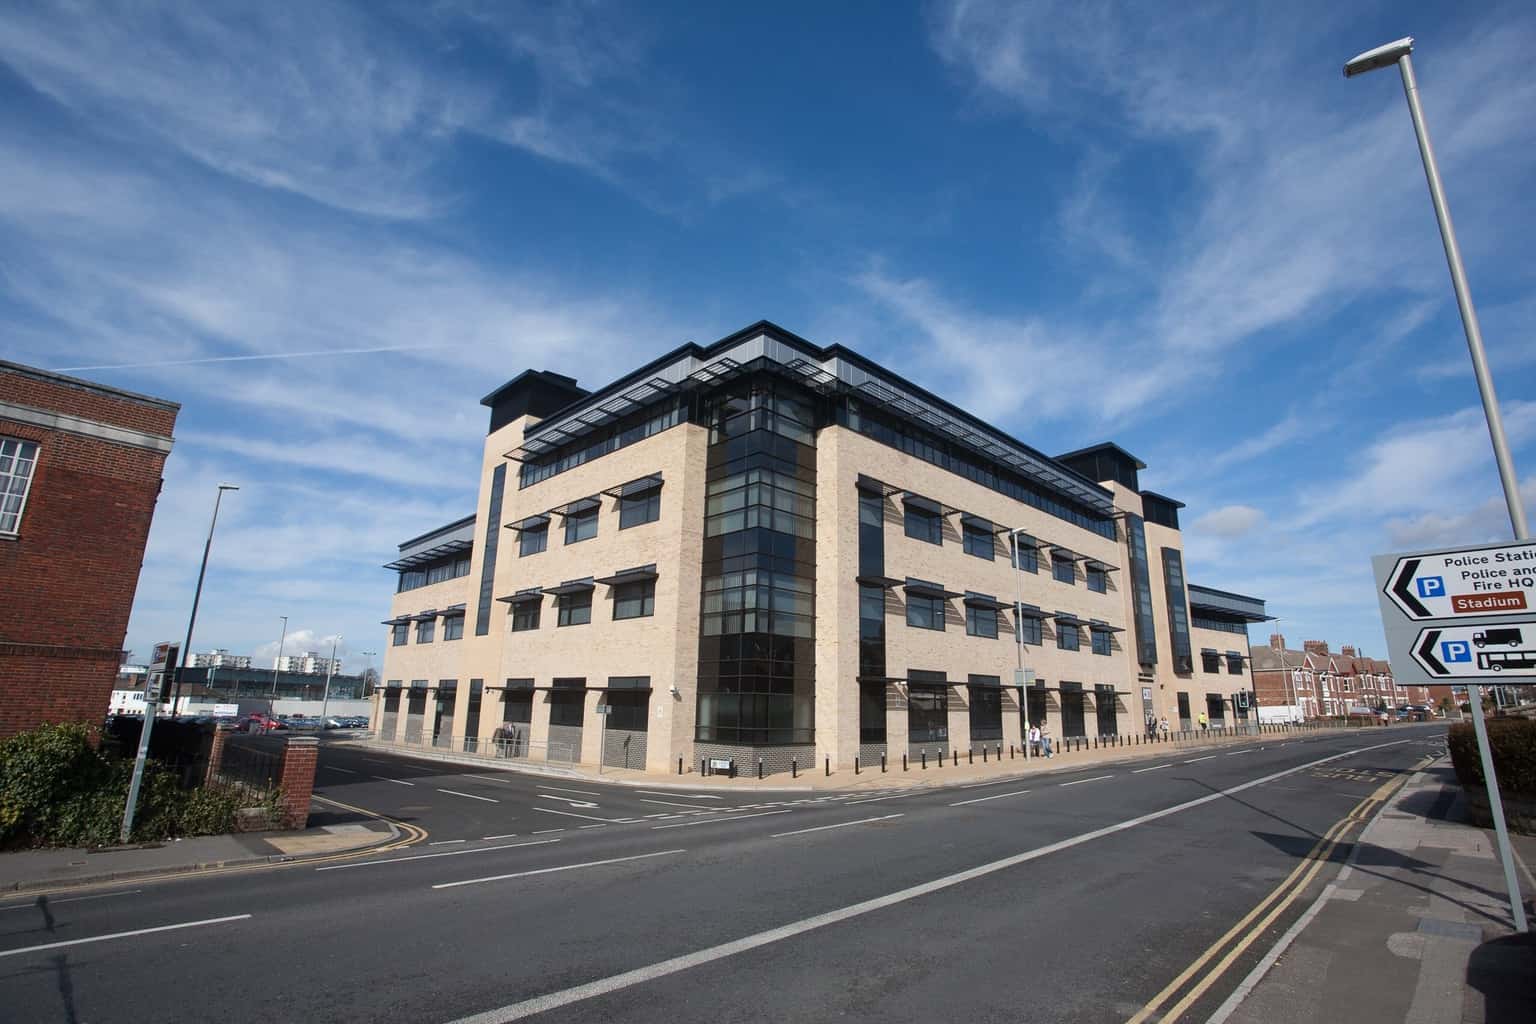
Image 2 is image 1 with the Guided Upright applied, just once, using three vertical lines, to image 1. The vertical lines were applied to the left hand, central and right hand verticals of the main building. This has resulted in the building leaning forward – it has done too much.

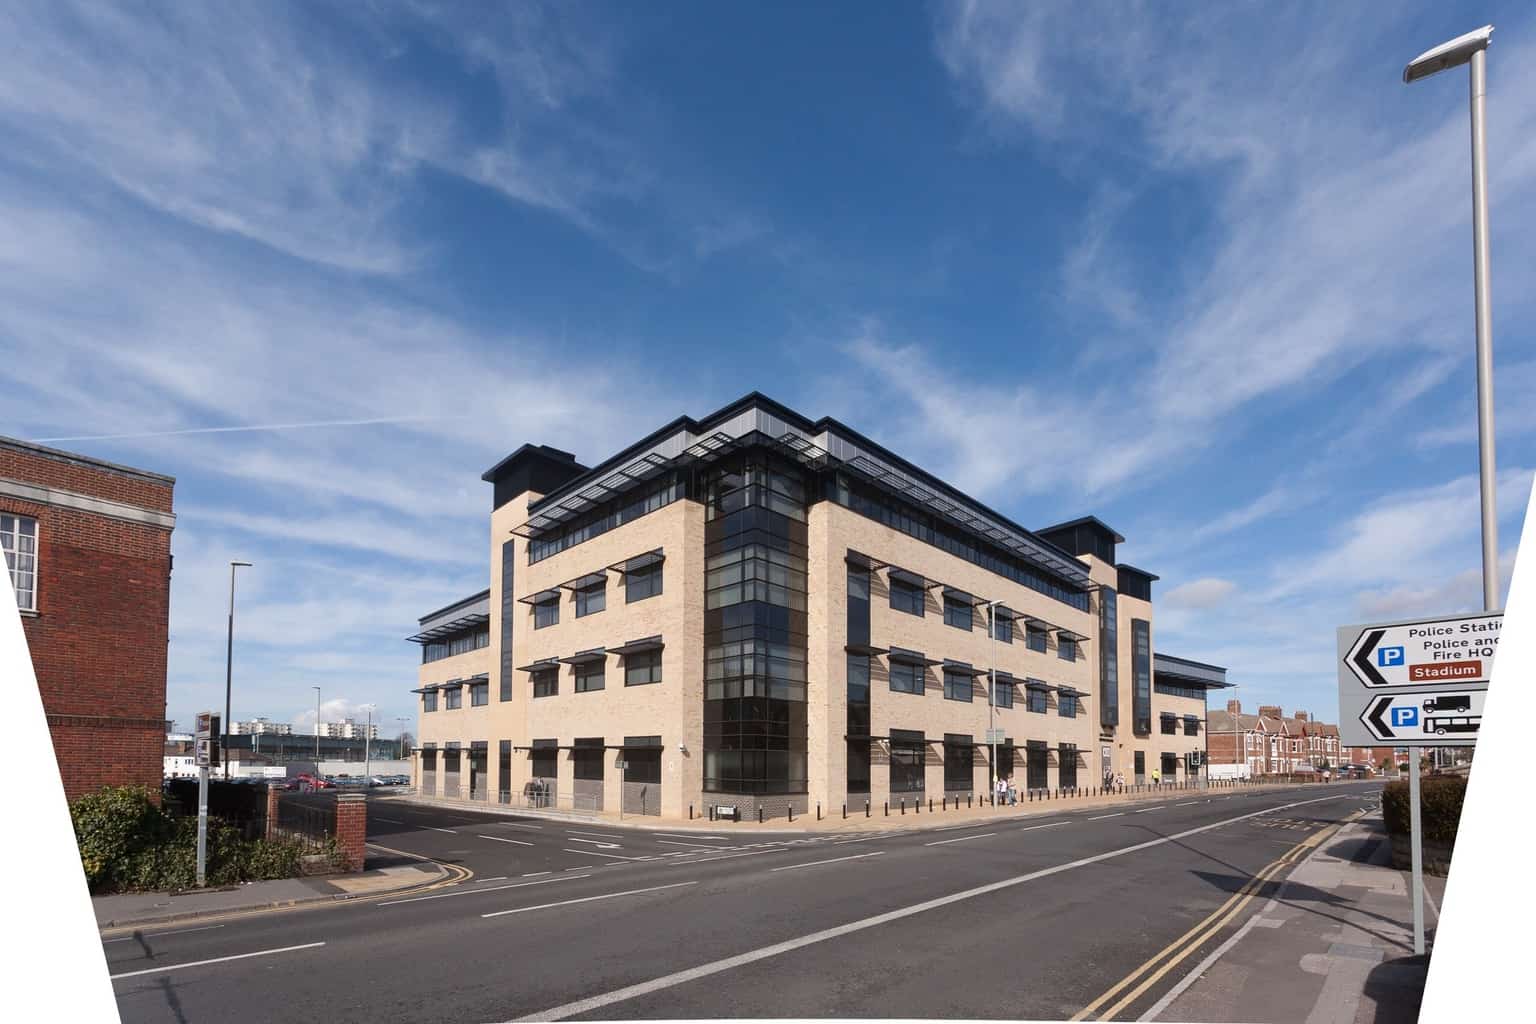
By comparison, Image 3 is another version of image 1 using the auto feature in the Transform panel, which worked better! It has done a really good job.
I will edit image 3 to produce a new final image, but what have I learned from this little exercise?
Firstly, try auto first and see what Lightroom does. Often, like in this image, it does a great job, not always the finished correction but a good starting point to a quick end result.
As for the Guided Upright tool it did not work on this image, but to be fair this is my first attempt. I just wanted to see what was the quickest way of getting the technically correct result I wanted.
For this image auto was great – next I will try on an image that auto could not cope with, so pop back to my blog for the next experiment with the Adobe Lightroom CC Guided Upright tool.
And having done some work to this image I had to go and do a full edit, which I will post shortly.