When you are taking photographs of a building you need to get the white balance right, and I have a great technique that I use which I will share with you here.
To get the white balance right when photographing buildings place a grey card in the first shot of a room. Take another shot without the grey card in. Then in Lightroom simply using the eye dropper tool click on the grey card and that is white balance done. You can copy and paste this white balance setting to other photos with similar lighting.
Yes, it can be that simple. Now I have to quickly caveat this by saying that in complex lighting you might need to do more, but most of the time this technique works, and is a super quick and super easy to get white balance right.
And the bit of kit that you need is not expensive – it is a piece of grey card after all!
Who am I?
I am Rick McEvoy, a professionally qualified architectural, construction and real estate photographer based in the UK. I teach this good stuff on my blog, and also on my splendid Photography Explained Podcast.
I teach you what you need to know and no more. No irrelevant details, just what you need to know to help you with your photography. And me too. Let’s not forget me – I am learning all the time here too.
OK – all good? Let’s do this.
Is this really that simple?
Yes it is. Sorry, some of these things to not have to be complicated. Just because something is quick and easy does not make it wrong. I know that you will find more complicated, technical in depth things and reasons why you need to do much more than I am telling you.
But you don’t, this is what I do, and this works.
And I will say this again – this works a treat for most lighting conditions. Yes there are more expensive, and more complicated products out there, but for me, most of the time, this works just fine. I take my grey card on every shoot, and I use my grey card on every shoot.
Is this important?
Yes, it is. Getting the white balance right gives you the correct colours in a photo, get this wrong and you will have a tough time getting the colours right. But as it is so easy to do why would you not do this anyway, and get the white balance right every time, quickly and easily.
What is white balance in building photography?
White balance is about lighting conditions and how accurately a camera records what we see. The human eye can adjust to different lighting conditions automatically. A camera can’t. Pretty amazing that in this day and age the human eye is still better!
Light is a combination of red, green and blue. It is the amount of each in a scene which changes how the colours look.
White balance presets
The best way to explain this is by telling you about white balance presets. If you are taking photos in RAW, you will have a number of white balance presets
- Auto White Balance
- Daylight
- Shade
- Cloudy
- Tungsten
- Fluorescent
- Flash
Each of these is a preset on cameras which you select according to the lighting conditions.
As you can see, the sun is a massive light source, and there are different settings depending on the conditions, daylight, shade, cloudy.
And there are different artificial lighting settings.
Are these presets not enough?
Quite frankly no. I want to record the actual light falling on my subject matter, and that is another important thing. It is the light falling on the subject, which for me will be the general interior of a room, typically the middle of the room, where the combination of artificial light from light fittings and natural light from a window come together – this is what we see, and this is what I want to capture.
What is a grey card?
A grey card is a card that is grey. No surprise there. 18% grey specifically. This is a middle, neutral grey, and including this in a photo allows you to record the light falling on the card accurately.
You can get grey cards that are actual card, or pop up ones that ones that are not actually cards (but
are still called grey cards).
Where do I put the grey card?
In the scene somewhere where the card is picking up the majority of the light in the composition. For the work that I do, photographing buildings, this will generally be in the middle of a room.
I have the light coming in through the window, and the light from the lights – I always take interior photos with the lights on.
This is why presets are not good enough – they will pick up one of the light sources but not the other. So the light reflecting off the grey card is the actual light in the room. This is what I want.
And when I go to the next room if the lighting is the same I don’t take another shot with the grey card in. No need. I only take another photo with the grey card in when the lighting changes.
OK -why take another photo without the card in?
Simply to save time editing. And I have a reference point for each lighting situation that has not been changed by editing.
What do I do in Lightroom?
For the first photo, simply click on the eye dropper tool in the white balance eye dropper which is to the left of the letters WB in the (not so) Basic Panel – here it is.
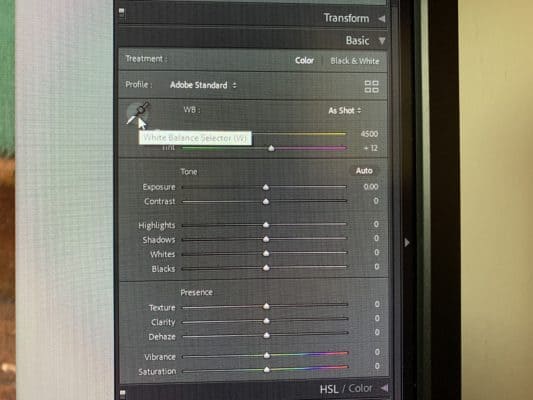
I then click on the grey card and that normally is that.
Sorted!
Does this really work?
Yes it does. There might be the odd occasion where it does not work, but I would say 99% of the time this is all I need to do.
How much does a grey card cost?
Well you get them free with some photography books. And you can spend £10, -£30 on a collapsible grey card, which is not actually a card!
But you need the right grey card. That is very important.
RAW and JPEG
Shoot in RAW and you can adjust the white balance later using the eye dropper tool, or by choosing a white balance preset in Lightroom. Shoot in JPEG and your options are much more limited.
What do I do?
I use RAW, the auto white balance setting on my camera, a grey card and the eye dropper white balance tool in Lightroom. And that is it – 99% of the time that is all I need to get my white balance nailed.
And when I get the white balance sorted for one room I can simply copy and paste it to other photos with similar lighting.
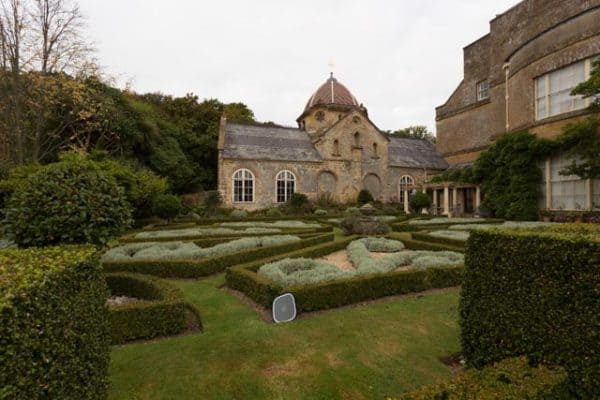
Here is me using the grey card to get a record the light outside before a shoot.
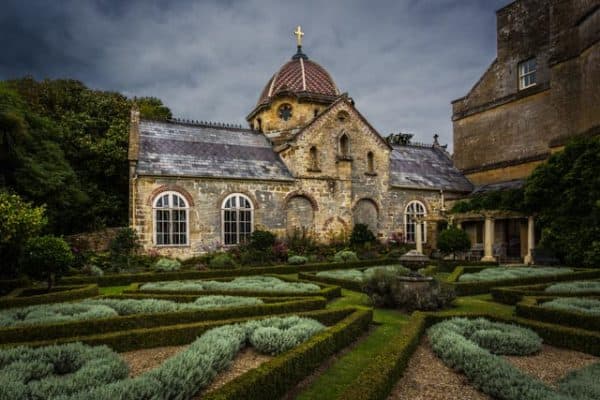
And here is the edited photo.
And here is me capturing the very specific light in a stunning English country house.
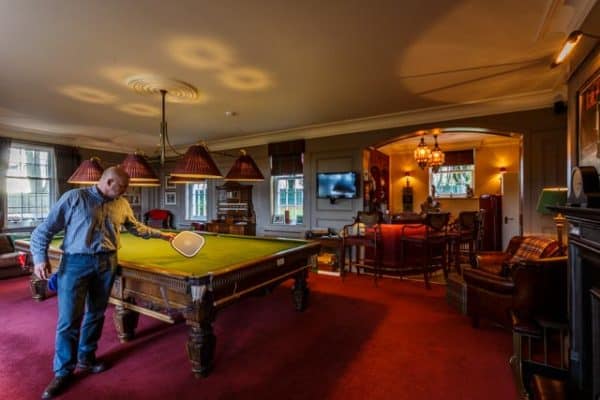
And here is a finished photo from that room.
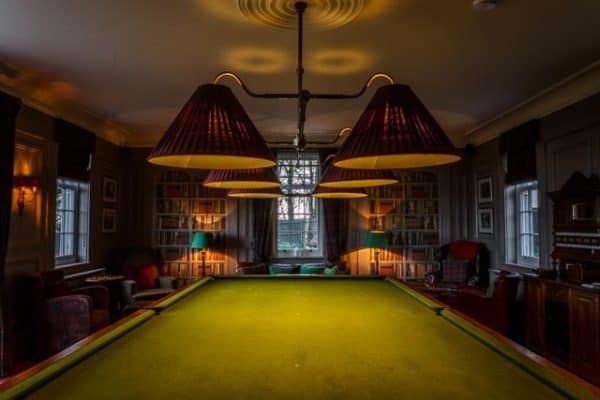
I hope that these photos explain the point.
It doesn’t have to be difficult
We can make things as easy or as difficult as we want. Sure, there is much more to white balance than I have told you here, but what I have told you here will help you quickly get the white balance right, and that is what matters.
What I have told you is what you need to know.
This works for me and will work for you.
Related viewing
There is a You Tube video for this blog post which you can watch here on my You Tube channel
OK – how can I find out more about this stuff?
Simple.
Get in touch with me – email me – sales@rickmcevoyphotography.co.uk
Check out my website Rick McEvoy Photography
Check out my splendid Photography Explained Podcast
Get in touch, ask me a question that I can answer on my blog or podcast, or just say hi – it would be great to hear from you.
Thanks for visiting my small but perfectly formed website, and I look forward to hearing from you.
Cheers from me Rick