Hi, everybody.
Welcome to Episode 14 of the photography explained podcast. In this episode, what rules of composition do I use?
I’m your host, Rick and each week I will try to explain one photographic thing to you in plain English in less than 10 minutes without the irrelevant details. My aim is to explain things in just enough detail to help us with our photography and no more.
In the last episode, I told you all the rules of composition that I could find. It was a long list, but I did conclude by saying, don’t worry, in the next episode I’ll just tell you the ones that I use, which narrows things down quite a lot and hopefully reassures you.
Before I go on, I want to apologise now for the number of times I failed to say the basic word composition, which is a concern when composition is in the title of the podcast episode.
I use the following rules of composition for my architectural and construction photography work to help me get the best compositions I can.
- Rule of thirds
- Depth of field
- Diagonals and triangles
- Foreground interest and depth
- High or low – different viewpoints
- Leading Lines
- Reduce clutter
- Scale and hierarchy
- Simplicity and minimalism
You can listen to the episode here
Or keep on reading. Or do both. Entirely up to you!
So what are the rules of composition?
Quick recap. I didn’t explain this in the last episode. What I didn’t say was this. This is all about the taking of a photo and nothing else. There are things we can all do to photos and processing.
But this is about getting the best composition you and I can every time, in camera, at the point of capture. There are loads of benefits to doing this so please bear with me.
This for me it is the single most important thing in photography, composition is king. If you learn one thing and one thing only from me, this is it.
Okay, so what rules do I use?
These
Rule of thirds
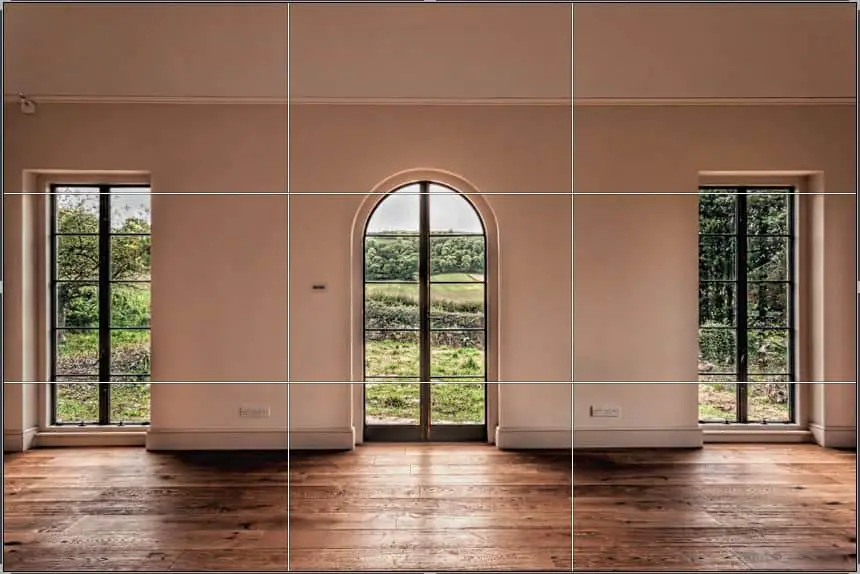
I use the rule of thirds a lot. This is a visual thing. But if you look through your viewfinder and imagine two horizontal lines, one-third and two-thirds height, and two vertical lines at one-third and two-thirds in, you’ve got a nice little grid split into nine squares with four intersecting points.
Here is a screenshot from Lightroom showing the rule of thirds.
Now these are golden.
I use the intersecting points if I’ve got something that I want to emphasise because those four intersecting points are points that the eyes are initially drawn to.
I use the horizontal lines on a landscape to place the horizon on either the lower line or the upper line. And this depends on what’s in the foreground, and what the sky is looking like. If there’s loads of interest in the sky I will include more of it. If there’s more interest in the foreground, or that’s what I’m photographing, I will use the lower line.
The point of this is you’re not putting the horizon in the middle of your frame which is basically cutting your photo in half which is aesthetically very unpleasing.
For architectural photography, I use horizontal and vertical lines to frame the building precisely. And it also helps me to get my verticals vertical in camera, rather than to fiddle around in Photoshop after the event which I hate.
Get it right in camera
There is a saying – get the image right in camera. I have another saying – get it right in camera because I hate Photoshop because it’s too complicated for me.
I love Lightroom but I hate Photoshop – I just don’t get it. Sorry, Adobe. Thankfully, I’m not being paid to say anything nice about Photoshop – anyway, I’m going on to something which is definitely for another episode.
So the rule of thirds is an excellent starting point. If you want to just go and try that one, hopefully, you’ll be pleasantly surprised by just what it does for your compositions.
It’s brilliant and I use it all the time.
The next rule that I use is depth of field
(I didn’t know this was a rule?) Depth of field is important in landscape and architectural photography and lots of other photography. It gets sharpness through the depth of an image from the front to the back if you want.
There is an opposite of (plenty of) depth of field (if the opposite is the right word).
I call this one flipping the rule where if you want to make something stand out, you blur everything else. This has to do with changing your aperture, which we’ll come on to in another episode.
Post episode note
Depth of field can be narrow (just one thing in focus) or large (a lot in focus). I did not explain that very well. But I did say this.
So you can have a shallow depth of field where there’s one thing in focus and everything else is blurry, or a larger depth of field where everything is sharp.
Okay, let’s move on to diagonals and triangles
Now you can find diagonals and triangles in buildings, streetscapes, and in nature. They can make interesting points of interest within a photograph.
I use them quite a lot in my architectural photography work. I can’t say that I use them a lot in landscape photography or travel photography, it’s more of an architectural thing for me.
Once you start looking for the shapes, it sort of helps you with the composition and it gives you something to start from and then If you can find other triangles and diagonals, you can get some interesting arrangements that make sense and give a pleasing image.
It’s good to look for these things and it gives your photos intent and structure. I must write that down as a quote “It gives your photos, intent and structure”.
I could use that somewhere.
Moving on, less about me more about the rules, not rules, sorry, tips, guidelines, that kind of thing.
Foreground interest and depth
I use this in my landscape photography all the time. In architectural photography, I use it where the scene requires it. But in architectural photography, I’ve normally got a specific thing to photograph, so my compositional choices are reduced, shall we say.
But there’s depth to be conveyed in any scene if you look hard enough. That’s about the placement of the elements within a photo to give depth. And when you’re doing that you’re leading the eye through an image from the front to the back, which makes it more visually appealing.
And it means people will spend more time looking at it, rather than just scrolling straight past having given your photo half a nanosecond of screen time.
Next high or low, different viewpoints
Well, the rules are called high or low, I don’t know who came up with that rule. On a commercial shoot, I’ll take the photo that I need. And then quite often I will take a photo from higher up. I even have a painter’s pole with a tripod attachment.
I can attach my camera to a painter’s pole, and I can get my camera five metres up in the air, which is brilliant. And cheaper than a drone, costing less than 20 pounds.
So I can get a high view from the painter’s pole or just hold the camera above my head. If you’ve got an articulating screen that helps but I don’t have this on my Canon 6D. But I still manage.
So don’t worry about that. Or you could use step ladders, or just go upstairs, there’s always a way of doing it.
I also take photos from very low down, which for me is on the floor. I use a Platypod for this. I’ve also got a Manfrotto Pixi. And sometimes I just place my camera on the floor.
You’re giving different angles which give my clients something different – this will make your photos more interesting. So it’s really good.
Leading lines
I use leading lines, which again, draw you into a composition. This is a naturally pleasing thing to do and gives you a photo a purpose, and somewhere for people to look.
I use leading lines all the time.
Reducing clutter
I hate cluttered photos, I spent years taking cluttered photos that were quite frankly rubbish. So decluttering photos, just do it.
Scale and hierarchy
For me, this is showing the scale of a building in relation to the things around it. You can apply this to any genre again.
Simplicity and minimalism
Yeah, this applies to any subject matter, and it’s one of my favourite things at the moment. Minimalism. It’s not lazy. It’s minimalism. Exclude things from a photo, don’t include everything. It makes what you’re including in your subject matter stand out really well.
So I recommend that one.
So that’s the rules that I use. I consistently apply the rule of thirds to my work.
All my photography work is simplified.
My image capture gives me a consistent look. And I worry less about composition as I’ve got a starting point.
So to sum up, these aren’t rules – these are just things that help us to get thinking about composition.
Learn these rules, enjoy trying them out, and see what works for you. But please, please, please think about composition with every photo that you take. That’s the big takeaway. The rest of it is detail, but thinking about your composition will, on its own, improve your photos, trust me.
I’ve been through this process, and it made a massive difference.
So what’s next?
Well, we’re at a point now where I have an episode drafted out that I don’t want to publish because I want to go down a different route. That’s the problem with having a brain like mine, which takes you all over the place.
So come back next episode and you’ll find something really good I hope.
Thank you
Thank you very much for listening. I hope you’ve enjoyed this podcast episode. I have loved looking into composition and telling you how I do things, which I hope helps you.
If it does, please leave a nice review and rating wherever you get your podcast from.
And also please subscribe so you don’t miss an episode.
And if you could also tell everyone you know about my podcast that would be even better, or just even one person and that would be greatly appreciated.
And check out my website Rick McEvoy Photography, and check out my blog. Get in touch if you want me to explain something.
And that is it. The 10 minutes is over. This episode was brought to you by the power of my needing a beer. Not got one yet, but I’m gonna digress here – I think it was on the Buzzsprout guide to recording a podcast. It tells you how to set things up and all the technical stuff.
And it says okay, sit down, relax, get a drink, a glass of water, a beer, or maybe a whiskey! And I just thought – it’s not a bad idea that but I’m recording this at nine o’clock in the morning!
What’s next? In the next Photography Explained Podcast episode 15 Foreground, Middleground, Background.
So yeah, I’m done there. Thank you very much for listening. I appreciate you giving me 10 minutes of your time. I’ve been Rick McEvoy see you in the next episode.
Cheers from me, Rick
OK – that was the podcast episode.
Want to know more?
Head over to the Start page on the Photography Explained Podcast website to find out more.
And here is the list of episodes published to date – you can listen to any episode straight from this page which is nice.
Let me know if there is a photography thing that you want me to explain and I will add it to my list. Just head over to the This is my list of things to explain page of this website to see what is on there already.
Let me send you stuff
I send out a weekly email to my subscribers. It is my take on one photography thing, plus what I have been writing and talking about. Just fill in the box and you can get my weekly photographic musings straight to your inbox. Which is nice.
And finally a little bit about me
Finally, yes this paragraph is all about me – check out my Rick McEvoy Photography website to find out more about me and my architectural, construction, real estate and travel photography work. I also write about general photography stuff, all in plain English without the irrelevant detail.
Thank you
Thanks for listening to my podcast (if you did) and reading this blog post (which I assume you have done as you are reading this).
Cheers from me Rick
