Product photography at home was my only option. In this post I will explain to you how I used my existing camera gear and the Photo Studio Tent from Amazon to create, in three hours at home, the photos which you can see in this post.
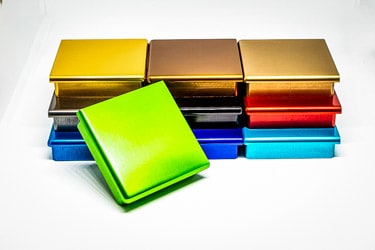
This is one of the photos.
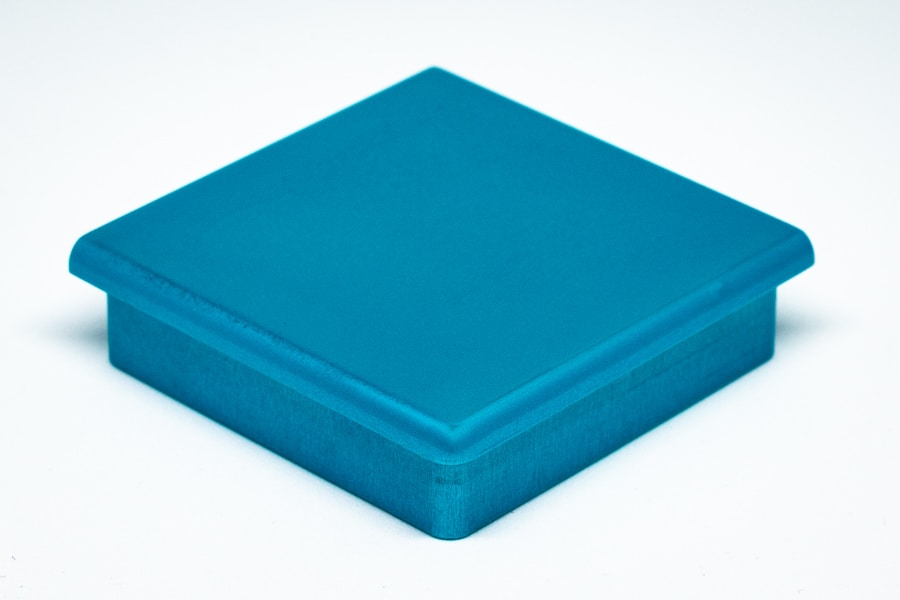
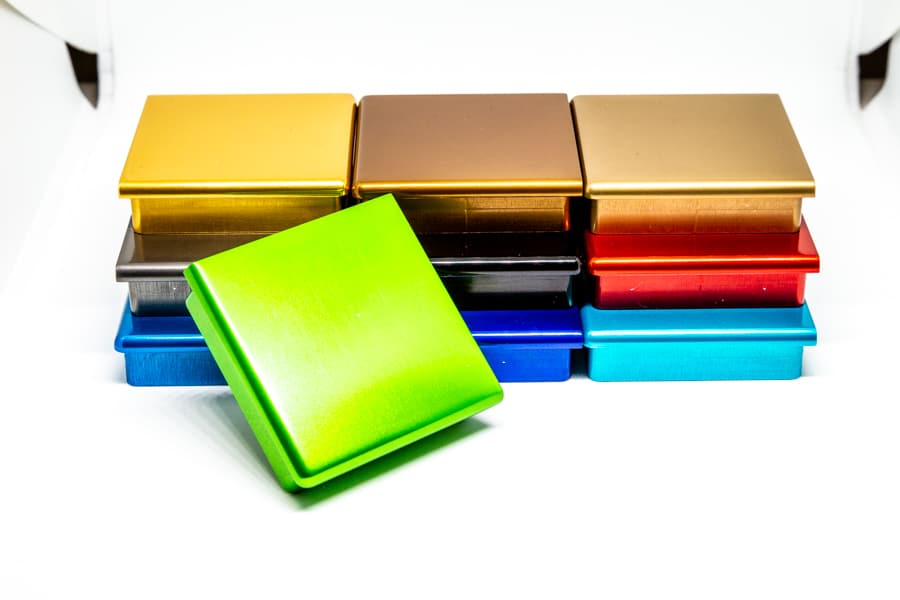
Product photography by Rick McEvoy
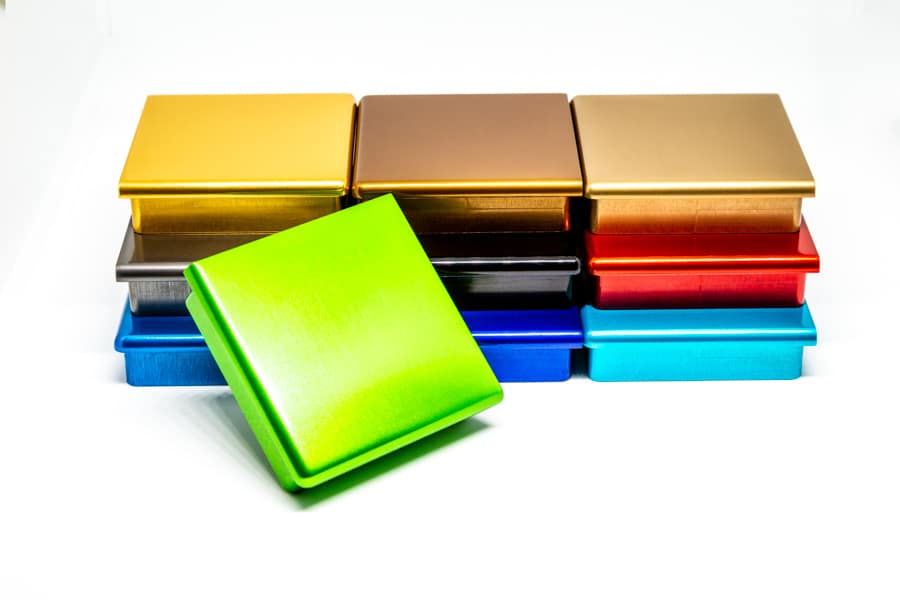
Not bad eh? (ignoe the bit top left) And here is another photo.
Product Photography at home by Rick McEvoy
OK so now we know that I am not photographing buildings!
Want to know how I completed this product photography shoot at home in 3 hours?
Great – let me tell you.
Firstly, where did this job come from? How did I get into this mess?
I have photographed this table previously for Mike Fabb – here is a link to his website.

This is a new enterprise that Mike is working on with a new website which has recently been created.
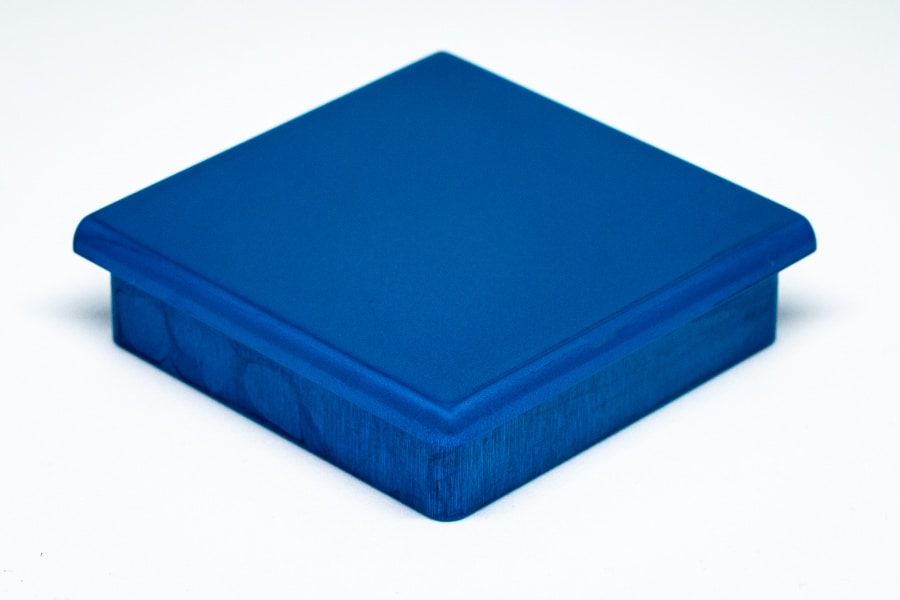
The job was to provide product photos for the new website of the 10 different coloured corner caps – these personalise the table to suit the décor of the room intended to house this lovely piece of modern, bespoke furniture.
What equipment did I use?
My usual camera gear
2 cups of coffee (Alta Rica)
Blu Tack (don’t worry I will explain)
And this bit of kit, which was the studio and lighting all one for less than a tenner!
Photo Studio Tent. Or to give it it’s full title from Amazon
Photo Studio Tent, Mini Foldable Photography Studio Portable Light Box Kit with LED Light, LED Light Tent (22.6cmx23x24cm)+ Two Backgrounds (White and Black), Shoot Amazing Pictures Like a Pro
What photos did I need to produce?
There were 10 different coloured caps, so that is 10 photos which were identical bar the colour of the actual corner cap itself – same composition, lighting, brightness, colour etc etc.
That was the brief.
So that what was I set off doing. Without knowing what I was doing to be honest!
How did I take these product photos at home?
First thing was to assemble the Photo Studio Tent, which took me a couple of minutes. It comes with LED lights built-in which is pretty cool.
Once assembled and the lights plugged in and working nicely I put together my camera gear and placed one of the caps inside the tent.
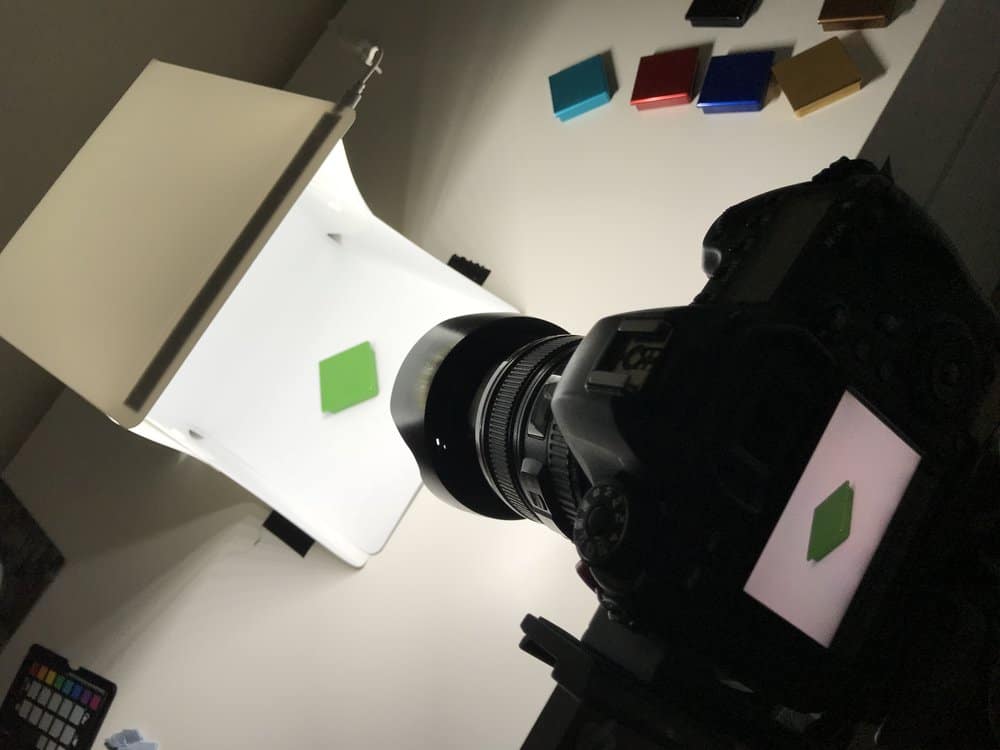
This is the scene in the spare room dowstairs.
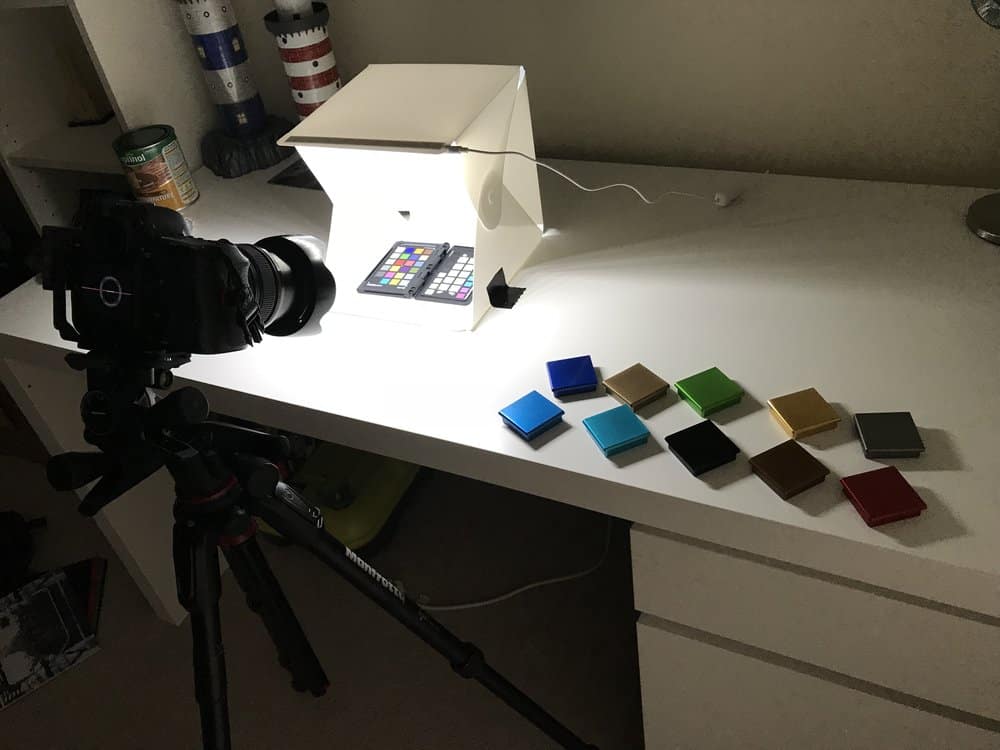
Product Photography at home by Rick McEvoy
First thing was to change from my Canon 17-40mm lens to my Canon 24-105mm lens – I needed the longer focal length as I wanted to zoom in as much as I could, but keep all of the cap in focus.
It took a lot of fiddling around to get everything set up, and then I took the first set of photos.
I imported this first set of images into Lightroom, and noticed straight away that the brightness varied considerably. I took the first set using AV Mode on my Canon 6D.
And I also needed to adjust the view to be a bit higher for the effect I was after.
I went back to do the same thing with my camera in manual mode, and metered for an average brightness cap.
One problem was getting all the caps into exactly the same place – to do this I made a sort of frame that I could push the caps back into using Blu Tac.
This was a bit hit and miss, but I persisted.
I made another set of images, and imported these into Lightroom.
They weren’t all aligned properly, so I had to do a third take.
This time I had an idea. The way the caps appeared in the viewfinder of my Canon 6D I could locate each cap using the focus points – this worked a treat.
That was the composition of the 10 images sorted, so I took those photos and then played around with stacks and combinations.
This is how I actually took the shots
- Place corner cap within the tent.
- Move the cap so the four corners of the caps coincided with four of the 11 focus points of my Canon 6D.
- Tilt my camera forward using the geared mechanism on my tripod so the front corner was in the main focussing point.
- Focus on this point using back button focus
- Tilt the camera back up to the original position
- Take the photo using the self-timer.
- Change caps and repeat
The exposure was already set in manual mode so I did not have to worry about that. And the lighting was constant so all was good.
I took another five images, making 15 in total. Some of these additional images were taken with my camera lower down, at the same level as the products themselves.
What camera settings did I use to take the photos?
Once I had got everything sorted these are the settings I went with.
- Manual Mode.
- Back button focus
- Aperture F16
- Shutter speed 1/15th second
- ISO400
- Lighting via the tent
- 10-second self-timer
Lens choice
I used the Canon 24-105mm lens – this worked a treat and is my favourite lens.
Aperture
F16 is the smallest aperture I am happy to use for this kind of photography – it gives me the largest depth of field without any of the problems F22 can bring.
Manual Mode
Using AV Mode was a mistake. That is what I use all the time, but taking the test shots and reviewing them on my screen told me that and meant I could fix the issue.
Blu Tack
I tried using Blu Tack to make a former to place the caps in, but the Blu Tac did not stick properly. I found a way round this – sometimes it is all about trying things and seeing what works.
Focussing points to frame
This was one of those happy coincidences – the four corners lined up perfectly with four of the 11 focussing points on my Canon 6D.
Tripod and head
I used my architectural photography tripod and head, as I get precise movements with the geared head, which I find essential for such close-up detail work.
Curtains closed
Sounds obvious but easy to forget – one light source is all you want and indeed need for work like this.
What about processing?
I started off importing the photos into Lightroom, using my usual import pre-sets
I needed to get accurate colours. The colours were obviously key to this.
This could be simple or complicated – time will tell.
I used the Passport Colour Checker for this. The first photo I took was the colour checker placed exactly where I was going to take the photos.
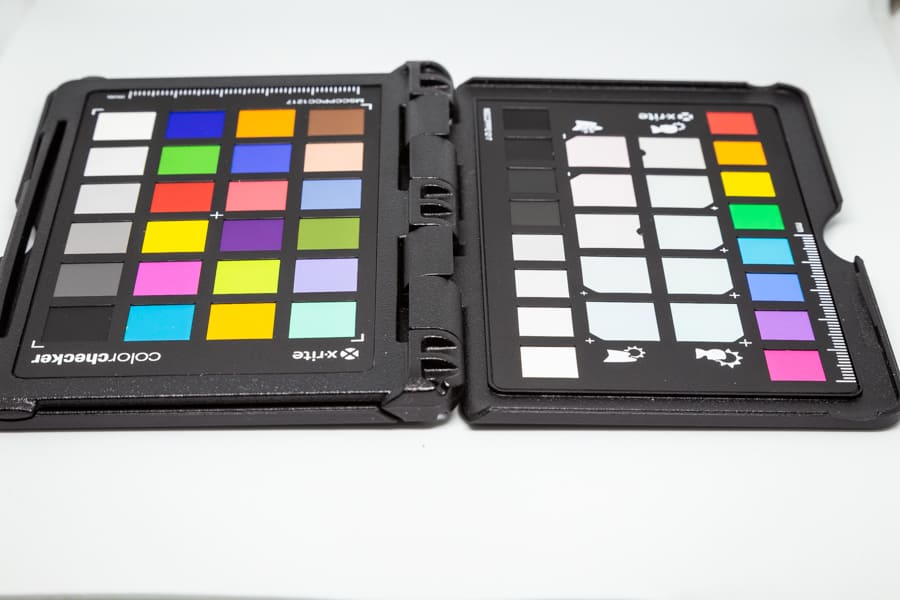
Passport Colour Checker
Now granted I haven’t installed the software to do this properly. Instead I tried using custom white balance in Lightroom. If that worked I could park the software installation to another time.
I know – I need to do this.
So all I did was select the eyedropper tool from the white balance bit of the Basic panel in Lightroom, and clicked on one of the grey squares. The numbers were all the same, so I was good to go.
I know I need to install the software, this is a job for over the Christmas Holidays I think.
Just saying….
Having got the white balance bang on, I copied this from the colour checker photo and pasted it to all the other photos.
Next thing was to sort out the image, which was a bit flat.
These are the develop settings that I used.

Once I had one image sorted I pasted the settings to all the other photos – an excellent feature of Lightroom.
I had to tweak the brightness of some of the images, and also the whites and blacks, but that was processing done.
Finishing off in Photoshop
There was some stuff that needed to be tidied up, which was straightforward to do in Photoshop. The corners of the tent which were visible, and some large dust sensor spots. All removed using spot healing, clone stamp and patch tools.
And there were numerous marks and scratches on the caps themselves.
How long did this take?
I tried doing colour swapping using Photoshop but this did not work too well. I could not replicate the textures of the caps by changing the colours.
That was an hour of fiddling about taking photos of the coloured caps and Photoshop.
We agreed that this did not work so it was on to plan B.
3 hours start to finish.
That includes setting up, unwrapping all the corner caps, taking the photos, importing them into Lightroom on my PC, editing and dispatch via electronic transfer.
3 hours start to finish is not too bad.
That to be fair is three constant non-stop hours working.
Which was four chargeable hours in total.
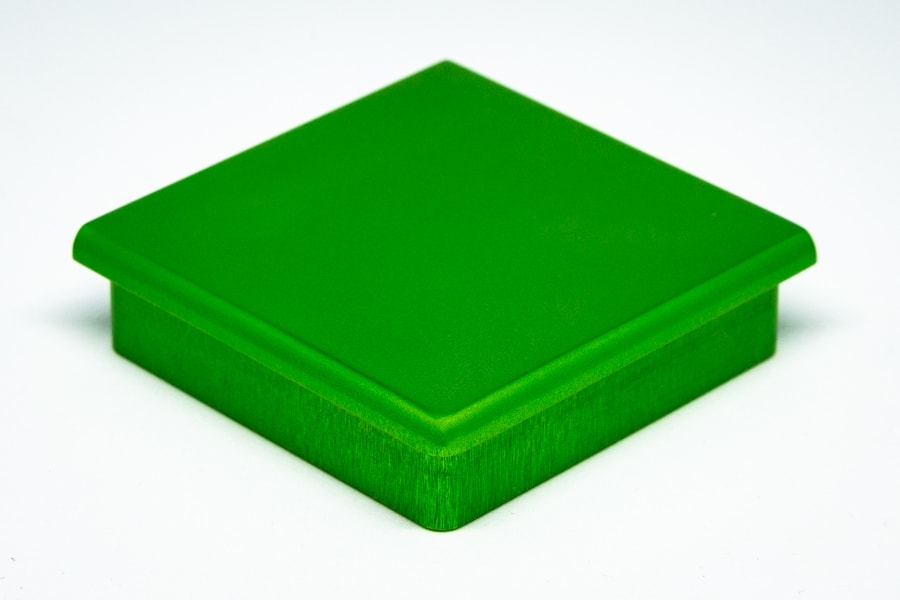
And here is a selection of the images that I took.
First the bright green cap
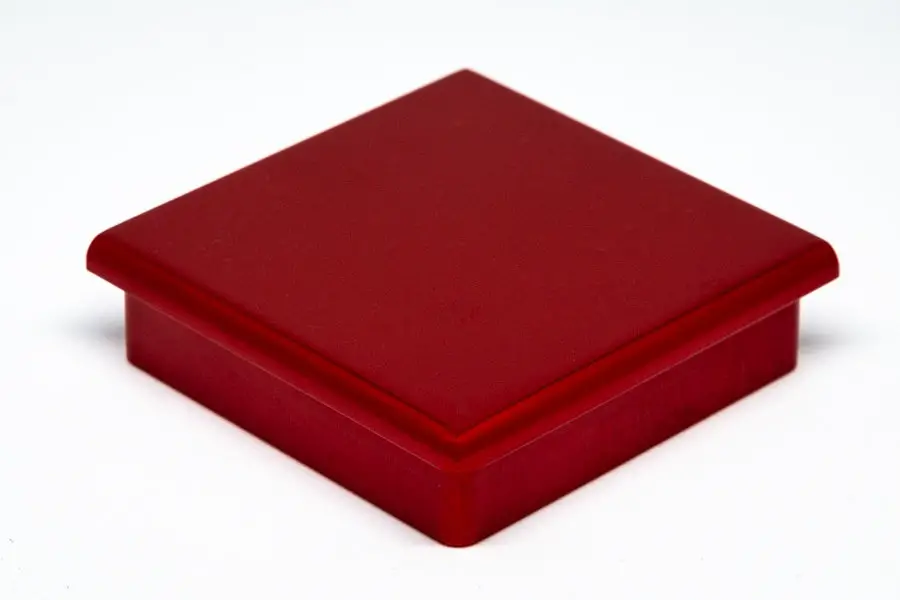
Next the red cap
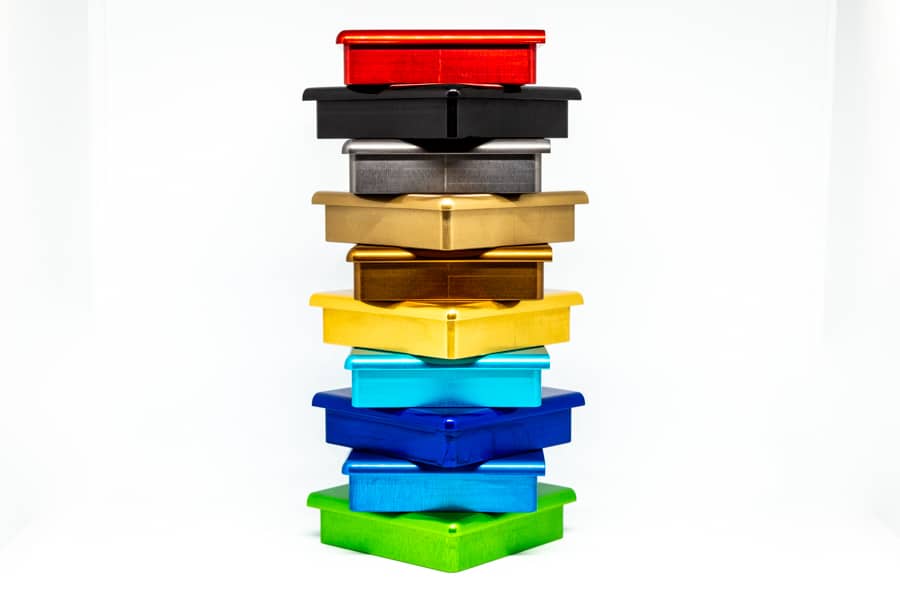
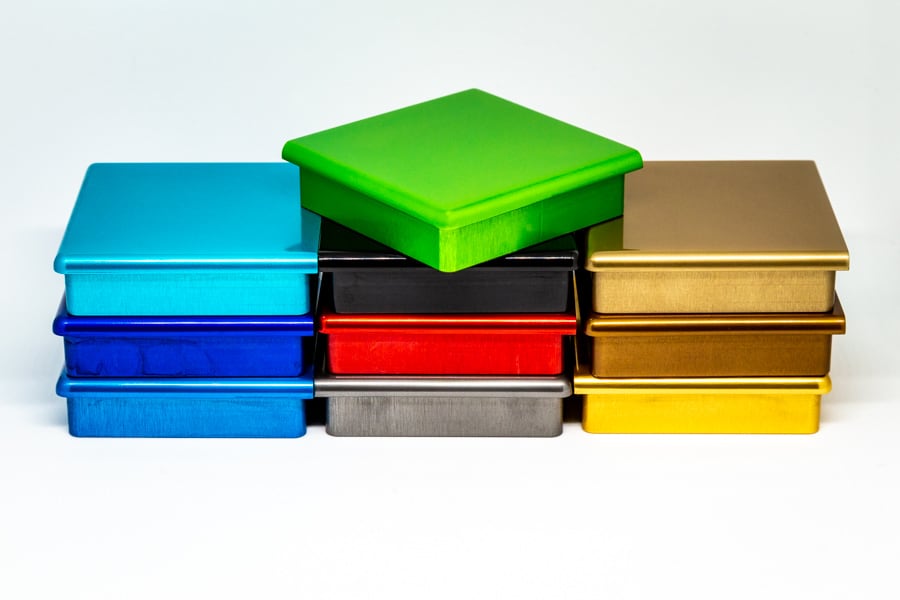
And here is one of the shots of all the coloured caps
And I have to say that I love the finished photos – I think they look excellent. So good they look like someone else took them.
Imposter syndrome
Seriously, when I looked at these photos my first thought was – did I really take them? They look like a real photographer took them!
Seriously that is what I thought.
I no longer think like this about photos of buildings or of my travel photography work, I have got over that.
But it did take a long old time.
No these photos are not something I normally photograph. And I have never taken photos in a tent like this one, with built-in LED lights.
So there was a steep learning curve.
Well sort of.
I have technical image capture sorted, so this was all about applying what I know in a different situation, photographing a different thing.
The basic principles of image capture and processing are the same for most situations, they just need tweaking to the particular thing you are photographing.
And what has photographing something different done for me?
I seriously love these images – they are of coloured corner caps for a table. But I genuinely love these images.
And I enjoyed taking photographs of something different. It was good to challenge myself photographing something completely different.
A quick word about lighting
I do not use flash, or any other artificial lighting. The extent of my use of lighting is to turn the lights on in a room to make it feel more homely.
So using these lights was a complete revelation for me, and has inspired me to do more with lights in 2019.
Lets get back to the point of this post – How to take great product photos at home on a budget
I have proved here that you do not have to spend a lot of money to be able to do work such as product photography in your home.
I have of course completely ignored the fact that I am using circa £3000 worth of gear that I already own, and focussing on the £10 bit of kit from Amazon.
This is though a fair assumption – anyone taking photos for money must have a base level of kit that can deliver professional results.
The point of this post was about that £10 tent which I bought from Amazon, which did an excellent job, and is there for the next time.
And the other point I would like to reiterate here is that it is good to try new things out. I spend my life photographing buildings and nice places, and this is the work that I market.
This does not however exclude me from other genres of photography – there are basic competencies that can be applied across most genres of photography.
Problem solving
Photography is all about problem solving. Some of the things we have to do just have to be worked out, and experience helps here enormously.
Summary
It is nice to take some different photos, and also nice to write about such a positive and pleasurable experience.
Product photography is a photographic specialism. But there is one significant difference about product photography that has just come to me.
Buy a folding tent like the one I bought. And guess what – you can practice at home to your hearts content using whatever you want to photograph.
Now this makes this kind of product photography unique – the only cost is getting really good at this discipline is £10 for the tent – the rest is just time investment to provide another string to your photographic bow.