I am going for it in this edit, and will be doing more than I normally do – this is play time for me so let’s push things and see what we get!!
I created this photo in Lightroom by first creating a new file using the HDR Merge feature. Next I cropped the image and corrected the verticals. I carried out global adjustments using the Basic Panel, then applied a vignette and adjusted the sharpening. And that is it. In this post I tell you the settings that I used in Lightroom to create this image.
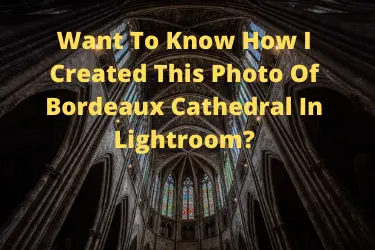
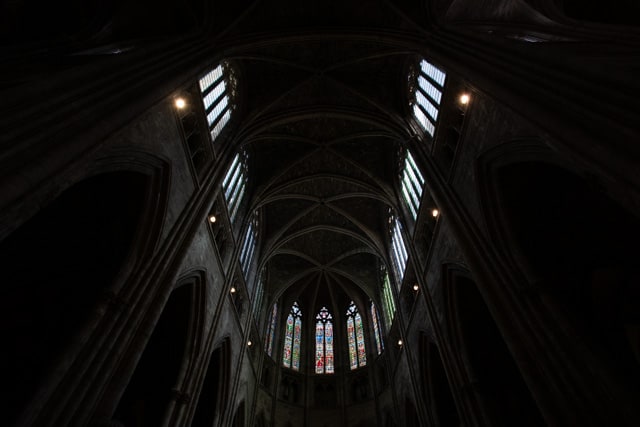
OK – this is the new edit of the photo of the stunning interior of Bordeaux Cathedral in France. Last week I wrote about the edit I did in 2016, lets see what I come up with now. And yes I will compare them at the end!

Let’s play in Lightroom!
What is this photo all about?
The space, the lights and the darks and the textures. This image is not about the colours, so I need to bear this in mind in this edit. No scrap that – after playing around a bit the colours in the stained glass windows are a major thing.
The video – coming soon.
I was hoping to record the editing on my screen but I have not worked this out yet – if I do then I will replace this paragraph with a link to the video – another thing for me to learn!
Starting at the beginning
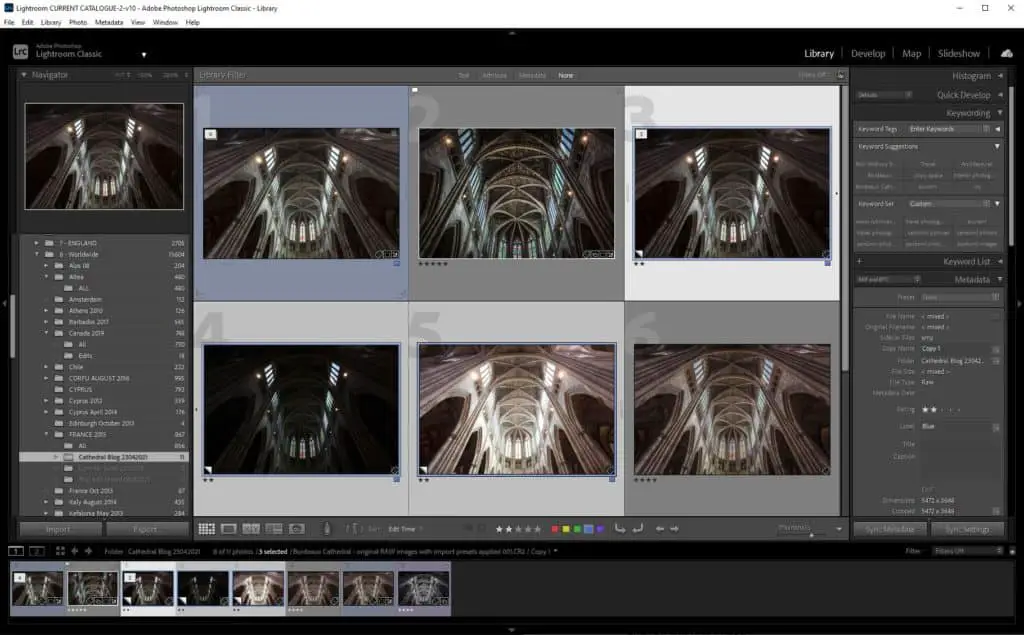
I am starting off at the very beginning with three images with all the processing I apply on import into Lightroom stripped out. These are the base, RAW files. How do I get rid of the processing applied on import?
Simple – just hit reset.
Non-destructive editing in Lightroom
I just want to remind you that anything that you do in Lightroom can be undone. Editing in Lightroom is non-destructive editing, which is a wonderful thing. Only at the point of exporting an image out of Lightroom do you have something that cannot be undone, i.e. the exported file. But you still have all the files in Lightroom.
Virtual copies
I am working with virtual copies. I did the original edit in 2016, and I do not want to undo all that good work, so I just created virtual copies which are what I am working with.
Virtual copies give you the opportunity to do alternative edits without affecting work already done, another wonderful feature.
How do you create virtual copies?
Right click on an image, select virtual copy and you are done.
OK – let’s get into the new edit.
First job is to create a new HDR image, merging the three images that I took together. A quick recap on this – I take three images, one the correct exposure, one two stops underexposed, one two stops over exposed.
Here they are.
And they do not look good do they? But you see all that bright stuff on one, and all that dark stuff in another? I want all that in one image, and that is HDR photography in a nutshell.
To merge the three images this is what I do.
- Click on the first image
- Holding down the shift key click on the third image. All three images should now be highlighted.
- Now right click again, and select Photo Merge, and then HDR.
Actually I described this process last week, so check out this step in the post How Did I Create This Photo Of The Stunning Interior Of Bordeaux Cathedral In Lightroom? I want to concentrate here on the processing I am about to do.
Note if you are doing a lot of these merges the keyboard shortcut is Control H – I get things how I want them with the first image and then can rattle through a set of images in no time.
A new file
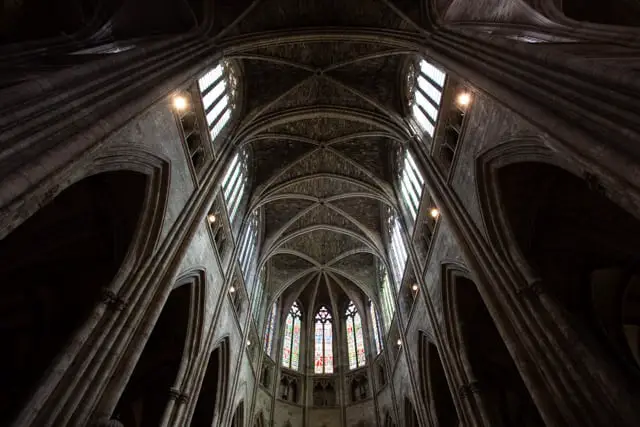
Lightroom has created a new file having merged the three images, which is a new RAW file. Here it is.
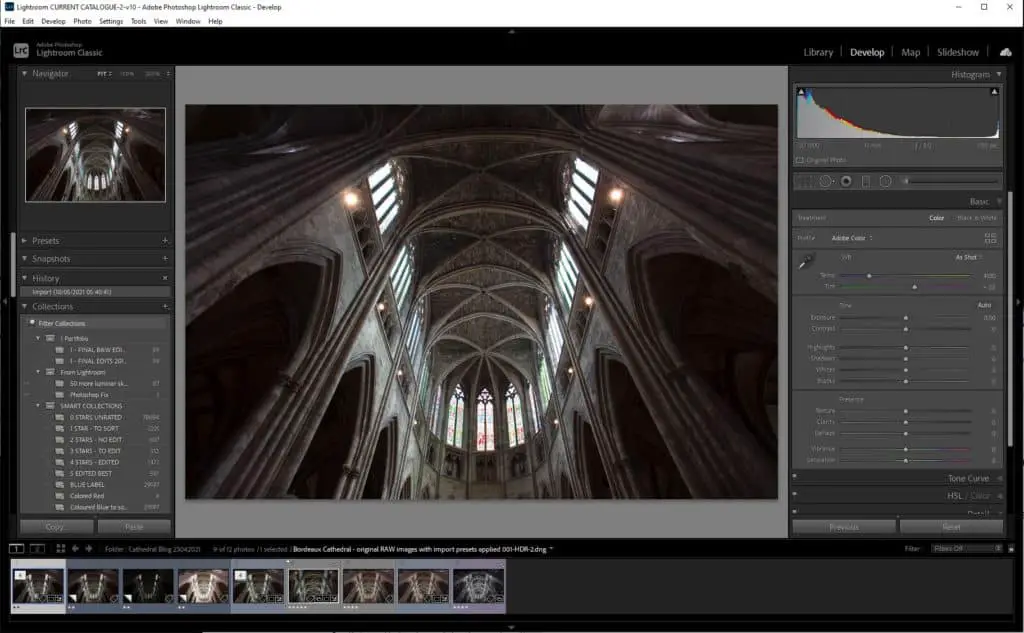
As you can see there is no processing applied in the Basic Panel.
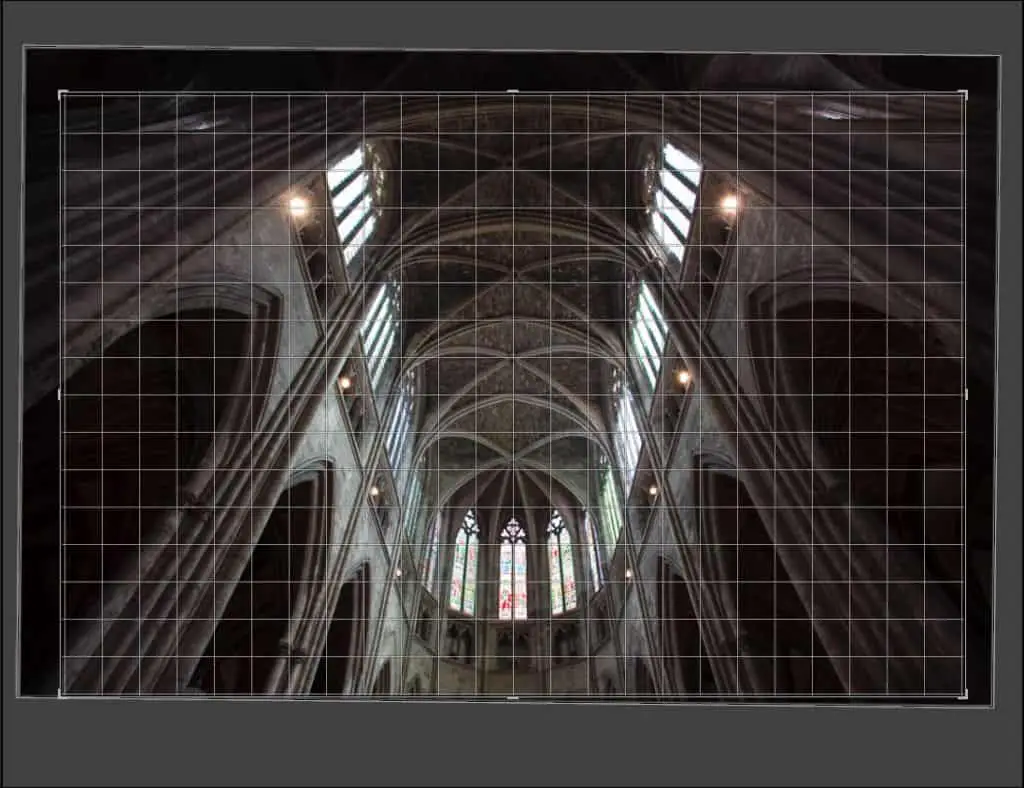
First job – crop and straighten
To get to the crop tool I use the keyboard shortcut R. There are different crop overlays that you can select to help you with the crop, just hit the key O and you can scroll through them (each time you press O and new overlay appears). I like the one which has lots of lines, a nice tight grid overlay.
This one.
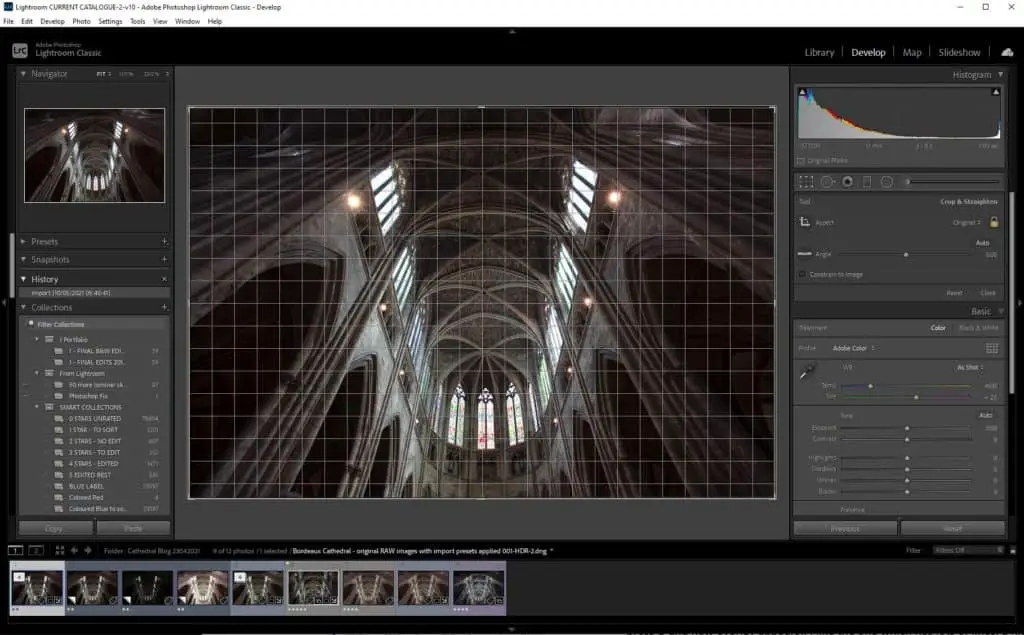
What am I looking for in the crop?
I want the centre line to go through the middle of the stained glass window and meet the intersections on the wonderful, vaulted ceiling.
This is a visual adjustment. Nothing technical – just so it looks correct.
And I took out a bit of the top of the photo.
Here is my crop.
Now there is a bit of an issue at the top, where the windows are not quite aligned. Can I fix this in Lightroom?
The Transform Tool
Yes I can! This is all I needed to do. I selected the Horizontal slider, clicked on the slider, and then used the left and right arrow keys to see what happens.
With the sliders in Lightroom you can use the left and right arrow keys which is often better than dragging the sliders – give this a go and you will see what I mean.
Here is the adjustment, subtle but it fixes the problem for me.
![]()
Add a vignette
Now I normally do this on import, but I will add this now before I go into the basic panel. A vignette darkens the edges, and can be found in the Effects Panel. Just -15, you can barely tell that I have done this but it is there. This darkens the edges and makes the middle stand out more.
Play around with this slider, slide all the way to the right, and then back to the left – now you can see what is going on!
You can change this to your hearts content!
Now the Basic Panel
White Balance
As I shoot in RAW I can change the White Balance in Lightroom. I try Auto first just to see what Lightroom gives me, but it looks awful. Next I try the presets but they are awful to. Only one thing left – do this manually.
Click on the eye dropper tool, and then move it over the image, In very crude terms you are looking for a part of the photo where the three numbers are the same.
Here is a photo as I cannot screen shot while the dropper is selected (in Windows).
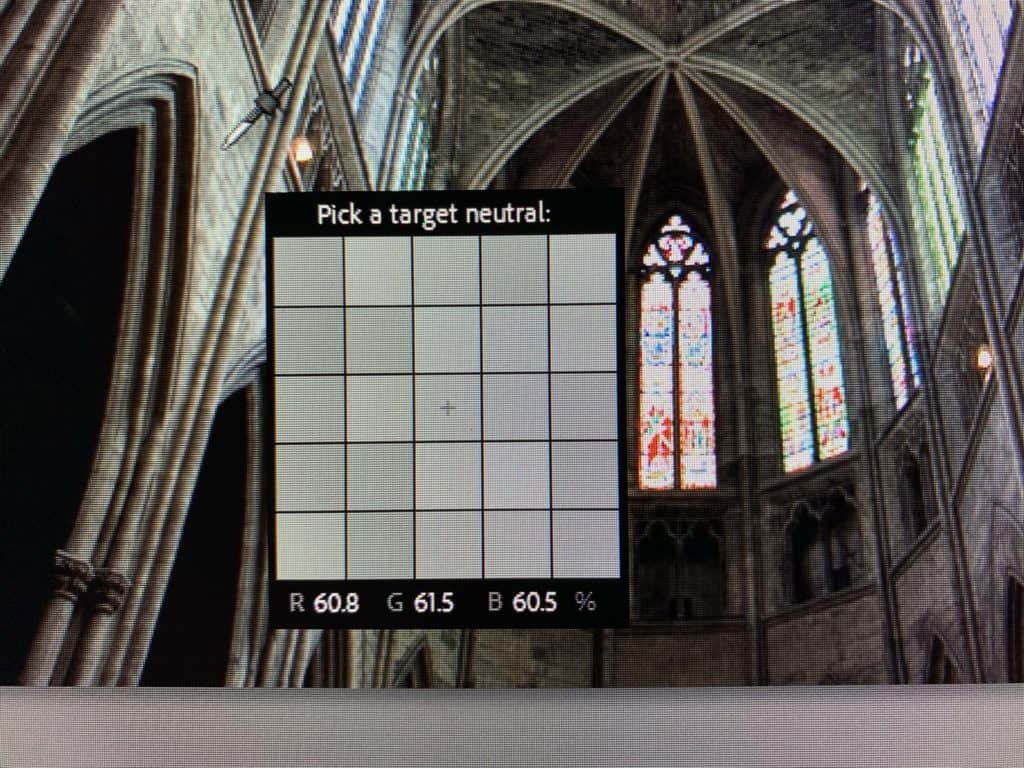
That is near enough and gives me a natural looking image. I want the white balance correct as this is always the starting point for me for a new image.
And now the rest of the Basic Panel
Try Auto
I try Auto see what it gives me – boom a much brighter image. This is it.
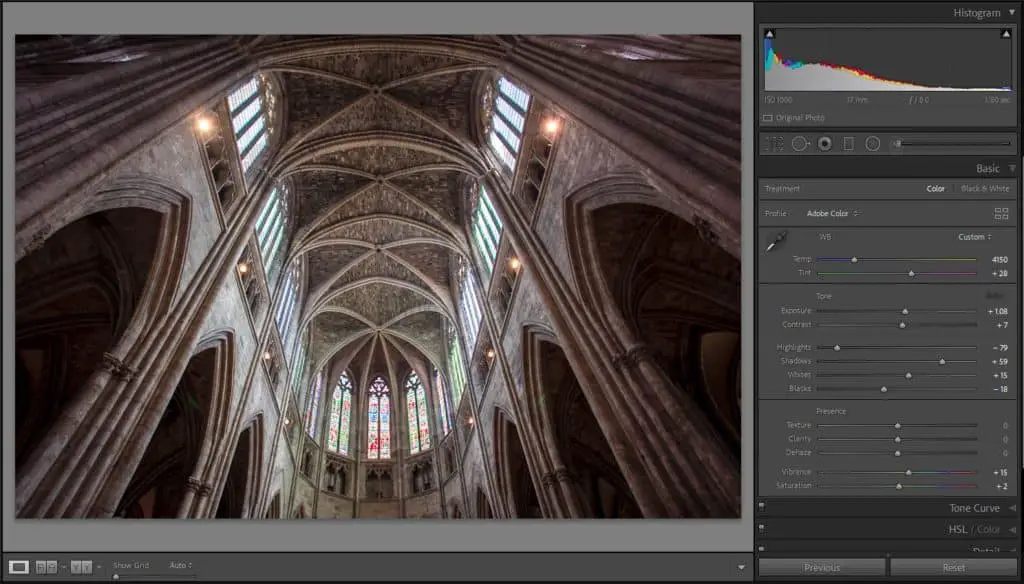
No that is a bit too much. To undo this I go to Edit, then select Undo Auto Settings. I do not want to use reset now as there is stuff that I have done that I want to keep.
Play time.
So now it is time to play with the sliders and see what I get. Don’t be fooled by the term Basic Panel – it is anything but Basic – this is where I do most of my work on most of my images.
I literally move the sliders left and right and see what I get. This is a quick process, and I love going all the way to the ends of the scales to see the ridiculous, and then come back until I have something that I like. And then I do the same with the next one and so on.
And then I come back to tweak whatever – this is a completely visual process. And one that I love. One thing affects another so it is a case of toing and froing until I find a combination that works for me.
And don’t worry about the numbers, they are the result of me moving sliders and getting an image that I like – they have no real meaning other than to record and quantify what I did.
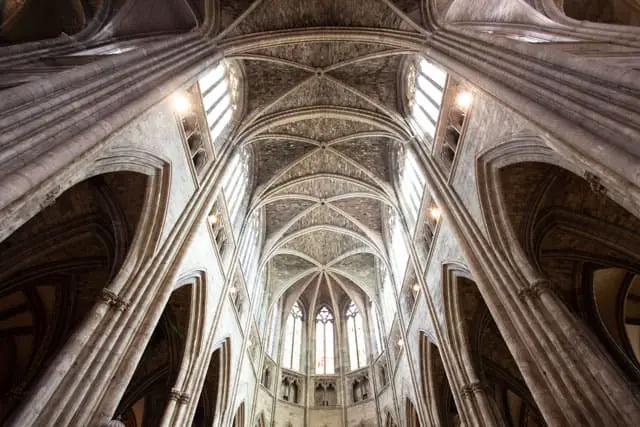
OK so here is the image and here are the settings.
And that is the basic image done.
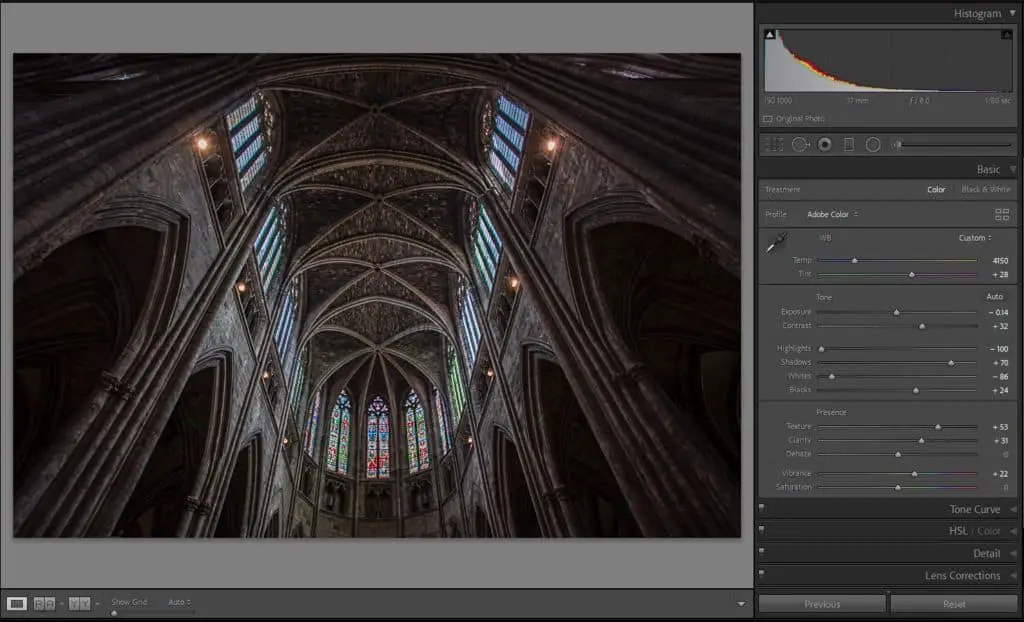
Detail – Sharpening
Sharpening needs to be applied as images are too soft without. I don’t really know why but they do (a question for the Photography Explained Podcast!).
This is the adjustment that I did, which is again a visual thing, just getting the image as sharp as possible without going too far. Zoom in to 100% and drag the sharpening slider all the way to the right and then back to the left to the point where it looks the best.
Dodging and burning
I love dodging and burning. Rather than explaining what it means look at the screenshot.
Dodging
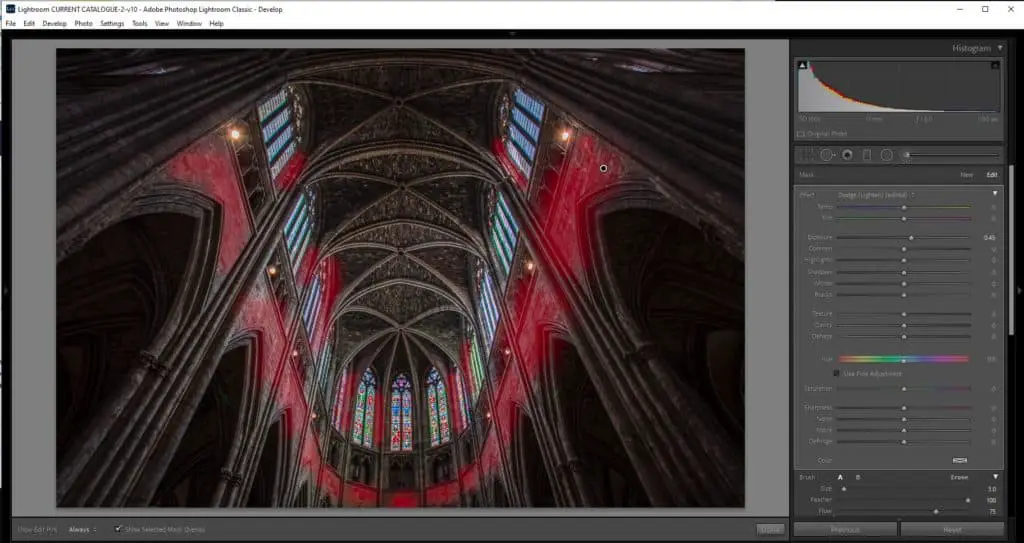
This is the dodging, which is lightening. You paint this on with a brush. I have checked the box Show Selected Mask Overlay so you can see what I have done. I applied an increase in exposure of 0.45.
I do this to make the lighter parts stand out. And after that it is Burn time.
Burning
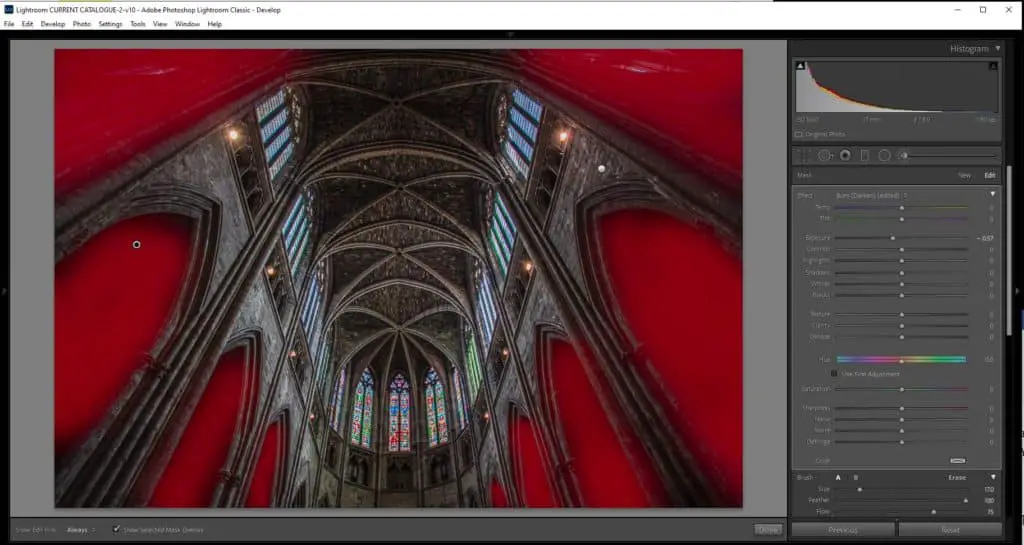
I have darkened the areas behind the arches. I want these to be black to accentuate the light elsewhere.
This is how I remember it. And that really is it.
I am happy with the image, and am going to stop there.
There are a few points that I want to make.
- You do not have to use all the panels
- You do not have to spend forever editing
- When you are happy stop
- Play with the sliders and see what you get
- Enjoy yourself – stuff like this is meant to be a joy and not a burden
- Be bold – you can undo anything at any time
Why not check out the video while you are here?
Yes you can watch the video on my You Tube channel where I talk about this in and probably give you some other thoughts on this subject – I usually come up with something new when I talk about this stuff.Summary
Sure I could do more, but I have learned over the years that you do not have to do everything to every photo. I like the image, this is what I remember seeing, and I am happy that my processing does justice to the magnificent building.
Now let’s put the two next to each other and see how they compare.
This is the 2016 edit
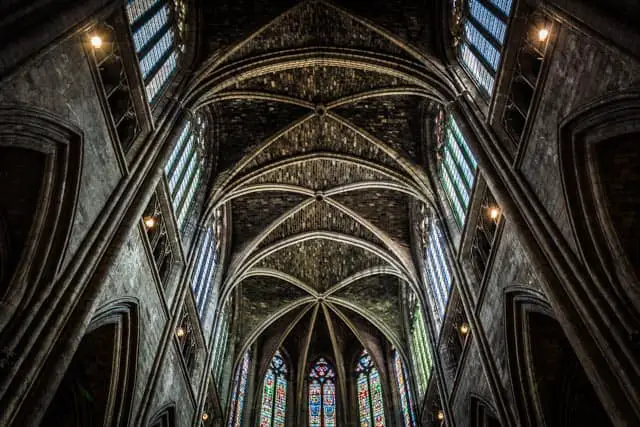
And this is the 2021 edit
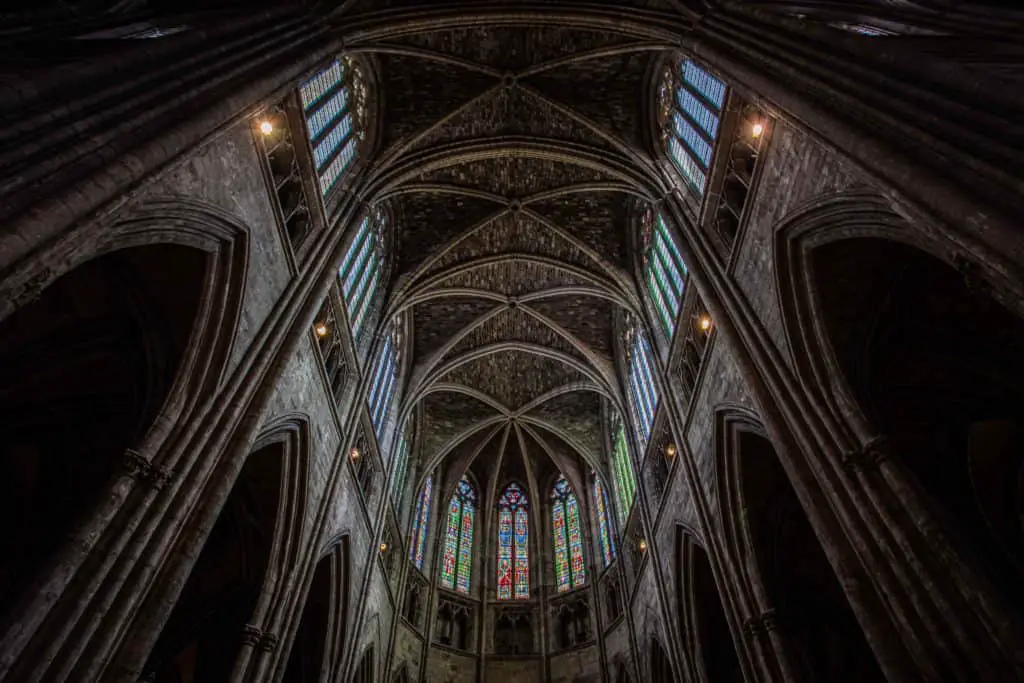 Love the new edit. Much more mood and feeling.
If only for those pesky lights…
Love the new edit. Much more mood and feeling.
If only for those pesky lights…
What’s next on my blog?
No idea to be completely honest with you.
Related reading
Check out a couple of pages of my website which link to lots of related stuff. Work With Me Construction PhotographyRelated viewing
You can watch the video for this blog post right here on my You Tube Channel. Go on give it a go…My Podcast
Also please check out the Photography Explained Podcast, my small but perfectly formed audio offering available on all good podcast providers.Any questions get in touch via my website. It would be great to hear from you.
Cheers from me Rick