Dorset Sunset Photography: The Ultimate Guide to Poole Harbour
The Alchemy of Light: Capturing World-Class Dorset Sunsets
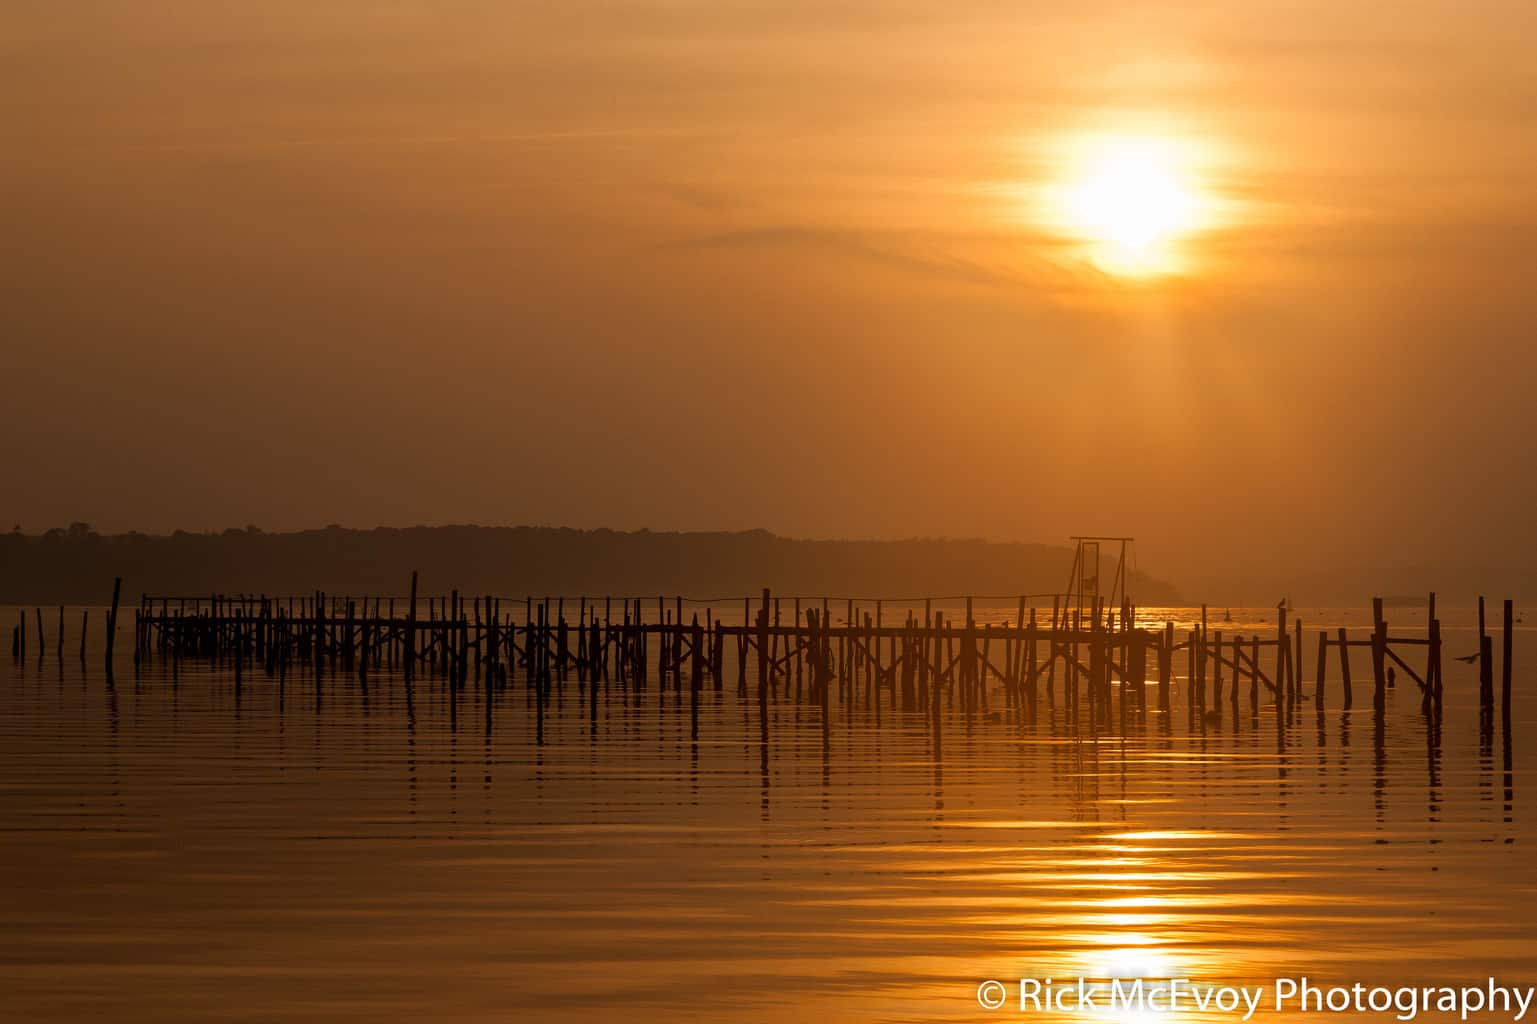
The challenge of photographing a sunset over water is the pinnacle of dynamic range control. The vast, reflective waters of Poole Harbour combined with the iconic silhouette of Brownsea Island against a fiery sky create a truly world-class photographic subject. As a commercial photographer specialising in the Dorset and Hampshire regions, I know that capturing this scene successfully requires technical confidence and an unwavering commitment to stability.
This definitive guide is tailored to the high-efficiency workflow I use: leveraging the creative control of Aperture Priority (Av) Mode and the exposure safety net of Automatic Exposure Bracketing (AEB). This technique ensures we get that stunning combination of sharp foreground details—like the wood of a jetty near Sandbanks—and perfectly saturated sunset colours, every single time.
This is the ultimate resource for anyone searching for professional tips on mastering Dorset photography and replicating the warmth, structure, and calm feeling of these beautiful coastal images.
Technical Mastery: Av Mode and AEB Workflow
My preferred workflow for a high-contrast scene like this is to maintain creative control over the depth of field while relying on the camera's advanced metering and bracketing functions.
1. Av Mode: Defining the Artistic Focus
In Aperture Priority (Av) Mode, you choose the aperture (f-stop), and the camera automatically selects the shutter speed required for a correct exposure based on its Evaluative Metering system.
| Setting | Recommendation | Creative/Technical Impact |
|---|---|---|
| Av Mode | Set to Av | **Prioritises Depth of Field**: This locks in your most critical creative decision (how much of the scene is sharp) while allowing the camera to manage the variable Shutter Speed as light fades. |
| Aperture (F-Stop) | f/11 to f/16 | **Pin-Sharp Focus**: An $\mathbf{f/16}$ aperture is ideal for maximum Depth of Field (DOF), ensuring the foreground, Brownsea Island, and the horizon are all critically sharp. It also generates the desirable **sunburst effect**. |
| ISO | ISO 100 or 200 | **Cleanest Possible Files**: Base ISO is essential for producing high-quality, noise-free images, which is crucial for large prints and commercial work. |
| White Balance | Cloudy or Shade | **Maximise Warmth**: Never leave this on Auto. Manually setting the WB to Cloudy or Shade injects those gorgeous, sought-after **warm, golden-orange tones** into the scene. |
2. Automatic Exposure Bracketing (AEB): The 0 EV Anchor
You have confirmed that the camera's metered exposure (0 EV) is the correct base point (Shot 1). This indicates confidence in the sensor's ability to hold the highlights while using the bracketed frames purely for insurance against unrecoverable shadows or highlights.
AEB Setup for High-Contrast Coastal Scenes:
Set the Bracket Spread: A spread of 2.0 EV is highly recommended.
Activate AEB: The camera will capture three images with a single press of the shutter:
Shot 1 (Base Exposure - The Keeper): Base exposure 0 EV. This is the critical frame. It utilizes the camera's internal metering and is the primary image intended for single-frame RAW processing.
Shot 2 (Dark Safety): Base exposure −2.0 EV. This ensures that if the sun brightens suddenly, the most critical highlights and colour saturation are preserved.
Shot 3 (Bright Safety): Base exposure +2.0 EV. This frame is the key to pulling out hidden detail in the jetty structure and the deepest shadows of Brownsea Island if the 0 EV frame proves too dark in the foreground.
The AEB sequence guarantees you capture the entire light range, with the 0 EV (Shot 1) serving as the foundation of your final image.
The Unsung Hero: Why a Tripod is Non-Negotiable for Coastal Sunsets
The true professional workflow for a scene of this magnitude demands a tripod. Its advantages are fundamental to achieving the highest quality and consistency in low-light, high-stakes environments like the Dorset coast.
1. Enabling Optimal Quality Settings (ISO and Aperture)
The tripod liberates you from the constraint of a fast shutter speed, allowing you to prioritize image quality:
Lowest Base ISO: A tripod ensures you can always shoot at your camera’s lowest native ISO (100 or 200), virtually eliminating noise. Handheld shooting often forces a compromise to ISO 400 or higher to maintain speed.
Deep Aperture Freedom: Since the camera is selecting the shutter speed in Av Mode, if you choose f/16, the light might fade quickly, forcing the shutter speed down to 1/2 second or even 1 second. A tripod handles these long exposures effortlessly, keeping the image sharp while the camera works to gather light.
2. Perfect AEB Alignment
Even though your primary file is the 0 EV exposure, should you need to blend, the camera must be absolutely still between frames.
Consistency is Key: A stable tripod locks your composition down perfectly. This consistency is essential to the integrity of the professional workflow, ensuring every frame is precisely aligned for any potential HDR blending or safety recovery.
3. Achieving Artistic Motion Blur (The Serenity Effect)
The tripod is essential for creative effects that enhance the feeling of the shot:
Silky Water: While your shot features beautiful, frozen rippling water, sometimes the desire is for a serene, silky, mist-like water surface. This effect requires a very slow shutter speed—often 2 to 10 seconds.
Dynamic Sky: Long exposures also subtly blur the movement of clouds, adding a dynamic, painterly element to the sky that enhances the sense of motion around the still, dark shape of Brownsea Island.
4. Precision Composition and Focus
Setting up a tripod encourages a more deliberate, thoughtful approach. You can lock in your chosen composition, use Live View to zoom in, and manually ensure the focus on your key foreground element (the jetty) is absolutely critical. This attention to detail is the hallmark of professional Dorset photography.
Location Deep Dive: Mastering Poole Harbour's Elements
Poole Harbour: The Panoramic Canvas
Poole Harbour, recognized as Europe's largest natural harbour, is the expansive canvas for these world-class sunsets. Its sheer size is what fundamentally defines the photographic opportunity here, providing vast, uninterrupted sightlines that stretch the dynamic range challenge to its limit. The primary benefit is the water itself: depending on the tide and wind, the water surface can transform from a field of glittering, active ripples to a flawless, misty mirror. This mirror effect doubles the intensity of the sunset colours, creating striking, near-symmetrical compositions that evoke immediate tranquility and drama. The best shots often embrace the wide panoramic view. Look for high vantage points—like those found around Evening Hill or the stretches of Lilliput—which offer elevated perspectives to clearly frame Brownsea Island against the sunset, while allowing the foreground to drop away dramatically.
Compositionally, the harbour is rarely empty; look for boats anchored, sail masts, or small jetties acting as strong, dark leading lines into the sunset. The key to mastering this location is anticipation: scouting the location at low tide versus high tide changes the foreground elements entirely, so knowing your tides is essential. Low tide can expose mud flats that offer unique textures and reflections, while high tide ensures a smooth, glassy water surface right up to the retaining walls. This foresight ensures you capture the most compelling structure and reflection in your final image, moving beyond a simple snapshot to a professional landscape piece.
Sandbanks: Foreground and Architectural Contrast
The Sandbanks peninsula is more than just a famous locale of luxury homes; for the photographer, it's the source of essential foreground interest that anchors the composition. When shooting sunsets over the harbour, the technical challenge is to balance the bright sky with the deep shadows of the coast. Sandbanks provides the perfect dark, tactile structures to achieve this balance. Concentrate your efforts on the numerous wooden jetties and pilings that jut out into the water. These elements act as powerful leading lines, guiding the viewer's eye directly from the sharp foreground, across the water, and towards the silhouetted Brownsea Island and the core of the sunset. The contrast between these rough, weathered wooden textures and the soft, glowing light is a signature element of professional Dorset coastal photography.
Furthermore, the area offers dynamic compositional elements. The Sandbanks Chain Ferry, with its slow, deliberate path, can be captured as a streak of light in a long exposure, adding motion and human scale to the vast natural scene. Positioning yourself near the ferry slipway (at a safe distance, of course) can yield powerful shots of the infrastructure framed by the stunning natural backdrop. The presence of nearby luxury architecture also allows for a unique contrast between human design and the raw beauty of the natural world. Utilising a wide-angle lens here helps exaggerate the scale of the foreground structure against the distant island, creating a sense of depth and dimension.
Brownsea Island: The Silhouette Anchor
Brownsea Island is the indispensable anchor in any successful Poole Harbour sunset photograph. Its role is purely compositional: it serves as the perfect mid-ground silhouette, strategically placed to interrupt the bright, overwhelming expanse of the sky. Without the island's solid, deep shape, the photograph can feel unbalanced, dominated by the brightness of the sun and water, lacking a focal point. The island's dense tree line creates a consistently powerful, dark shape that effectively frames the point of light. This contrast is what dramatically increases the perceived saturation and intensity of the sunset colours behind it—a simple trick of visual science where the eye registers the surrounding colour as more vibrant due to the adjacency of the deep shadow.
As the sun drops, the island’s profile becomes sharper and darker, turning into an essential, two-dimensional shape. Photographers should focus intently on how the island sits relative to the horizon and the water line, often positioning it to adhere to the Rule of Thirds for optimal visual weight. The key move here is subtle shifting: moving along the harbour's edge allows you to control the island's position relative to the setting sun's core, ensuring the sun isn't directly obscured unless that is your intended effect. Capturing the island's small castle or the iconic jetty on its near side can also add secondary points of interest, maintaining that crucial balance between the foreground structure and the spectacle of the sky.