Have you thought about using manual mode, but not been sure where to start? Well if you have you find yourself in the right place, as I am going to tell you in this post how to learn to use manual mode. And if you thought learning to use manual mode was boring think again!
To learn to use manual mode you need to start by putting your camera in manual mode. Take photos with the cameras suggested aperture, shutter and ISO combination. Then experiment with different apertures, shutter speeds and ISOs, and combinations of the three. And check out what has happened when you changed these things.
It is this practise and experimentation that will help you grow as a photographer.
OK – that is the answery bit.
In this post I want to tell you how you can learn how to use manual mode. And don’t worry, this might sound boring, maybe even daunting, but this is the fun stuff – this is playing around and learning.
Yes, this is practical stuff that you can do with your own photos that will help you understand exposure and the exposure triangle better. And this will help you to take better photos. And it will help you with so much more – more on that at the end.
And you might only have to do this once for some wonderful pennies to drop and for things to fall nicely into place.
If you use a film camera this is probably not for you though, as this involves taking lots of photos and probably deleting a lot of photos too, all in the name of practise, research and learning.
Why should I do this?
In my opinion, we should all learn how to properly use manual mode. Manual mode is another tool available to us photographers.
You don’t have to use manual mode all the time, but if you want to that is just fine. But it is good to know how to use manual mode in case you have a problem getting a correct exposure in other modes. You never know when you will need it.
What is manual mode?
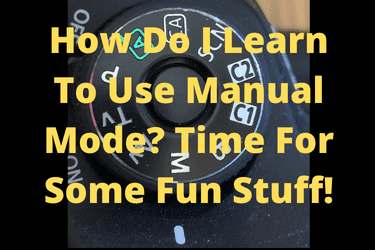
Manual mode is the mode where you set everything. Manual mode is an advanced mode, but one well worth learning. In the Canon Ecosystem, and certainly with my good old Canon 6D, manual mode can be found in the Creative Zone. The other Creative Zone Modes are Program, Tv (Shutter Priority AE), Av (Aperture Priority AE) and Manual.
This is what the Canon 6D Manual says
“In this mode, you set both the shutter and aperture as desired. To determine the exposure, refer to the exposure level indicator in the viewfinder or use a commercially-available exposure meter. This method is called manual exposure. <M> stands for manual.”
Commercially available exposure meter? Don’t worry I have never used one of these let alone bought one.
See it’s not that bad is it?
These are the steps that you go through to take a photo in manual mode.
Again, I am quoting from the the Canon 6D camera manual. Well there is not much point me writing this when Canon have already done this for me now is there?
- Set the Mode Dial to <M>.
- Set the ISO speed.
- Set the shutter speed and aperture.
- Focus the subject.
- Set the exposure and take the picture.
And that is how you take a photo in manual. There are a few other things that you need to do before getting into the learning how to use manual mode stuff.
Things you need to turn off
- Auto ISO – turn this off or the camera might just change the ISO which you do not want in manual mode. Well I don’t anyway. And certainly not for what we are about to do.
- Auto Lighting Optimizer- turn this off.
- Anything else that affects the exposure – turn that off too.
OK – so now you are in manual mode, it is all down to you.
Things to bear I mind.
Aperture
You need to choose the right aperture for each and every photo. And the aperture you choose will influence how sharp the image is, and how much of a composition is in focus from front to back.
Shutter speed
The shutter speed you select will determine how long the shutter is open. You need a fast enough shutter speed to get a sharp photo handheld, or put the camera on a tripod. And the shutter speed will also determine how sharp the subject matter is – photograph something moving fast with a slow shutter speed and it will be blurry.
ISO
The ISO that you set will determine the amount of noise and digital bad stuff in a photo. Basically, the higher the ISO (larger number), the more chance there is of bad stuff in a photo. The lower the ISO the less chance there is of bad digital stuff in a photo.
The exposure triangle
Aperture, shutter and ISO are all related, in what we call the exposure triangle. Change one of these and it affects the exposure. But you can change two or three things and get the same exposure but completely different results.
And this is where we enter manual mode
It is all down to us now. The camera is just doing what we tell it to. The meter is taking readings, but all it is telling you is how underexposed or overexposed a photo is with the settings that you have selected. In manual mode the camera is doing what we tell it to.
The safety net has been removed.
Getting started in manual
I recommend that you put your camera on a tripod. If you haven’t got one no problem, but please believe me when I tell you that if you are serious about your photography then get a tripod. You will need one at some point.
And once you have used one you might use your tripod to take all your photos. This is what I do for my commercial architectural, construction and real estate photography work.
And for what I am talking about here, putting your camera on a tripod just makes things easier.
Starting in manual mode
Follow the steps above to take a photo with the correct exposure. It’s not too bad is it? Have a look at the photo on your camera screen or electronic viewfinder. Is it correctly exposed?
If you have a Histogram you can check the exposure. More on this in another post, but basically this is a graphical display of the exposure level distribution, and overall brightness of a photo. In very simple terms the white bars should not go off the left or right end of the screen, but should start and end within the graph. Check out Photography Explained Podcast Episode 114 – What Is A Histogram And How Can It Help Us When We Shoot?
And you will see this in the photo that you have taken. Is it too light or too dark? Can you see in the shadows, and are the light bits all there?
If you have highlight alerts selected these will flash if there is an overexposed part of the photo.
OK – what next?
You started by taking a photo using the settings suggested by the camera. Now change something.
Play with the aperture
Whatever your settings were for the correct exposure, do this. Change the aperture. Go wide open, select the aperture with the largest number. Take another photo with everything else the same. Now go to the next full stop. If your maximum aperture is F4, the next full stop is F5.6. Take another photo. And do this until you have got to the minimum aperture.
Remember
- Maximum aperture – smallest number, largest opening in the lens, letting the most light in.
- Minimum aperture – largest number, smallest opening in the lens, letting the least light in.
Play with the shutter
From the same starting point, choose the slowest shutter speed that you can. On my Canon 6D it is 30 seconds. Take a photo.
Now this is why I recommend a tripod for this. And use the self-timer in your camera.
And go through the shutter speed range. 30 seconds, 15 seconds, 8 seconds, 4 seconds, 2 seconds, 1 second, ½ second, ¼ second, 1/8th second, 1/15th second, 1/30th second, 1/60th second, 1/125th second, 1/250th second. Keep going, you get the idea.
And finally ISO
Set the ISO to 100. Get the exposure correct. Take a photo. And the go through the ISO scale, 100, 200, 400, 800, 1600. Keep going.
OK – what will this give you?
A range of rubbish photos – but I am not done with you yet.
Go back to the correct exposure. Take a photo. And this time adjust the aperture by 1 stop one way (over or under exposing), and adjust the shutter speed by one stop (the opposite of what you did with the aperture?
This is what I mean. If the correct exposure is 1/250th second at F8, change to this
1/500th second – reducing the shutter speed by half, which is 1 stop, meaning half the amount of light gets through to the camera sensor.
And the aperture to this
F5.6 – larger aperture (but smaller number), one stop larger, meaning double the amount of light gets into the sensor.
And you will have a correctly exposed photo. But this time the aperture and shutter are different, but the overall exposure is the same.
Repeat this exercise using the full aperture/ shutter range.
And then do the same but this time change the ISO and go as far as you can with the correct exposure. And if it is too bright to get the highest ISOs just go somewhere where it is darker and give it a go. You are after a correct exposure with the highest ISO possible, which you might not be able to do. But it should be fun trying! And if you don’t have any joy just do this when it is going dark. Or dark.
The exposure triangle
This is how you use the exposure triangle to get the exposure that you want with the aperture and shutter speed that you want.
And if you need a faster shutter speed but don’t want to change the aperture then you need to choose a faster ISO (larger number).
Ok – that is it in a nutshell.
You use manual mode to change the aperture, shutter and ISO, and also how they combine to give you the exposure that you want.
- If you want a darker photo then choose either a smaller aperture, a faster shutter speed or a lower ISO.
- If you want a lighter photo choose either a larger aperture, slower shutter speed or a higher ISO.
That is the exposure triangle in practise. And that is also how you learn to use manual mode.
What about all those photos that you took?
Now you have your own visual reference of what happens when you change the aperture, the shutter, the ISO, and also the aperture and shutter combination whilst giving you the correct exposure.
And you can now see what happens when you change the ISO, all the way from those lovely clean images at low ISOs to the digital snowstorms of high ISOs.
Check out the video
Yes I have done a video of this blog post which you can check out here on my You Tube Channel.
OK – I am done
But this is so much more than learning how to use manual mode
This is just the beginning. This is learning what manual mode does, and the implications of using manual mode. Do this and you will be moving your photography to a higher level. You have started to learn about exposure, and will now be thinking more technically when taking photos.
You will be taking more time thinking about the photos that you are taking.
You will be starting on the journey to take your photography to the next level.
Any questions get in touch via my website. It would be great to hear from you.
Cheers from me Rick


