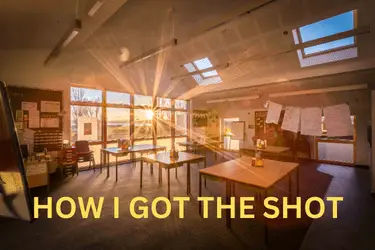
OK, week 2 of me writing about photos of buildings that I have taken. And this week a photo that I love. So how did I get this photo?
I got this photo of a brand new classroom by planning the shoot in advance so I had access to the room at the right time, and to be ready for the time when the sun was in position to give me the starburst effect I was after. I made sure that the room had been cleaned, and that the teacher was not working late in that room on that day. So planning was key to getting this photo.
Planning is key in getting photos of buildings, and this was planned nearly to perfection. I say nearly, more on that in a bit.
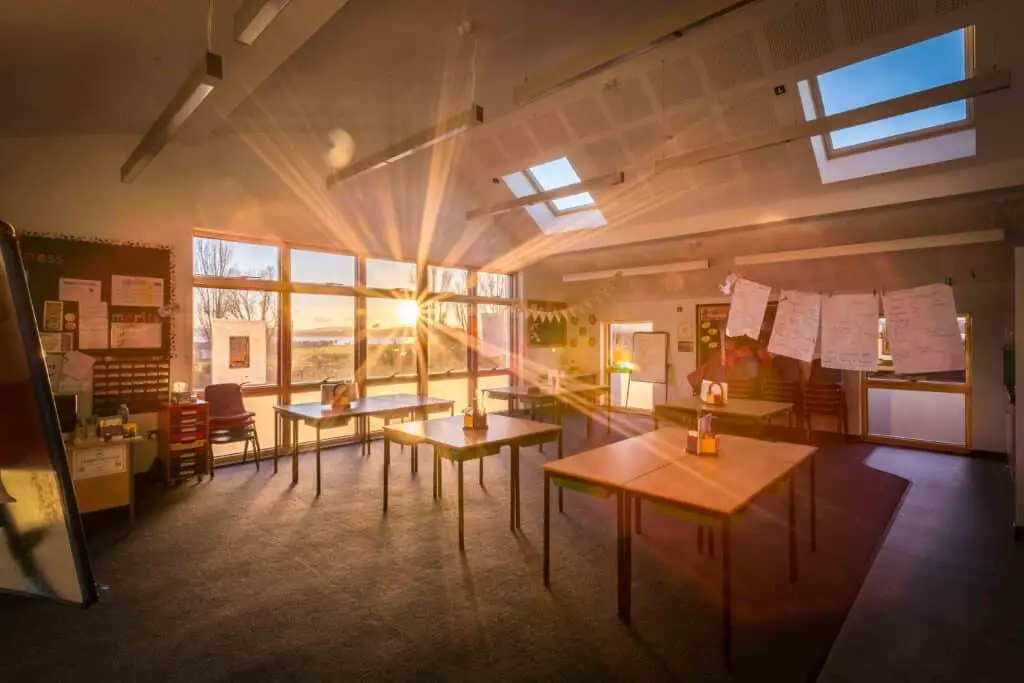
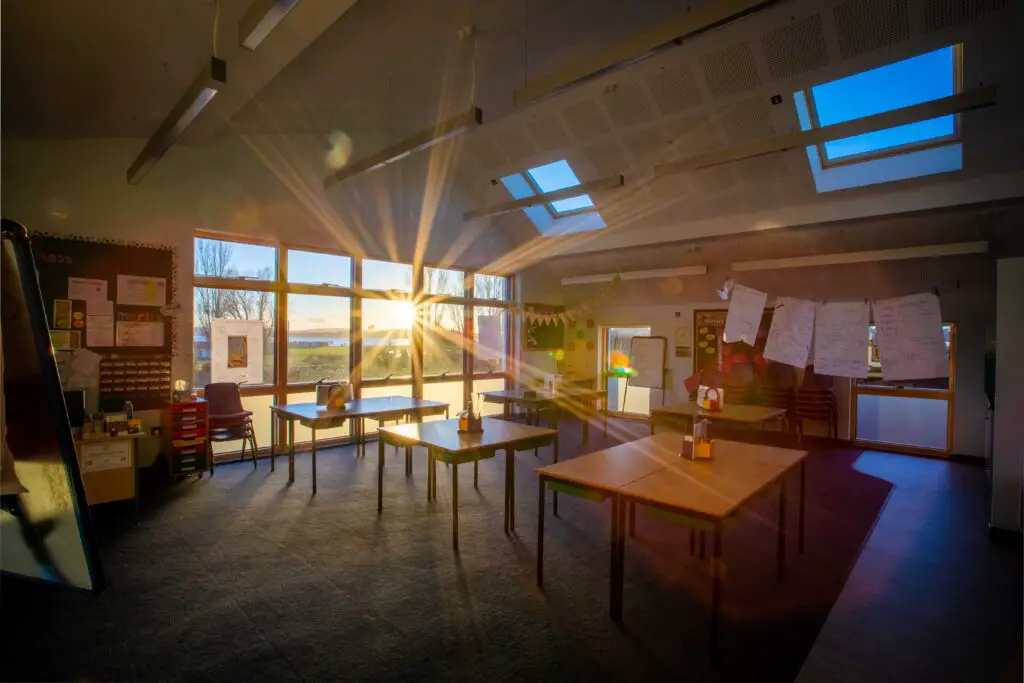
Here is the photo
The rest of this post will magically appear here soon – bear with…..
Right, now I am going to tell you lots more about this photo. All good stuff too!
Camera settings
- Aperture F22
- Shutter Speed – 1/200th second, 1/50th second, well the third photo, I erm cannot find?
- ISO400
- AV Mode
- Tripod
- Focal length 17mm
- Self-timer
The only thing I want to say here is that I used F22 to get the starburst effect. This would not have worked at F8. Try it with your fave lens and see what happens.
Gear
- Canon 6D
- Canon17-40mm lens
- Manfrotto 190 Go tripod with geared head
- Lastolite grey card
- Loupe viewer
And that was all the gear that I used. Just my default gear, my go to base stuff. Everything else was in the car. And this is the gear that I use for probably 95% of the photos that I take.
Where was the shoot?
It was of a new building at a school in Dorset. It had been recently completed and I was taking the photos for the architect.
It was one of a series of shoots that I did for the same client for marketing and record purposes.
Timing of construction works
This is something that I want to elaborate on. If you are taking photos of a completed building you have a real challenge. The challenge of when the building is complete that is.
Now the building firm, main contractor, construction company, call them what you want, the people who need to get sign off of the building as complete, they will have their understanding of what complete means. And the client will possibly have a different understanding.
And me as the photographer? Well I am normally stuck in the middle trying to juggle the state of completeness (or not) with getting some finished photos. These days when a building is complete the client moves in pretty rapidly leaving a very small window in which to get completion photos before people move in and use the building, making it their own.
And that window of time is the challenge. It really is.
Real estate photography – not a problem. You are normally taking the photos ultimately for the seller, to help them sell (or lease)their property, so they have a vested interest in presenting the building at its best.
Which is seldom the case in the often frantic completion of a construction project!
The edited photo
I have included the edited photo earlier in this post. This is the edited version issued to the client at the time. And everything from here on is from the newly created HDR file, taken from the three image captures. So I am not starting with a single RAW image OK?
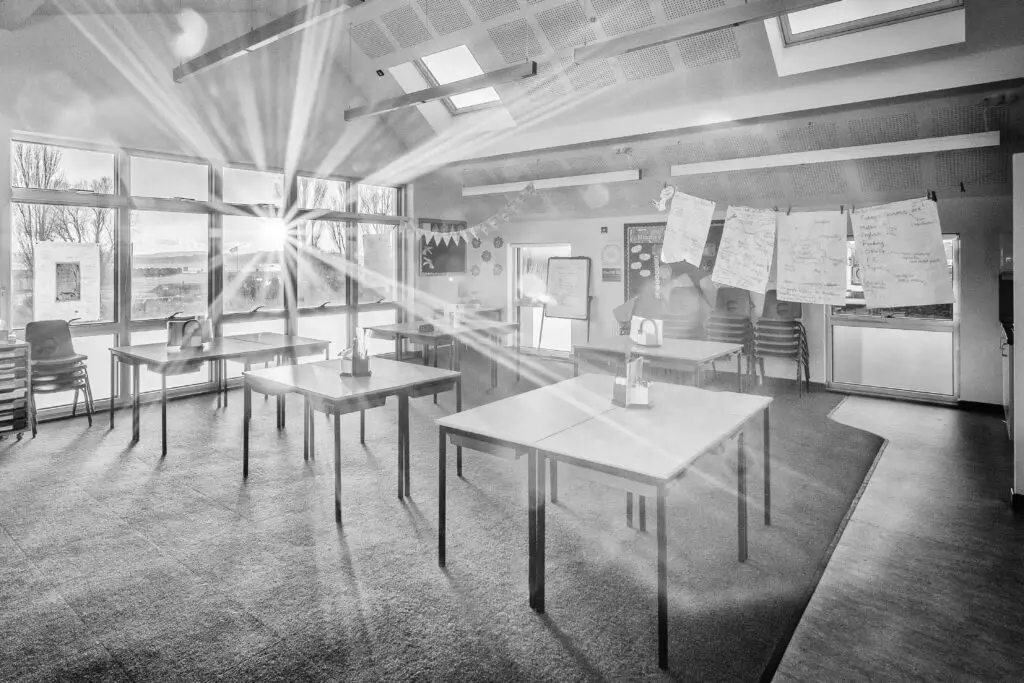
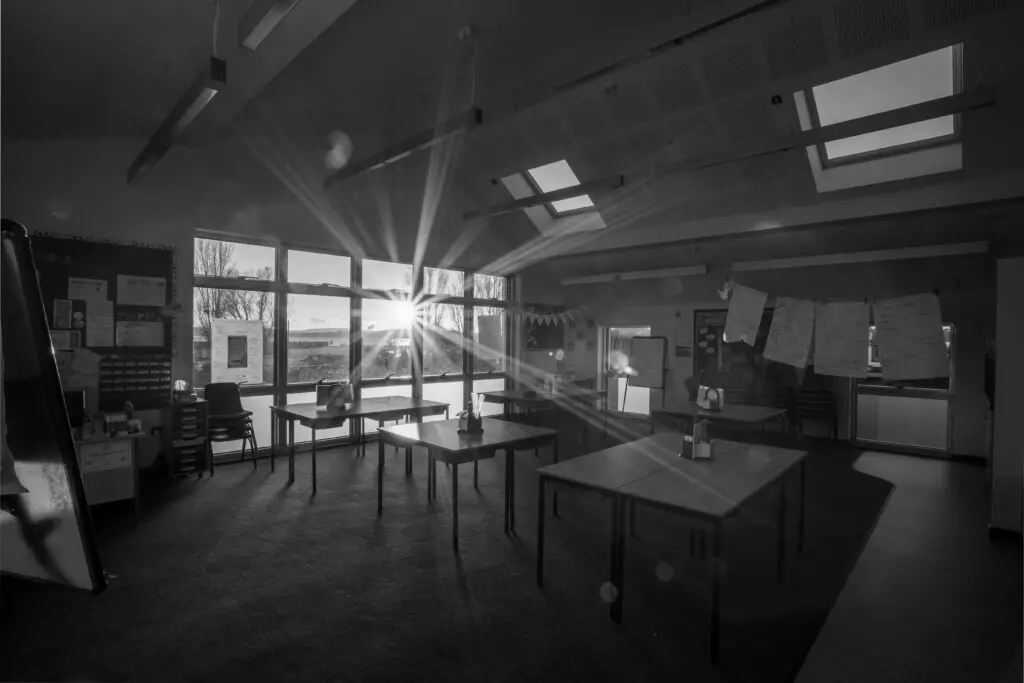
And here is a black and white version that I did at the time.
The Lightroom auto edited photo – from the new HDR file
Yes I love playing with this tool. One click for auto white balance and another click for everything else in the Basic panel.
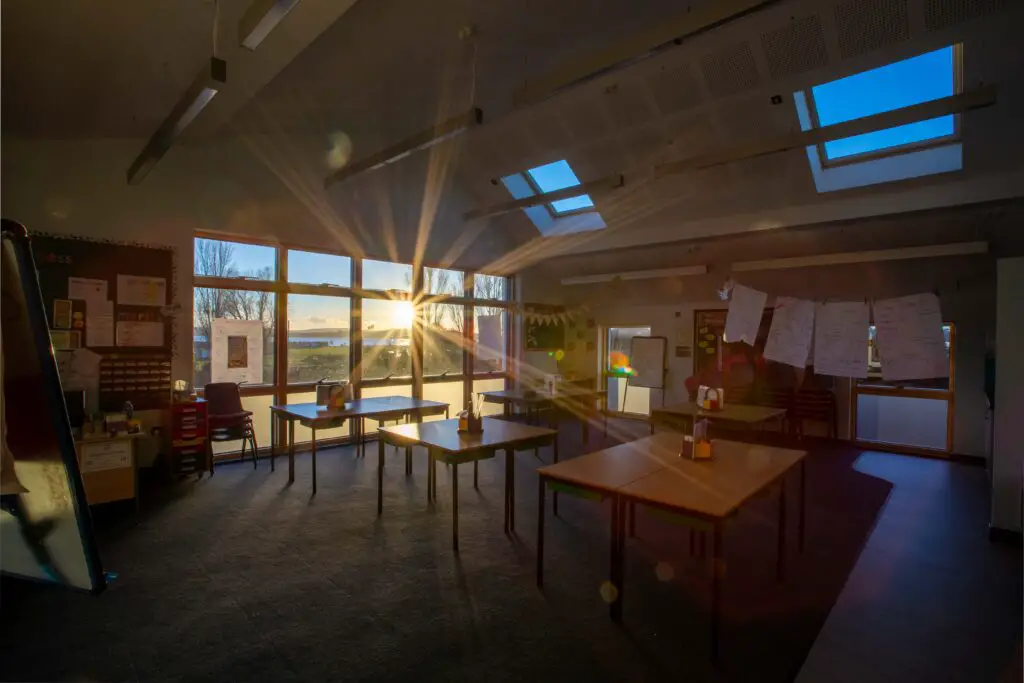
To be fair Lightroom struggled with this one. In the last post it did better than me so quite happy with this!!
Remember this photo is with challenging lighting conditions.
Black and white with one more click?
Here is the black and white version according to Lightroom.
It’s ok, that’s all.
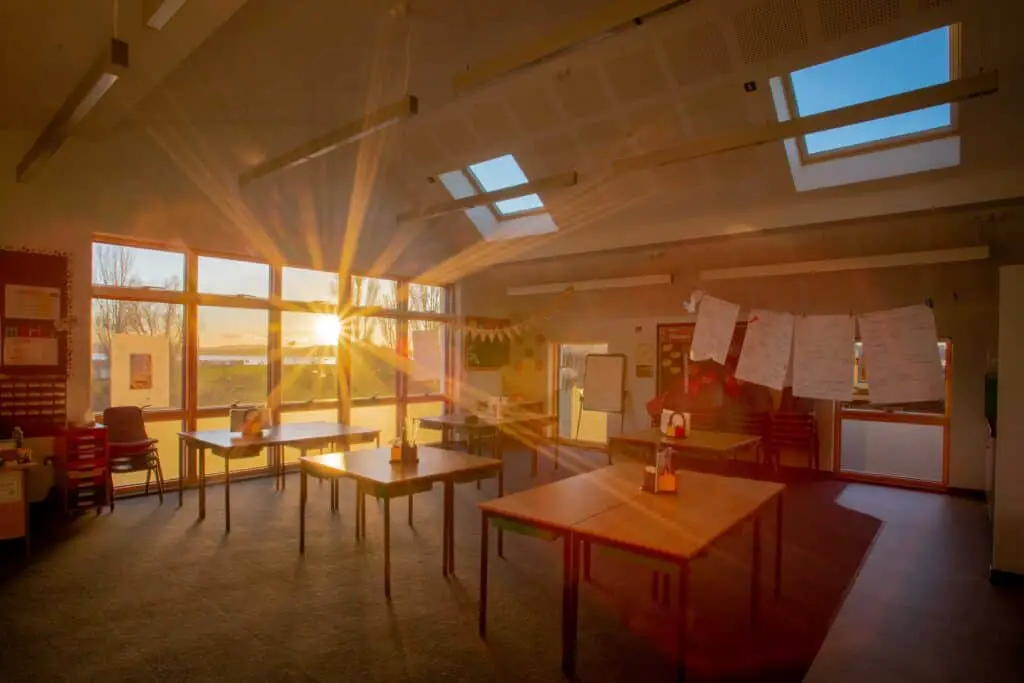
Finally – my 1 minute edit of the RAW file
This is as far as I got in one minute. Well I wouldn’t expect to edit a photo like this is less than one minute. Much too much to do. But I made a go of it, and this is nearly acceptable. Well no it isn’t really.
Ok and here is my re edit start to finish.
I need to go into Photoshop to get rid of some lens flare. Lightroom has done a fantastic job of removing most of it, but there was one that I could not deal with. If I don’t tell you where it is you might never notice it.
But this took me 10 minutes to do. OK I stopped at 10 minutes. Like I say I could have spent more time in Photoshop on some more careful removal works.
But I did crop in to give what I think is a better composition.
Lessons learned – gear
Nothing to say. I used my go to gear. And I used F22 to get the starburst effect with the sun.
But – talking of my gear
There is a page on my website where I show you all my gear. And this page is full of Amazon affiliate links, so if you click on any of these images and go to Amazon, anything you buy in the next 24 hours I think I get a commission on. You don’t pay anymore, Amazon just get a bit less. And you get a big thank you from me.
Lessons learned – composition
The sun is too central. I can’t get beyond that now. Could I have re-framed? Not sure, it was 2016, and I have been pretty obsessive about my compositions for many years. But could I have got the sun into one of the rule of thirds intersecting points?
I was going to try to explain this in words, then realised that I can show you much more quickly. Here we go – x marks the spot
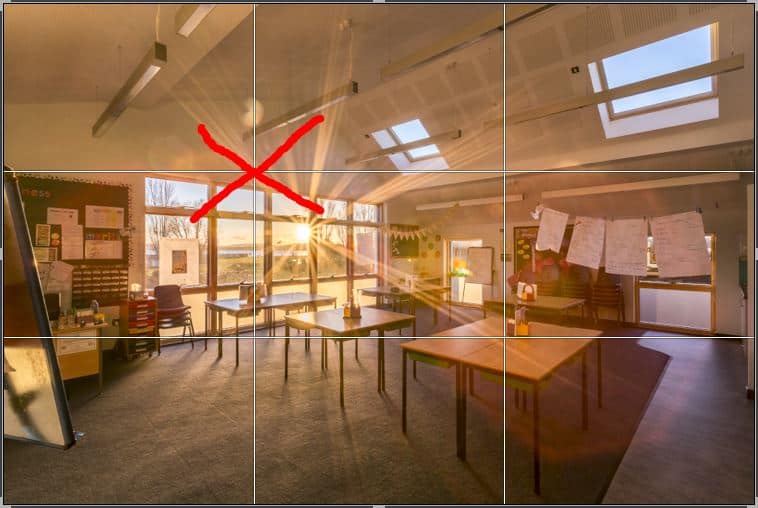
This is the rule of thirds people – use the lines to help compose the photo, and the intersecting points for the important things in a photo.
And then I remembered – I had my tripod as far back into the doorway as I could get it, so very little scope to change the composition. And let’s not forget that I was photographing straight into the sun, which hardly helps when you are trying to compose a photo!
No a fair image capture. But one that I would like to think that I would do better with if I were to take the same photo today.
And the client was happy, which after all is all that matters.
Lessons learned – image capture
Shooting straight into the sun is a challenge. And it makes composition harder. I did get the effect that I was after, but this is one of those times when I should have taken photos from slightly different positions, giving me slightly different views.
These will have given me variations in the lens flare that is pretty much inevitable shooting straight into the sun.
I try to get each shot in one image capture, maybe I need to give myself a bit more freedom.
And the thing that I forgot?
I forgot to put the chairs under the desks. No one has noticed this other then me. See when you are photographing a school building it will be when there are no kids around, meaning that the chairs will either be in stacks on the floor or placed on the tops of the desks. This is pretty much always the case, and something that I normally remember, but not on this occasion.
Time pressure clearly got to me – I had such a limited time window to get the shot that I simply forgot. And lets also not forget that no one has ever said anything, no one ever said “Rick – what about the chairs – what were you thinking?”
But I know. Let’s keep this to ourselves ok?
Lessons learned – processing
Where was the third photo from the bracketed sequence? What have I done with it? And how did I create this photo then?
Now to be fair to me this photo was taken and processed in 2016, and the set were taken, processed and issued immediately to the client. And I know that this would not happen now, so refined is my workflow.
That is a good thing to take away from this post – it is important to have a logical workflow, one that works for you, one that allows you to produce consistency amongst your photos.
And another thing.
Lightroom auto edit struggled with this one – see there is still a need for image capture and processing skills, because you never know when you will go beyond the auto capabilities of a camera and editing software. I am quite happy with that conclusion.
And I needed 10 minutes to get to something approaching an OK photo technically.
What if I use a phone to take photos?
You will struggle with lighting like this. My Canon 6D struggled with a single image capture, so we are into the pushing it zone here with a phone.
And that applies to processing. Lightroom auto stuff cold not really cope with the lighting conditions, and if we are being realistic how different is what Lightroom does to what a phone processing app does? The main difference is that in my case Lightroom is dealing with a photo taken with a full frame camera sensor using RAW image capture, so there is much more data to work with.
Conclusion
I need to give myself a break, be less rigid, more creative, and probably give myself a little more time, certainly for what I know is going to be a headline shot. With a slight change in position and composition I could have made this a better photo.
That simple. Sure I need rules and parameters to work within, but photography is a creative process, and a creative process needs time.
Right – happy with the outcome of this, and happy with what I am getting out of going back to some old photos.
OK – and now a few more things
The Photography Explained Podcast
I want to tell you about my small but perfectly formed podcast. I am the creator and all things at the splendid Photography Explained Podcast. In my podcast I explain one photographic thing per episode in plain English without the irrelevant details in less than, well less than 27 (ish) minutes these days.
I talk about all aspects of photography in my podcast, and welcome questions from listeners that I love answering.
Related reading
Check out my website. Simple. Everything pretty much is all about taking photos of buildings.
My You Tube channel
Yes I have an ever growing You Tube channel, where I talk about what I have written on my blog. Check out the video for this post right here.
Again no frills, no bull, just me telling you the stuff that you need to know.
Get a weekly email from me to you
Yep, if you want to receive an email from me every week then fill in the form on this page – there will be one somewhere. And in return I will send you a splendid Lightroom thing, and you will receive my thoughts straight to your inbox on a Friday afternoon. Which is nice.
Finally – how can I find out more about this stuff?
Simple.
Get in touch with me – email me – sales@rickmcevoyphotography.co.uk
Get in touch, ask me a question that I can answer on my blog or podcast, or just say hi – it would be great to hear from you.
Thanks for visiting my small but perfectly formed website, and I look forward to hearing from you.
Cheers from me Rick

