I have written about the best aperture, shutter and ISO settings for real estate photography, so now it is time to put this little lot together.
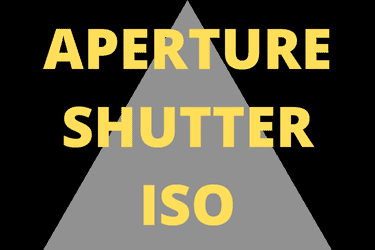
The exposure triangle helps real estate photographers get the correct exposure by selecting the correct aperture, shutter speed and ISO for the subject matter and lighting in the composition. These settings can be selected by the camera, the user or a combination of the two, and are adjusted by the user in challenging lighting using the exposure triangle.
OK that is the answer to the question, let me tell you a bit more about this. And don’t worry, this explanation will be in plain English and understandable to all of us real estate photographers.
What is the exposure triangle?
The exposure triangle is the combination of aperture, shutter speed and ISO which work together to create a correctly exposed photo. Or an incorrectly exposed photo if not set correctly.
How do I know what settings to use?
Well cameras have meters built in, and will tell you when the exposure is correct. You as the photographer can do this yourself, or let the camera do the work for you.
Camera settings set by the user in manual mode
In manual mode you have to set the settings yourself, using the cameras meter to help you if you want to. If you use manual mode you set the aperture, shutter and ISO. Simple.
Camera chooses all the settings in automatic modes
In automatic modes the camera selects all the settings.
User and camera together set the exposure between them
In semi-automatic modes you set the ISO and aperture, or ISO and shutter, and the camera sets either the shutter speed or aperture, according to your settings and the camera meter reading.
Camera meters
A quick word here – when you press the shutter release halfway the camera will focus and take a meter reading – it is this meter reading that the camera is using to tell you what settings to use, or for you to decide yourself what settings to use.
Either way the camera meter is giving you the information about the light in the photo that you are about to take.
Normal lighting
It is worth saying that for most real estate photos the camera gets the exposure correct. This is using evaluative metering (the default metering mode on Canon cameras), which works well. And this is what I use.
If you are inexperienced you should check each photo and make sure the exposure is correct, and adjust accordingly if the exposure is not correct.
When you get more experienced, you will know when you take a photo if you need to tweak the settings, so don’t worry – with practise, time and thought this will become second nature.
And remember the camera is working within fixed parameters which work well a lot of the time, but need to be kept on top off – you can’t just rely on the camera all the time – it is down to you as the photographer to make sure that you get the exposure correct, with the help of the camera.
Challenging lighting
This is when you use the exposure triangle. This is when you need the exposure triangle. I am going to explain this lot in practical terms relating to real estate photography ok?
So, in normal lighting you can take the camera settings and be pretty much fine. But this is not always the case.
Over exposed image
You take a photo, and it is too light. You have lost of stuff in the highlights. You have stuff flashing on the camera screen. Check highlight alerts in your camera manual and turn them on if you have them – they are very handy.
And if you lose stuff in the highlights you can’t get that data back, so this is what you do.
- Select a smaller aperture which means less light getting through to the camera sensor.
- Or select a faster shutter speed which also means less light getting through to the camera sensor.
- Or select a lower ISO for those camera settings.
Or a combination of all 3.
Which you change depends on your preferences, but all three can reduce the amount of light getting into the sensor.
Retake the photo and if OK move on. If not adjust more until OK.
Under exposed image
The opposite of under exposed. The photo is too dark. You have lost data in the shadows, the dark bits.
What to do?
- Select a larger aperture which means more light getting through to the camera sensor.
- Select a slower shutter speed which also means more light getting through to the camera sensor.
- Select a higher ISO value, making the camera sensor more sensitive to light.
Or, again, a combination of all three adjustments.
Retake the photo and if OK move on. If not adjust more until OK.
Specific shutter required
If the correct exposure is, say 1/30th second at F8, with an ISO of 100, and you need to shoot handheld you need a faster shutter speed right?
Change the shutter speed to 1/60th second and you are 1 stop underexposed, so you can either change the aperture (F8 to F5.6) or the ISO by one stop (100 to 200).
Or put your camera on a tripod.
Specific aperture required
The correct exposure is, say 1/125th second at F8, with an ISO of 100.
You want to isolate a detail by using the maximum aperture to get everything else out of focus.
With my go to Canon 17-40mm lens the maximum aperture is F4. So, what to do? Well in this case I would change the aperture to F4, which is a 2-stop adjustment, with the larger aperture letting more light in. To get back to the correct exposure I would adjust the shutter speed by two stops, reducing the amount of light. 1/125th second would therefore be changed to 1/500th second.
Specific ISO required
Now I start with an ISO of 100. I rarely change from that; I only change the ISO to give me a faster enough shutter speed.
For each stop of ISO adjustment, you need to make an opposite adjustment – if you go from ISO100 to ISO200 this is a one stop adjustment, making the sensor more sensitive to light. The adjustment would be changing the aperture by 1 stop, reducing the amount of light getting through to the sensor, going from say F5.6 to F8.
And to be honest with you I rarely make this change, it is more the case that I will change the ISO to get a fast enough shutter speed for my preferred aperture.
And that is the exposure triangle working in practice.
Check your photos and fix in camera
Whatever the issue, check your photos to make sure they are ok. When you start off you will be checking pretty much every photo after you have taken one, but don’t worry, this will not last forever.
As you get more experienced you will learn when you need to check your photos.
What do I do?
Because of the way I work (with my camera on a tripod wherever possible) I set the aperture to F8 (and the ISO to 100), and let the camera work out the shutter speed. I use a semi-automatic mode called AV, which stands for aperture value. This is also known as aperture priority mode.
I check the first couple of photos on every shoot, just to be sure. And after that I might not check them again until I have finished the shoot, as long as everything was straightforward.
But, if there was a tricky shot, be it a tricky composition, lighting or even a tricky situation (like holding my camera out of a window) then I will check that the photos that I have just taken are OK.
The point is, get the photos right in camera whenever you can – do not rely on fixing things after in Lightroom or Photoshop.
And this applies very much to the exposure.
But there’s more – the wonders of auto-bracketing
Well, I must be honest with you, I take all my real estate photos using auto bracketing, so I take three photos and merge them together in Lightroom. The three photos I take are
- The correct exposure
- 2 stops underexposed
- 2 stops overexposed
And this gets me over a lot of problems. But I still need to check tricky lighting and situations and adjust using the aperture, shutter and/ or ISO.
But I am capturing 2 stops either way of the correct exposure automatically, which pretty much deals with most of the problems with lighting that I encounter. This is HDR photography – High Dynamic Range – one for another post all on its own.
Challenging situations
Now when I started writing this post I was thinking about challenging situations, but now that I am here I cannot think of any that are relevant to the exposure triangle!
And HDR helps me with lots of challenging situations.
AV Mode – my picture taking mode of choice
I take my photos in AV Mode, and if I have a problem photo that I have to take handheld I use the exposure triangle to give me a faster shutter speed so I can take sharp photos handheld. I do this by selecting either a faster aperture, or a higher ISO.
And 99 times out of 100 I will keep the aperture and change the ISO to give me a fast enough shutter speed for to capture a sharp photo handheld.
This is how I use the exposure triangle to help me with my real estate photography.
I want to expand on what I have just written.
I have a preferred aperture for real estate photography. It is F8. This is the sharpest aperture on my Canon 17-40mm lens, and gives me the depth of field that I need. I normally only change to F16, and this is only when I need more depth of field.
I take most of my photos on a tripod, so the shutter speed does not matter as what I am taking is not moving. And this means that I can set the lowest ISO to get the highest quality.
And then my reality kicks in
- Tight corners – when I need to do stuff.
I need to take a photo right back in a corner, so there is no room for me and my tripod and me getting my head behind my camera.
In this instance I must squeeze myself into the corner and take the photo handheld, meaning I have to raise the ISO for that one shot to get a fast enough shutter speed.
- Sloping gardens
I once photographed the rear elevation of a super house near the sea, so I needed my camera up higher than I am, so I had to get my painter’s pole and stick my camera on it.
I had to select a fast enough shutter speed to get sharp photos with my camera 4 metres above me on a pole.
- Photographing an excavator unloading gravel at a live rail siding facility
Not real estate photography granted but this happened to me. Back to good old painter’s pole.
The point is this.
You need to know this stuff because life will not just give you nice exteriors on bright sunny days all the time. That might be the norm but there is always going to be something else that bites you or I, and an excellent understanding of the exposure triangle is one of the best tools in our toolboxes as photographers.
Related reading
So much – first here are the directly related posts.
What Is The Best F Stop (Aperture) For Real Estate Photography?
What Is The Best Shutter Speed For Real Estate Photography?
What Is The Best ISO For Real Estate Photography?
Related Viewing
Yes, related viewing. You can watch the video that I have created for this blog post right here on my You Tube Channel.
Real Estate Photography page
Here is my real estate photography page. One page where you can get straight to everything that I have written about real estate photography.
And yes, I even have a course called How To Become A Real Estate Photographer!
Related listening
Yes, related listening. OK I am not going to list all the episodes here, so here is a link to my splendid Photography Explained Podcast website.
Summary
The exposure triangle is an essential tool for photographers, not only real estate photographers but any area of photography where you must deal with anything that is not the nice, sunny day norm.
Learn the exposure triangle and it will help you in difficult times believe me.
Thanks for reading this post, any questions get in touch. Cheers from me Rick