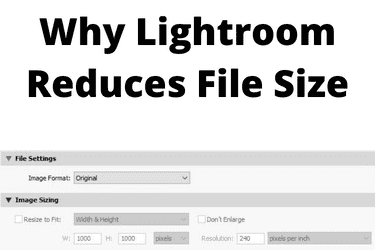
Lightroom reduces the file size when exporting images out of Lightroom if adjustments are made to the image size, quality or dimensions in the File Settings and Image Sizing areas of the Export dialogue box. You can check this by simply selecting a photo, Export, and checking to see if any boxes are checked in the File Settings or Image Sizing sections.
Ok – that is the answer to the question. Next I am going to explain all of this good stuff to you. I am going to do this as quickly as I can for once, and see how this goes ok?
Who am I to tell you this stuff?
I am Rick McEvoy, photographer, blogger and podcaster. I have been using Lightroom ever since version 1.0 was released in 2007, so I know about this stuff.
Lightroom does not change the size of images in Lightroom
First point I want to make. An image in Lightroom is the size that it is. Whatever editing you do to a photo the original image file size stays the same. Well each thing that you do makes the file slightly bigger, but you would expect that. But the fundamental file and dimensions remain the same.
I have had a play around in Lightroom and tried to change the image size. In the last post I talked a bit about aspect ratios and all that good stuff, but once a photo is in Lightroom that is it.
And anything that you do within Lightroom can be undone. Lightroom is what is called non-destructive editing.
Cropping does not change the file size, as what you have cropped out is still there.
So this is all about exporting images out of Lightroom ok? But there is more – if you change the size of an image on export out of Lightroom the original photo is still there unchanged in Lightroom.
Exporting images out of Lightroom
When you export images out of Lightroom there are things that you can change. These are
- File location
- File name
- Video stuff
- File settings
- Image sizing
- Output sharpening
- Metadata
- Watermarking
- Post-Processing
Not surprisingly we are interested here with just two of these, File Settings and Image Sizing
This is what the screen looks like – sorry nearly forgot to add this.
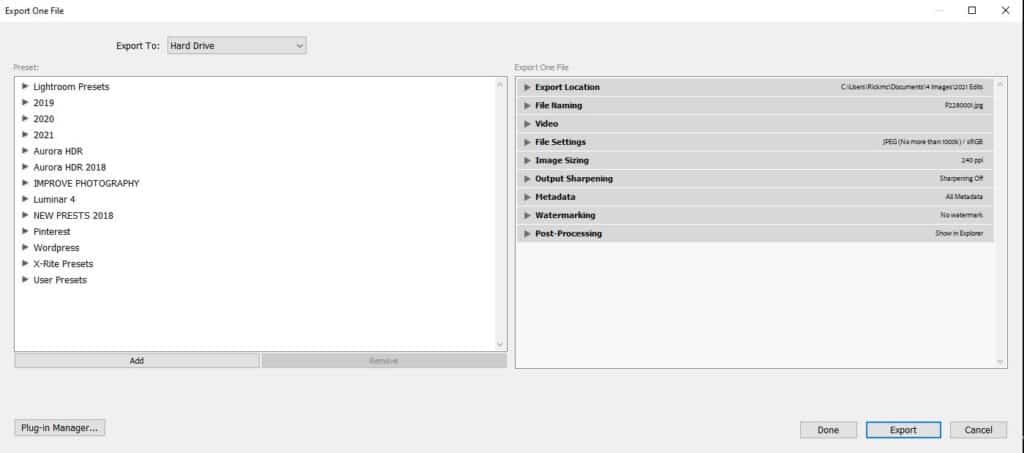
You will see that there are a load of presets on the left which you can use to change the file size to suit your purposes.
Let’s look at the two of interest to us here.
File Settings

There are a number of options.
Image format
I use JPEG. You can use whatever you want but if you use JPEG anyone else can open your files. Send someone a RAW file and they need something like Lightroom to open it.
And if they can open it they can probably edit it. I never issue RAW files, only JPEGS with my editing locked in.
Quality
This varies. Use 92% and no one will be able to tell – that is the traditional magic number that gives you a significant file size reduction without a perceptible loss of image quality.
Color space
First off, this spelt incorrectly Adobe – it is COLOUR!!!. I use sRGB. That’s all I want to say on this ok?
Limit file size to
Well it depends what the photo is for, but you can set the file size to what you want.
Image Sizing

Resize to fit – you can specify a width and height for an image, and also the resolution. You can do this in units of pixels, inches or centimetres which is nice.
What settings should you use?
Well I will show you some of my presets at the end which will help you.
Why would you want to do this?
File sizes can be big. The average RAW file that sits on my hard drive taken with my Canon 6D is about 20MB. Now you don’t want to be emailing them out do you? And neither do you need to. This is why there are so many options to reduce the file size when exporting images out of Lightroom.
Why can’t you change the file sizes in Lightroom?
Well I have never thought of doing this up until right now and writing this post. The only reason that I can think of that would lead you to reduce the size of files in Lightroom is to save hard drive storage space, but I would advise that you get more storage space rather than do this. External hard drives are not expensive these days.
Export presets
These are settings that you apply to photos when you export them out of Lightroom. You apply these to a set of images at the time of export. These do not change the edited photos in Lightroom, they create new files that sit outside Lightroom.
I will show the presets that I use in a bit. I have created some of my own, and there are some already in Lightroom sat there ready to be used.
What are the best settings?
I will show you what I do.
Can I change the file size after export?
Well yes you can using other software but why would you? Lightroom has enough export options in there to mean that you should never need to do this. I have never done this myself, I export photos out of Lightroom and that is that. And if a file size is not what I want for a specific purpose I just go back to Lightroom and export a new image to the required size.
I have never changed a file size after exporting a photo out of Lightroom.
How do I make the file sizes smaller in Lightroom?
Well you could export the images out of Lightroom, reduce the file size on export and then reimport them I guess. Or you could use other software such as Photoshop to reduce the file size and then import back into Lightroom.
But I cannot see why you would want to do that. The only reason I can think of is to save hard drive space, but this is really not a long term viable option. If this is your problem then do what I did and get an external hard drive and put your photos on that.
What do I do?
I change the file size of every photo that I export out of Lightroom. I use presets to give me the file sizes and dimensions that I need.
Here are some of my preset settings.
1MEG 75% JPEG 2021
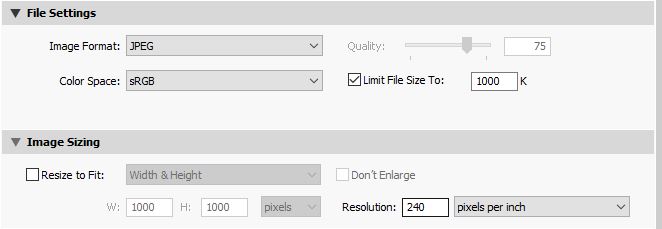
This is a good all-rounder. I have limited the file size to a maximum of 1MB (or 1000K), and dropped the quality to 75%.
This works for photos that I am going to share and use on my website and blog.
Client issue 92% 5K
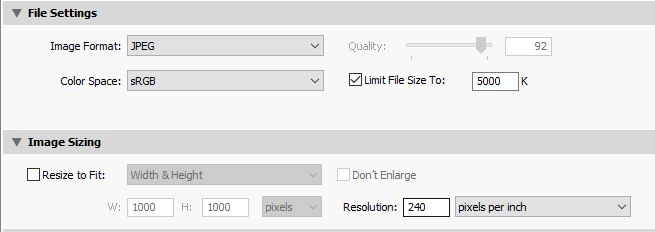
This is what I use for client work. I have reduced the file size from circa 20MB, or 40-60MB for an HDR Merged file, down to a maximum of 5MB. I reduce the quality to 92% and you cannot really see a difference, so smart is the technology.
And I convert the files to JPEG.
Thumbnails 17032020
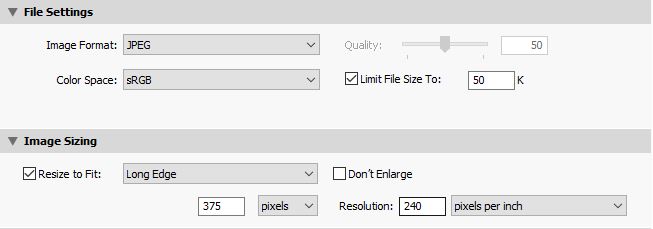
Now this is a great example of the value of these presets. I use this one for the thumbnails I create for blog posts – a very specific size with a very small file size.
OK – these are some of my presets – now a dead handy Lightroom preset that I use on every commercial job.
For Email (hard drive)
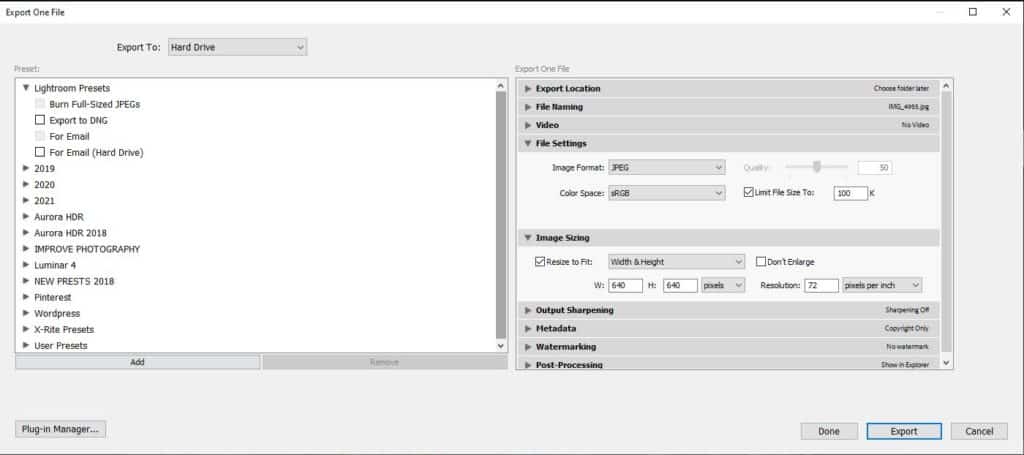
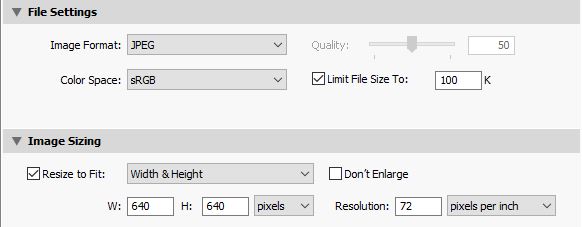
When I issue a client a set of images I give them a second set using this preset. The file sizes are tiny but the photos still look great. Clients love these smaller files which they can email without clogging up everyone’s inboxes. And they are good enough to quickly post to social media.
And I don’t tell my clients that I am going to do this so it is a nice surprise to them. And it takes seconds to do using this Lightroom preset.
I name my presets
You will have noticed that I assign names to my presets so I know what they are which is helpful.
And that is it – nice and simple.
Oh sorry, one last thing.
I don’t want to change my file size!
No problem, just make sure that in File Settings you have selected the Image Format – Original. Here it is.

OK – I am done here. Happy exporting!
Related viewing
Check out the video of this blog post right here on my You Tube Channel. And there is lots of other
Please, any questions get in touch via my website. Cheers from me Rick


