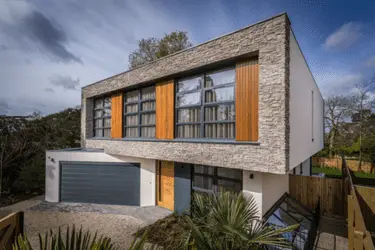
When taking real estate photos you need the right camera settings to get the best images that you can. These camera settings will determine the success of a shoot, and the standard of the photos taken. The camera settings you choose will also influence how you take the photos.
Clearly then, it’s important that we get these settings bang on!
The best camera settings for real estate photography are
- AV Mode
- Aperture – F8
- ISO 100
- Shutter speed – determined by the camera
- Remote release/ self-timer to activate shutter
- AF – One Shot
- Auto Exposure Bracketing – set a +/- 2 stops.
- Drive Mode – Continuous Shooting
- Image Recording – RAW
- Auto White Balance
- Metering – Evaluative
- Camera mounted on a tripod.
These are the camera settings that I use for every real estate photography shoot. I set these before I arrive at a shoot so I am good to go when I get there. And I don’t change these during a shoot. These settings are tried and tested, and help me work efficiently, effectively and professionally.
This is how I work. Everything is dialled in so all I need to concentrate on is the composition and getting great photos. I do not want to be faffing around changing stuff on my camera on a shoot, as this wastes time, and can distract me from the job in hand.
Before I get stuck into the list though.
Who am I?
I am Rick McEvoy. I specialise in real estate photography, architectural photography, and construction photography. Basically I photograph buildings. No weddings, portraits, or pets. I am professionally qualified in both photography ABIPP and construction management MCIOB, so I know about this stuff ok?
And I explain using my own personal experiences, in plain English without the irrelevant details, telling you just the stuff that you need to know to help you to take the best photos that you can.
Affiliate Links
Some of the links in this post are Amazon Affiliate links. If you click on one of these links and buy something I get a commission, for which I will say thank you. You don’t pay any more, Amazon just gets a little bit less, which I am sure we can all live with!
My Canon 6D
Yes, I am still using a Canon 6D, so everything applies to the settings on this camera, but these settings can be applied to pretty much any camera, and if not then the principles apply across the board.
OK – let’s get into this.
1 AV Mode
I use AV Mode on my Canon 6D. I select the aperture (and the ISO – see below), and the camera selects the shutter speed.
AV stands for Aperture Value. This mode is also called aperture priority mode.
2 Aperture – F8 (or F16)
The aperture is the name for the thing in the lens that changes the amount of light that gets through to the camera sensor.
- A large aperture value i.e. F22 = a small aperture opening which = less light getting in.
- A small aperture value I.e. F4 = a large aperture opening which = more light getting in.
I know, hardly intuitive.
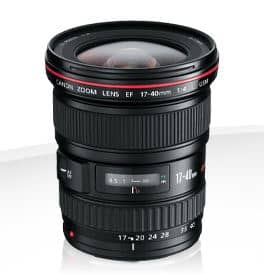
When you buy a camera lens the maximum aperture is used. So for my Canon 17-40mm F4 L lens the maximum aperture is F4, which is fully open. You can’t see the aperture, and this setting lets the most light in.
The aperture is the thing that you adjust, and making the aperture smaller lets less light in.
The minimum aperture on my Canon 17-40mm lens is F22. This is the smallest opening, which lets in the least amount of light, but provides the most depth of field.
The maximum aperture on my Canon 17-40mm lens is F4, which is also called wide open. The opening in the lens is fully open, letting in the maximum amount of light, but giving the least amount of depth of field.
I do not use F4 or F22, as there can be a loss of quality at either end of the aperture range.
I use F8, which is the sharpest aperture on my Canon 17-40mm lens. It is also the sweet spot on many lenses. I use this as my starting point on every shoot. On a full frame camera choose F8 or F11 and you can’t really go wrong.
I take most of my photos at 17mm, which is very wide. This means that I do not need to worry about depth of field using F8 as everything I need is lovely and sharp!
If there is something in the immediate foreground though, and I want the background in focus as well, I will probably change to F16.
3 ISO – 100
What is ISO? It is the sensitivity of the camera sensor to light. The lowest ISO on my Canon 6D is 100.
This is what I use.
The lower the ISO, in general terms, the higher the quality of the images that you will get. The higher the ISO, the greater the chances of you getting noise and other bad stuff which is not good.
So this is what I use.
4 Shutter speed – whatever the camera chooses.
The shutter speed is the amount of time that the camera shutter is open, exposing the sensor to light.
A fast shutter speed lets in less light than a slow shutter speed.
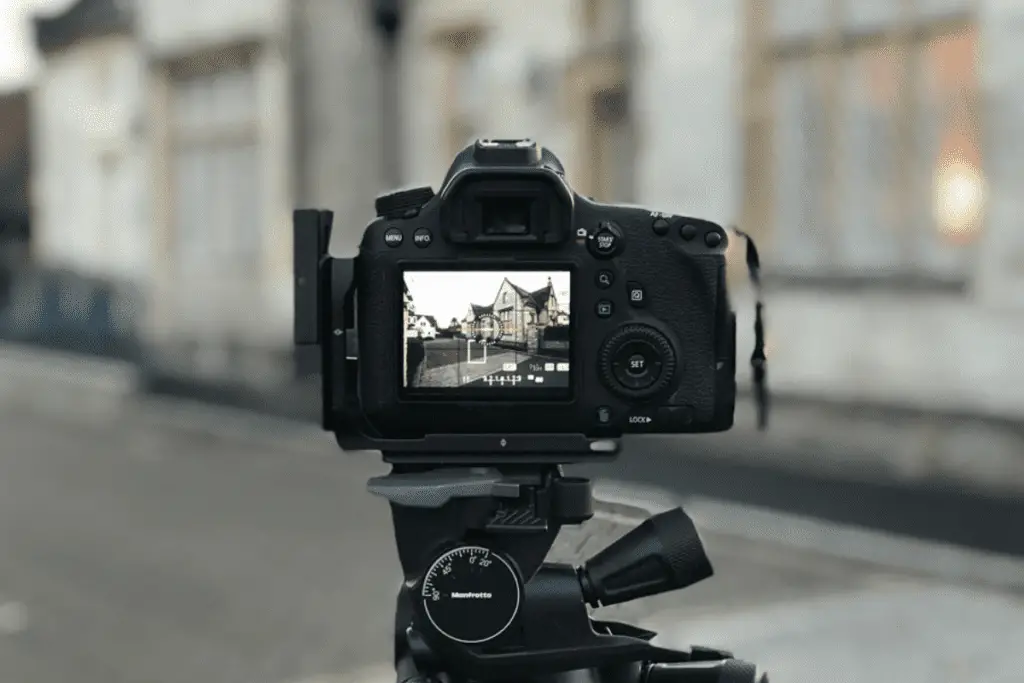
As I take every photo with my camera on a tripod I am not that bothered about the shutter speed that I use. If am shooting handheld though I need to ensure though that I have selected a fast enough shutter speed to take sharp photos handheld.
The exposure triangle
This is a combination of aperture, shutter and ISO. If you want to know more about the exposure triangle check out this blog post The Exposure Triangle: Fully Explained For Beginners.
This is pretty important, and is used to help us get the correct exposure with the camera settings that we want.
5 I use the camera self-timer to activate the shutter
My camera is securely fixed to my tripod. I want super sharp photos. As sharp as I can possibly get. I do not want my camera to move when I take a photo, which there is a risk of doing when you press the shutter release button. What you do to minimise this is gently roll your finger over the shutter release button as gently as possible.
Or to eliminate movement completely use the camera self-timer.
This is what I do. I focus where I need to focus, and then start the self-timer which is set to take a photo after 10 seconds, when the camera will be nice and still.
You can get remote releases which do the same job, as in activate the shutter release without touching the camera. I used to have one of these, but have dispensed with this, and just use the camera self-timer.
Simple. And one less bit of gear.
6 AF – One Shot
This is one of those things that I had to actually check on my camera. Which AF Mode do I use? Seriously I did not know!
And it doesn’t make sense really that I use One Shot when I take three photos – more on that in a bit.
Well next actually.
7 Auto Exposure Bracketing
Yes, I use auto exposure bracketing.
I set my Canon 6D to take three exposures, with + and – 2 stops. This is how it works.
Press the self-timer, and when the time is up the camera takes 3 photos, one after the other, automatically.
- First photo – the correct exposure.
- Second photo – 2 stops underexposed – darker.
- Third photo – 2 stops overexposed –lighter.
Why do I do this?
I do this so I capture more of the lights and darks than I can in a single image capture. My camera cannot capture the full range of light, known as the dynamic range, in a single image capture, so I use a bit of clever camera tech to get around this problem.
And merging the photos in Lightroom after the shoot is a doddle.
I am after the most efficient and effective way of getting great photos for my clients – that is my absolute number 1 priority. And this helps me to do just that.
Some call this HDR Photography. You can call it what you like – I call it smart photography. Yes I use HDR. And let me tell you there is nothing wrong with that.
8 Drive Mode – continuous shooting
That is how I take the three photos – I was getting confused before…
9 Image Recording – RAW
I only ever shoot in RAW. I see no reason to shoot in JPEG. RAW captures the maximum amount of data in a scene that the camera can capture, and gives me the maximum amount of data to work with.
I never use JPEG as this applies processing to the image which cannot be undone – I do not want processing done which I am not in full control of.
And with RAW I can change the white balance in Lightroom to my heart’s content after the shoot, which is a wonderful thing to be able to do.
So, I only ever shoot in RAW, but convert the images to JPEG before issuing to a client (so they can open them).
10 Auto White Balance
Another one that people may criticise you/ me for. There are people who will say I should get it right in camera, and they are of course correct. What I mean is to set the white balance for every photo myself.
I do not do that.
I have to get the photos done as quickly as I can. I do not have the luxury of all day, I have a limited amount of time.
I want to concentrate on the shot-list and compositions, and not camera settings. This is the reality of life as a real estate photographer.
I use auto white balance and adjust in Lightroom later. I put a grey card in the first photo, which gives me a target against which I can pick the correct white balance. And if the light changes in another room or location I do the same.
Again, quick, easy and very effective.
11 Metering – Evaluative
This is the default camera metering mode and it works nicely for real estate photography.
I very rarely change from this mode.
Evaluative metering on the Canon 6D is the camera evaluating the brightness of a number of zones within the composition, and using this data to calculate the correct exposure, which as I said works nicely for real estate photography.
12 Canon 6D mounted on a tripod
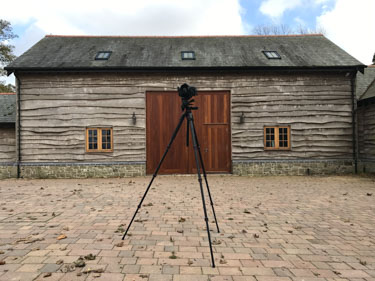
I always use a tripod. I only take real estate photos hand-held if I am not able to use a tripod due to space or physical restrictions. I use a Manfrotto 190 Go tripod with a Manfrotto XPRO geared head.
And if I can’t use a tripod then I shoot handheld or go to another bit of kit.
Check that out in this post – How The Excellent Manfrotto Magic Arm Helps Me With My Construction Photography
A quick word on my camera and lens.
Oh yes, a word about my canon 6D. I talked about gear in the post Real Estate Photography Gear – The 11 Things I Use On Most Shoots. But yes I do still use this wonderful camera. Check out another post about the Canon 6D which is still nice and relevant (which I have just updated) – Is The Canon 6D Still Worth Buying In 2022?
And my Canon 17-40mm lens.
A quick word about this lens too – it is a great but not expensive lens. You can pick up a Canon 17-40mm F4L lens on Amazon for about £600 at the time of writing this post
Summary
These are the best camera settings for real estate photography. These are the camera settings that I use, which I set before a shoot, leaving me to concentrate on getting the photos that my clients want, that they are paying me to produce.
I very rarely change these settings, they work for me.
Related reading
Want to know more? Well I have written lots of good stuff on photographing buildings, real estate photography, call it what you want to.
Here are three posts where I go into more detail on this subject.
What Is The Best F Stop (Aperture) For Real Estate Photography?
What Is The Best Shutter Speed For Real Estate Photography?
What Is The Best ISO For Real Estate Photography?
Related viewing
Check out my You Tube channel, where you will find a video that I recorded about the stuff covered in this blog post.
Photography Explained Podcast
Shameless plug time, well why not? I am the creator and all things at the splendid Photography Explained Podcast, where I explain one photographic thing per episode in plain English in less than 27(ish) minutes without the irrelevant details.
Get a weekly email from me to you
Yep, if you want to receive an email from me every week then fill in the form on this page – there will be one somewhere. And in return I will send you a splendid Lightroom thing, and you will receive my thoughts straight to your inbox on a Friday afternoon. Which is nice.
OK – how can I find out more about this stuff?
Simple.
Get in touch with me – email me – sales@rickmcevoyphotography.co.uk
Check out my website Rick McEvoy Photography
Check out my splendid Photography Explained Podcast
Get in touch, ask me a question that I can answer on my blog or podcast, or just say hi – it would be great to hear from you.
Thanks for visiting my small but perfectly formed website, and I look forward to hearing from you.
Cheers from me Rick

