Right then. Time I gave you some thoughts on how to get good pictures of buildings. I said good not great OK – one thing at a time……
To take good pictures of a building you need to
- Find out the story of the building
- Explore the building and get to know it
- Tell the story of the building
- Capture the main external features of the building
- Show the outside in all its glory
- Convey the scale and mass of the building
- Show how the light interacts with the building
- Capture the details, textures and patterns
- Place the building by capturing the surrounding area
- Explore the insides
- Show the scale of interior spaces
- Get the light – the magic of interior spaces
- Capture the details, textures and patterns
- Show how the different parts relate
- Composition is king
- See what you can exclude from a photo
- Check around the edges
- Simplify your compositions
- Get the exposure bang on
- Nail your focus
- Choose the depth of field to suit
- Choose the right ISO
- Focal lengths and buildings
- Choose the right aperture
- Enjoy yourself
And you also need to
Know what you are and are not allowed to do with the pictures
Right then. That is my answer. And what a great answer, if I do say so myself. But who am I to tell you this stuff?
Who am I?
I am Rick McEvoy, photographer, blogger, podcaster and all round nice chap. I photograph buildings, and teach others how to photograph buildings.
I am professionally qualified in photography, having the proud designation ABIPP (Associate of the British Institute of Professional Photography) and I am also professionally qualified in building construction (MCIOB – Member of the Chartered Institute of Building).
And how many photographers can say that? That is what makes me unique (I guess). And I have been photographing buildings, and working in construction, for donkeys years. Not sure exactly what donkeys years means to be honest, but a lot of them.
So I know this stuff OK? You are in the right hands with me. OK, happy? Great then I will tell you all that you need to know.
1 Find out the story of the building
What? The story of a building? What am I on about? Well think about it, every building has it’s own story, it’s own past, it’s own things that make it unique.
Old buildings have so much history within them, old buildings have been there while society has changed, while history has happened. Old buildings have been at the heart of communities for hundreds of years. Old buildings have stories to tell.
But what about new buildings? Well new buildings will have their own history, how they got to be created, why they are where they are, how they were built? Unique or unusual design features, unusual construction methods. Modern buildings have a history all of their own too.
Every building has something about it. I know this doesn’t apply to say a house on a large housing estate but I hope you get the idea.
Find out the story of the building you are going to take photos of – do this and you are understanding the building, which will set you above everyone else right at the start.
2 Explore the building and get to know it
Once you have found out about the building, be it an old building or a brand new building, get to know it. Walk around, look at it, study it, find the interesting bits.
I do this on every shoot. For a real estate shoot it is a quick orientation to make sure that there is nothing unusual.
For an architectural shoot the I will have spoken to the client, normally the architect, and found out all that I need to know – what is important to them. I will still have a walk round though, but I know what I am looking for, what I am being paid to photograph.
And if it is a grand old cathedral that I am photographing for myself then I will walk around as along as I want to.
I went to the world famous Sagrada Familia, the Gaudi masterpiece in Barcelona, and did just this. I walked around the outside and just took it all in. I didn’t even go in, I just took in the grandeur of the exterior.
Here is a photo that I took with my Olympus camera.
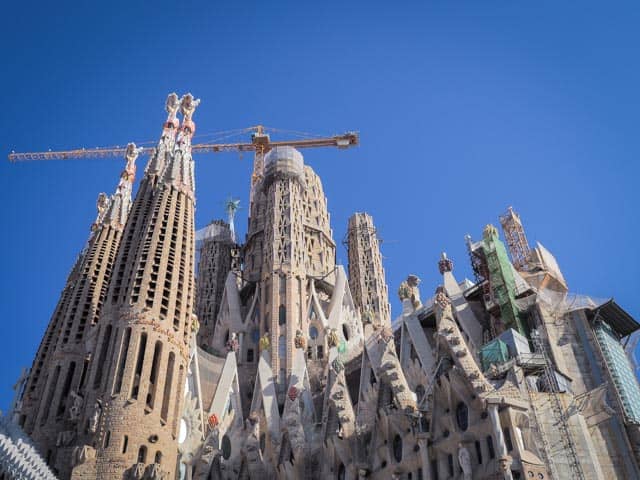
I will go in next time I am there.
So get to know the building, this will help you get the best photos that you can of the building.
3 Tell the story of the building
You know what the story is, and now you have seen it all. Have these things in mind when you take your photos.
And how many photos are you looking for to tell the story of a building? I try to do it in one or two if I can.
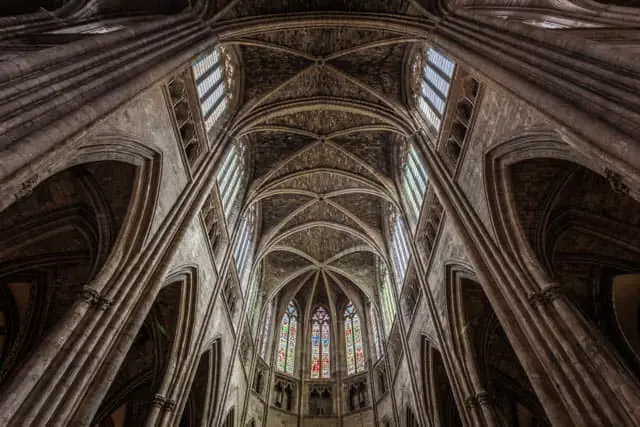
For a client no more than 30 photos. For myself, for say the grand Bordeaux Cathedral, just the one photo. That is all I am after. One photo that tells the story of, in this case, the stunning interior with all that amazing stained glass.
And here it is. The only photo that I have edited from several hours in this magnificent place.
4 Capture the main external features of the building
Every building has a main façade. Well some have more than one, but every building has a front, a back, and sides. OK – apart from a pyramid that is!
The front is normally the headline shot. Like this photo of Duomo.
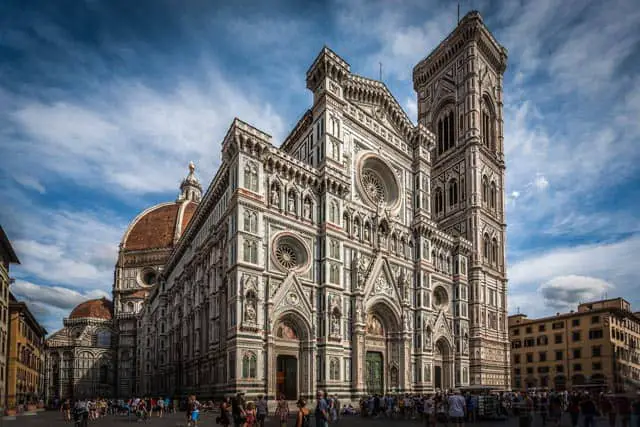
But there is often so much more, that is why it is important to explore the building first, as if you just turn up, get the headline front shot and move on you might miss the best bits.
5 Show the outside in all its glory
We are not just taking photos here – we are celebrating the magnificence and glory of buildings. Miracles of technology, construction, time, money, effort, innovation and human creativity.
We need to try to celebrate buildings with every photo that we take.
6 Convey the scale and mass of the building
An architect spends a lot of time and thought on the scale and mass of a building. This needs to be understood and captured. See I told you there was more to this than just turning up, taking a photo and then moving on to the next man made wonder.
You might not have thought about this before, but stand in front of a building and think about the sheer scale, and the mass of the building. And know that the massing of the building was thought about long and hard.
And once you have got your head around that, work out how you are going to do it justice in a photo, how you are going to convey this stuff.
7 Show how the light interacts with the building
Now this is the really good stuff. The sun, our primary, free light source, moves. That is the problem with the sun – it moves.
But as it moves this changes how it lights up a building. Front on and you get a flat, two dimensional photo. But when that light is from the side buildings can be transformed into 3 dimensional structures.
So the time that you photograph a building exterior will have a massive impact on the photos that you get. And yes, you can find this out these days using the internet, and there are lots of apps out there that can help us.
Be aware of the orientation of the building, and plan the best time to take photos.
8 Capture the details, textures and patterns
Front on sunlight is not our fiend here. When the light is more directional, from the side, this is when the textures in construction materials are brought to life.
The same can be said for details and patterns.
All these elements change as the sun moves around the building, and the other good news is that this gives you opportunities to capture great light to the sides as well!
9 Place the building by capturing the surrounding area
A building is part of the environment, and how it relates to the things around it are part of it’s story. Place the building in it’s context. This is one of those often missed opportunities to tell the story of a building.
10 Explore the insides
I love interiors. Absolutely love them. And I love exploring them, finding out what is hidden inside them. I often find myself on my own, exploring the bits that many others do not appear to be interested in.
I never said I was normal though did I?
11 Show the scale of interior spaces
The scale of interior spaces can be hard to convey. I will give you some tech advice in a bit, but the bit we need to think about there is that it is important to convey the scale accurately and realistically.
Don’t exaggerate the size of a space, and don’t make it look smaller than it is. Convey the size and grandeur realistically but flatteringly.
12 Get the light – the magic of interior spaces
Light enters buildings through windows, doors and other openings. And the light moves during the day, as the sun goes about its daily business.
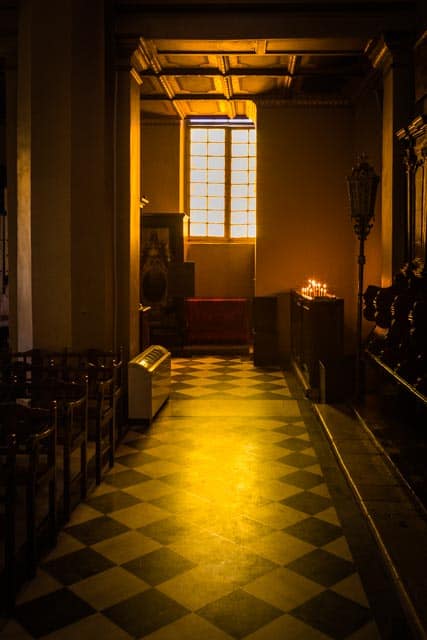
And it is this directional light that we are interested in. How the light interacts on interiors can transform a space, and make a dull photo a great photo.
Check out this photo of a church in Corfu Town. Lovely light coming straight in through the window.
And this is my single favourite thing. I have a definite thing about this. It fascinates me, how the light interacts on interior spaces, and how these spaces change over the course of a day.
I absolutely love this, and also processing the photos that I have taken, developing the scene that I have captured, and making the photos I have taken the best that I can.
Photography is drawing with light, so we need to use the light as our best creative photography tool.
13 Capture the details, textures and patterns
Same as for the outside, there are small things, details, textures, shapes, patterns. These make interesting subjects on their own, or as prominent features in a photo of a broader space.
How you place elements in a photo impacts on how good a photo is. You can put a detail in the foreground and the rest of a space in the background and make the two work together. This is how you tell a story of a space, giving the details prominence and context.
14 Show how the different parts relate
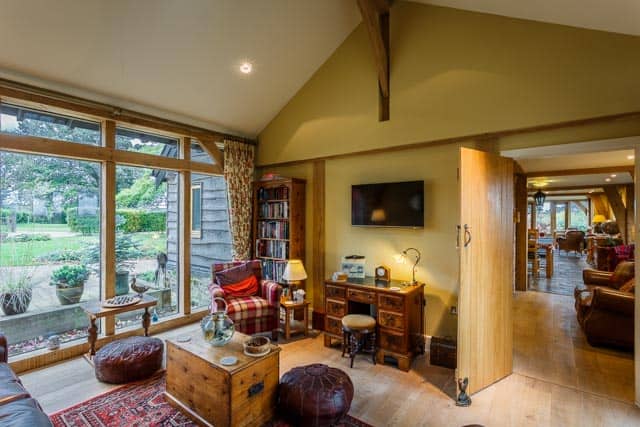
Show connecting spaces is a really interesting thing to do. You can go as far as you want with this, starting with the main entrance and taking the viewer on a photographic walkthrough of the building. Or you just show how one room connects to another, how the spaces relate.
This will of course depend on the purpose behind the photos that you are taking. For real estate photography you need to show how each room relates to the other, so the viewer can envisage themselves living in the building.
Like in this photo.
For architectural photography there is a slightly different agenda at play, capturing the architecture and the construction, but also capturing how the building works.
15 Composition is king
Take a photo and check the content. I spend a long time getting the composition right. I use the viewfinder and LCD screen. And I check once I have taken a photo to see what I have got.
I spend a lot of time not only composing in camera, but also seeing what the best composition is when I walk around and look at a building for the first time. Everything is about getting the composition – as I like to say
Composition is king
Well it is. Think about it. The composition is what is in the photo. It is what anyone looking at our photo sees. And they do not care about all the other stuff that went into creating a photo.
All they care about is if the composition is good or not.
Of course the photo has to be technically correct, and more on this, but if the composition is rubbish everything else is pretty much a waste of time.
Do not for get this, this is important.
Composition is king ok?
16 Check what is in a photo, and you can take out of a photo
And finally, check the edges for stuff intruding, like a tree branch, TV aerial, anything that spoils the edges. Recompose if you can to exclude, and if not remove later.
17 Technically correct is a must
Get verticals vertical, horizontals horizontal. Get them right in camera if you can. If not get the horizontal nailed which will help make correcting the verticals later in whatever software you use. And allow enough space in the photo for this.
Photos of buildings have to be technically correct – this is a must.
Apart from……..
You get a building vertical. How does it look? Possibly too vertical? Too straight? Too upright?
Not natural.
Why is this? Well, we are used to looking up at buildings, and we are used to them leaning back. That is the perspective that we are familiar with. So technically correct might not be the answer.
What do I do? I give the building a vertical adjustment of -5 in Lightroom, making it look more natural.
Don’t tell anyone though, this is just between us right?
18 Simplify your compositions
Less is more. Take a look at your photos, are they cluttered? Try cropping out distractions and see what this does to your photos. Does it make them better?
It probably does.
So apply that logic to when you are taking photos. If there is one subject in a photo make sure that the subject is the star of the show. Fill the frame with the subject, so everyone knows exactly what they are looking at.
Less really is more.
19 Get the exposure bang on
Well you have to get this right. I take three photos, one underexposed, one over exposed and one the correct exposure, and merge them together in Lightroom.
This gives me more of the lights, more of the darks. This allows me to capture the lighter content in a window as well as the some of the details in the shadows.
20 Nail your focus
Sharp photos are a must. Sort where your focus point is to get what you want sharp. For a building façade it is just that, so nice and easy. For an interior you have to decide where the focus needs to be. But focus on what is the subject of the photo. You need to decide what is sharp and what is not sharp in a photo. Some, a bit. Or all of it.
Talking of which
21 Choose the depth of field to suit
Depth of field, the amount of a photo from front to back that is sharp.
This will depend on the
- Aperture
- Focal length
- Point of focus
- The composition
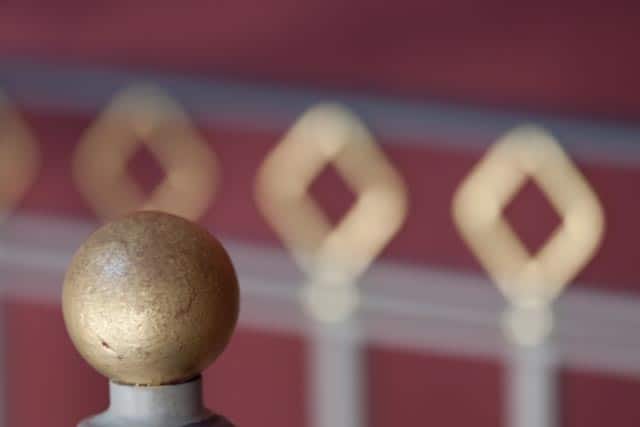
I tend to want all of an interior or an exterior in focus, I only want a shallow depth of field when I want to isolate a feature or a detail.
Like in this detail photo
22 Choose the right ISO
Basically, the lower the ISO the better. Use the lowest ISO that you need to get the sharp photos that you can – here I mean if you are shooting handheld. You need a fast enough shutter speed to get a sharp photo handheld.
The higher the ISO the higher the chance of noise or other bad stuff. But noise is better than a blurry photo.
Use a tripod like me and this is not a problem. I use the lowest ISO I can.
23 Focal lengths and buildings
I use a wide angle lens for 95% of my building photography. It is the Canon 17-40mm lens.

And I probably take 95% of my photos with a 17mm focal length. Yes 17mm. This is wide enough to capture buildings and interior spaces, but not too wide to exaggerate or deceive.
24 Choose the right aperture
My go to lens is the Canon 17-40mm lens. I use F4 if I want to blur the background. I use F8 for most of the photos that I take, but if I want more depth of field, with something very close to my camera in the foreground, I may use F22.
But that is it. That is apertures in building photography covered.
25 Enjoy yourself
Yes, really. Enjoy yourself. Photography is meant to be enjoyed, even when you are working for a client and under pressure to deliver. Yes really.
I love taking photos of buildings. And that is after many years of doing this. Many, many years. And I love taking photos for clients as much as I do taking photos of buildings for myself.
It does help if you get the stuff I have told you in this post sorted – learn this little lot and it will help you to enjoy taking photos of buildings just like I do.
And if you enjoy doing something you tend to do it better than if you do not.
What is not to love eh?
And that other thing – Know what you are and are not allowed to do with the pictures
Very important. You can’t just take photos of someone else’s building and sell them now. Oh no. Know what you are doing with the photos that you take, and know what you can and cannot do. In fact, check out this post I wrote Can you sell photos of buildings? Is it illegal?
What do I do?
Well, all of the above.
I get to a building and walk around. I take in the building, get to know it. I look at what the light is doing, and how it interacts with the building interior and exterior.
I do all this before I take my camera out of my bag and place it on my tripod. Before I take a photo I know what I am going to do, I know what I am trying to capture.
I take most photos of buildings using a 17mm focal length on my Canon 17-40mm lens, with my camera securely mounted on a tripod. I use ISO100, F8 or F16, the camera self-timer to take the photos and I take three photos at different exposures using auto-bracketing which I merge together in Lightroom.
That is what I do. And I love doing this.
Related reading
Well there is so much that I have written on photographing buildings. Just check out my website, there are too many posts to list here.
And check out these pages which take you to lots of related good stuff.
My splendid Construction Photographer page
My equally excellent Real Estate Photography page
My course that teaches you how to become a real estate photographer
Talking of real estate photography, if you want to get into this then check out the courses page of my website where you can find out all about my splendid How To Become A Real Estate Photographer course.
Related viewing
And yes there is a video for this blog post that you can watch on my You Tube Channel right here. Which is nice.
Any questions get in touch via my website. It would be great to hear from you.
Cheers from me Rick