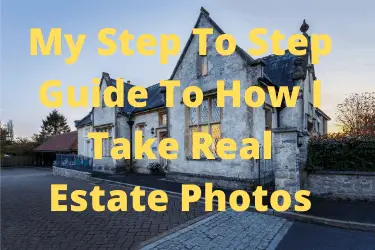
This is the third post in my series about being a real estate photographer, and this is the good stuff about taking the actual photos.
I have a strict workflow for my real estate photography work which helps me to consistently get the images that my clients need. This workflow has been refined over many years of working as a real estate photographer in the UK. I am not saying to do as I do, but if you take the principles of what I am telling you and apply it to your photography workflow this will help you take better photos consistently.
OK – who am I?
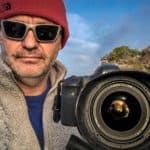
I am Rick McEvoy, a real estate photographer based in the UK. I specialise in anything to do with photographing buildings, architectural photography, construction photography, all that good stuff. I write a weekly blog post about something that I want to tell you, just like in this post.
I am also the creator of the Photography Explained Podcast.
So yes I do know about this good stuff!
Lets break this down
Preparation
Preparation is the key. Before I learned the value and importance of preparation and planning every shoot was a stressful, last minute nightmare.
Now they are serene, expertly executed pieces of work that I love doing. And love doing well.
Alone or accompanied
I am not going to lie to you, I prefer doing shoots on my own. If I am accompanied by someone I find that distracting, and it really does put me off my stride.
After all I am a bloke, and am happy to admit that I can only do one thing at once. It is often the client who accompanies me, and I have to tell theme before I start that if they speak to me and I do not answer then I am not being rude, I am not ignoring them.
I am just concentrating on the job in hand.
Now I am a sociable chap and would love to able to chat happily whilst taking photos but I am not wired that way.
Gear
This will be a separate post all of it’s own, where I will tell you what gear I use, and how I prepare it. All I want to say here is that I prepare my gear the day before.
Prepare the building
This is normally done by the client, but I always ask. Real estate agents will prepare a building for a shoot just as they will for a viewing by a potential buyer or tenant. Just ask and make sure that this is done before you arrrive.
And if you are being commissioned by a private householder it is doubly important that you do this as they might not have thought about this. It is private house holders who I work directly for who I have to do the most moving of stuff for!
Actually thinking about it I am going to do a separate post on preparing a house for a shoot, and another one on preparing commercial premises.
I could have done these before this post but I wanted to get the taking the photos one done first so you can apply that to practising, and then I can get into more detail about the the stuff that you need to know for doing this for real for money. OK?
Let’s get onto the day of the shoot.
Arrive nice and early
I always get to a property early. In the days of mobile everything if I get to a shoot an hour early I have an hour to do work without other distractions. It is actually really productive time for me.
And on some occasions I can start the shoot earlier and get away earlier, so either way is good.
But I arrive very early so have no worries about the traffic, getting lost, being late. Just a nice relaxing drive.
Be hydrated
Sounds obvious but I make sure that I am properly hydrated as it can take a bit out of you doing this work, especially on a hot, sunny summers day. Yes we have the odd one of those here in England!
Having spent most of the morning loading up with caffeine I switch to water for proper hydration which always makes me feel better, which in turn makes me work better.
Camera bag
As I said earlier, I will do a separate post about preparing my gear. On the day of the shoot I have a bag packed and ready to go (prepared the day before).
I use a Peak Design Everyday Backpack, which is a relatively small, compact and lightweight camera bag which has the stuff that I always use and very little else.
I know what I am going to use on a shoot and it all goes into that one small backpack that leaves my hands free if I need to get up ladders for example.
Stuff in the car
I used to take a massive bag with me on real estate shoots and use about 10% of the gear I weighed myself down with – where is the sense in that? I do have a massive bag with everything else in but that stays locked in my car.
I do not need to take that with me – that is my spare everything, and I mean everything.
And water, snacks, all that good stuff that helps keep me going.
Assemble my gear
My gear is my Canon 6D and Canon 17-40mm lens. I attached my Three Legged Thing Universal L Bracket to my camera, then attach 2 200PL Manfrotto mounting plates to the L bracket.
The L bracket allows me to switch from landscape to portrait quickly without moving my tripod head.
I attached a loupe viewer to the rear of my Canon 6D which magnifies the LCD screen.
I then put my camera on the tripod and I am done. And my backpack is so light now as there isn’t much in it.
Sorted!
Taking the photos
I will have a shot list agreed with the client. I have this with me normally in an email that I can check on my phone, or in my free note taking app of choice on my phone – Google Keep.
I used to tick off the photos but these days I check the list before I pack up to make sure that I have got everything. That is enough and rarely have I missed a shot.
I work through the list which is normally in a logical order, top floor down. I work though a floor before moving onto the next one.
Camera settings
Yeay finally I get to my camera. Here are the settings that I use 95% of the time.
- AV Mode – I select the aperture and the camera selects the shutter speed.
- Aperture – F8 or F16.
- ISO 100 – the lowest native ISO on my Canon 6D.
- Shutter speed – whatever the camera decides.
- Focal length 17mm.
- Autofocus on – well why would you turn it off?
- HDR – Auto bracketing – correct exposure, 2 stops underexposed, 2 stops over exposed. I will explain this later.
- 10 second self timer on.
- Camera RAW and not JPEG.
These are the main camera settings that I use.
What is HDR?
HDR stands for high dynamic range. I take three photos, the first the correct exposure, then one two stops overexposed and finally one two stops overexposed. This gives me more data in the highlights and the shadows, and also gives me a lot more latitude in terms of the exposure. It is a safer way to take photos with less risk of getting the exposure wrong.
I merge the photos together in Lightroom which is a wonderfully quick and easy process.
I know that the purists will not agree with my approach, but this is the most effective way for me to get the photos that I need without worrying about the exposure.
And having all the other settings dialled in means I only have two things to think about.
- The composition
- Where I focus.
Nailing each and every composition
So my camera is on my tripod and my camera is set. I am ready to take my first photo.
I look through the viewfinder quickly, and then place my tripod on the ground where I think the best composition is. For interiors it is normally in a corner of a room, for exteriors close enough to fill the frame but far enough away to allow for some breathing space and also to show the next elevation along, to make things work together.
Telling the story of a building
What? Telling the story? What am I going on about?
Here I am talking about flow of the building, how one room connects to another. And how external spaces connect.
This is the story of a building, and it is your job to tell it!
Getting the composition right
Composition is king. Just wanted to get that out there.
And once I have the composition that I want I make sure my camera is level, sideways and front to back, using the level built into my Canon 6D.
And then I adjust the verticals to get them right. But horizontals first.
This is why I have a geared tripod head, that allows me to make these precide adjustments.
I take the first photo, using the remote release, taking three photos, and then I check the LCD monitor. I have the loupe viewer which helps my ageing eyes. I use the viewfinder and the LCD screeen to get the composition I am happy with.
And if I am happy with that first image capture I move on.
Where do I focus?
Normally about 1/3rd in to a scene for most shots, using the white box on my LCD screen.
How many photos?
Two per room from opposite corners normally, and each elevation plus how the bits fit together. And if there is a view out of the window I make sure that is in the photo.
That can get me to 20-30 photos, maybe up to 50 max. But I do not take three photos from very similar views – each and every photo is a different composition. Well I used to but not any more – I have learned my lesson on that one!
And that is normally it.
Once I have the first photo it is a case of repaeting the same process through the shot list.
Which aperture?
For most photos F8. If there is a feature in the foreground I might go to F16, but normally F8.
Do I change my cameras settings during a shoot?
Most of the time no, what I start with is what I end up with. This is great because the images all look the same, they look like they are from the same set.
And I do not have to worry about my camera at all on many shoots! Which is great for me – I can concentrate on the composition and not worry about everything else as that is all already sorted.
And this also saves me time.
Thats it!
Like I say I work through the shot list then I am done. A quick check to make sure I have everything and I am out of there.
Related reading
If you want to know more about real estate photography check out my real estate photography page.
If you want to know more about me, and for everything else just head over to my Start Here page.
And you can watch the video here on my You Tube Channel.
Photography Explained Podcast
Yes I have my own podcast, the Photography Explained Podcast, which is very good, even if I do say so myself! Photography things explained in less than 10 minutes (ish) without the irrelevant details.
Thank you
Thanks very much for reading this post, and I am off to write the next one!
Please, any questions get in touch via my website. Cheers from me Rick