Well in the last post I gave you my step by step guide to taking real estate photos. I should have done this first, but not to worry. This is the bit before the shoot – the preparation.
I prepare for a real estate photography shoot by
- Agreeing the shot list, a copy of which I will take with me on the day of the shoot.
- I carefully select, prepare, clean and pack the gear that I will be using.
- I ensure that the building is ready for me and access available.
- I check all the other external factors such as location, weather, traffic and time to ensure that I arrive nice and early, and fully prepared to take the photos my client needs.
- I prepare myself! Probably the bit that needs the most work!
I do all of this before each and every shoot.
Who am I?
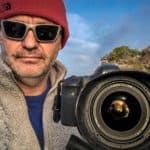
Before I go on, it is rude to presume that you know who I am is it not? I am Rick McEvoy, a real estate photographer based in the UK. I am professionally qualified in photography ABIPP and construction MCIOB, so I know my stuff. Oh yes, and I have loads of years of experience in both.
And I write about this stuff on my photography blog.
So hopefully you can trust what I say, which is all based on my personal experiences.
Do I really do all this stuff for every shoot?
Yes I do. I do this for every shoot. In my opinion, not being properly prepared for a shoot is unprofessional. And if you are starting out you can’t possibly know all this stuff, so please take note of what I have learned.
I have learnt a lot of hard lessons along the way, and this is the outcome of all those years of learning.
Affiliate links
The links to gear in this post are Amazon Affiliate links – if you click on a link and buy it I get a commission and you get my virtual gratitude. You don’t pay anymore, Amazon just gets a bit less, which I think is fair enough!
The Brief – What I am Going To Photograph
I have a copy of the brief on my phone and my iPad. This will have been discussed and agreed with the client during the appointment process.
This is what I am being paid to do. The brief is what the client must have.
My quote is submitted on the explicit understanding that this is what I am charging my client money to provide.
More on getting work and pricing in a future post.
But the one thing that comes out of the brief that I take with me is the shot list.
Shot list
This is a list of the photos that I have to capture. These are the essential images.
I used to write down the shot list in a pocket sized notebook that I put in my camera bag, which has a pen attached to it. I used to check off the photos as I took them, but now I check at the end of a shot, to make sure I have got everything,
If you are starting off this is a good thing to do as it is a completely bombproof way of making sure you get every photo, and in the early days ticking photos off a list gives confidence and helps as you can see the progression.
These days I have moved on to having the shot list in my notetaking app of choice, Google Keep, which is on my phone and my iPad.
I read the list before the shoot, and check it at the end.
Gear
I only take the gear that I need, which I carefully select and prepare the day before a shoot.
I have a spare everything in a big bag which stays in the car.
Camera – Canon 6D
Yes, I use a Canon 6D…. I clean the mirror box with a hurricane blower. I clean around the lens mounting too. I take the eye cup cover off and clean that. They are not expensive – check this one out.
I use the hurricane blower to clean around all the moving parts, dials and buttons etc.
And then I clean the outside of the camera body using the same things I use to clean my lenses, Pec Pads. More on them in a bit.
Camera settings.
I make sure that everything is set just how I want it – more on that in other blog posts. I mentioned them in a previous post, and want to write a single post just about the camera settings that I use for real estate photography.
All I want to say here is that I check the camera settings when I prepare my gear.
Batteries
I charge all the batteries then put them in my camera bag in separate pockets on one side of the bag. I always put them in the same place so I always know where they are. One of the batteries I of course place in my camera.
I have 4 batteries always fully charged, along with a contingency car charger just in case. I use Canon batteries.
And touching wood, I have never had a problem with batteries.
Apart from the one time that I forgot to pack the spare batteries, and I had to do a shoot with one battery, which was a tad fraught!
Spare camera
I used to have a Canon 5D as my spare, but these days my spares are my Olympus gear, with the camera body being the Olympus EM5 Mk 2.
Lenses
I say lenses. I use the Canon 17-40mm F4 L lens on 95% of my real estate photography work. I clean all my other lenses as well, well not every time to be fair as most of the time they will not have been used so will be nice and clean.
I clean the front and rear lens elements, including the inside of the front and rear lens caps. I get my hurricane blower and blow off any dust or debris that there might be. I do the same to the lens hood, which is always on my camera lens for every photo that I take.
I inspect the front and rear lens elements, and make sure the focus ring is moving freely.
I make sure the AF is set to ON on all the lenses.
I try all the lenses on my camera, checking each fully and taking test shots which I check out.
I use Eclipse lens cleaning solution and Pec Pads.
Memory cards
I format all the memory cards one by one in the Canon 6D. I place one blank, formatted memory card in the camera, and the remainder of the blank formatted cards in a hard case with a yellow trim.
I do the same with my Olympus camera, which is equally prepared.
After a shoot, or part way through a shoot, I will put the card with images in it into a separate card holder with a red trim – more on that in the What Is The Best Way To Create Excellent Real Estate Photos Consistently?
I have an extensive collection of 16GB and 32GB Lexar Memory Cards.
Other stuff
Loupe Viewer
I use a Loupe viewer, which helps me see the not so great LCD screen on my Canon 6D. I clean all the parts and surfaces, again using the Eclipse solution and Pec Pads.
The viewer is stored in a pocket in my camera bag.
Tripod
I set up my tripod to make sure all is well. I make sure that all the parts of the tripod are tightened and working, and listen out for any strange noises.
I clean the feet using wipes which go in my camera bag.
If I shoot the exterior of a house first I will clean the tripod feet before going inside.
My tripod of choice is the Manfrotto 190 Go.
Tripod Head
I do the same to the tripod head, and reset everything so when I take the first photo the head is set pretty much level.
Not a lot to do with this other than give it a quick check.
My tripod goes in a separate bag with a padded top to protect the tripod head.
This is the one that I use.
L Bracket
I use a Manfrotto L bracket when I take photos, which allows me to switch quickly from landscape to portrait without moving the tripod head, a great time saver which I use on every shoot.
Platypod and small tripod head
Same again, quick check that all is OK and all the bits that come with it are there and safely packed away.
Grey card
I just need to pack this. It is a card that is grey.
Here it is.
Colour checker
Ditto
Bag
I use the Peak Design Everyday Backpack. And I use the small, 20 litre one. This takes all the gear above, which is my core gear. I do not need a bigger bag, as this is all the gear that I take.
I want to travel light and have my hands free. Once my camera is on my tripod the bag is really light, and is normally put on the floor behind my tripod.
This is it.
The night before
I pack my gear into the bag the night before having checked it all and done one final check by putting everything together just as I do for a shoot.
And I pack my bag in exactly the same way every time.
Car keys
The Peak Design bag has a thing that you can attach to a keyring, meaning I can attach my car keys securely to my bag and not have them in a pocket bothering me.
I ensure that the fixing for my car keys is where I want it to be, so I do not have to worry about where my keys are or them irritating me in a pocket.
Spare gear
Everything else lives in Lowe Pro Magnum. I clean and check everything just like the above. This stuff might not get used but is still quickly but thoroughly checked.
3 Make sure the building is ready
Now the good news is that when you are working with a real estate agent then the building should be prepared for viewings so this should not be an issue.
Private house holders understandably do not all think like real estate agents, so you need to ask the house owners to make sure that their property is prepared for the shoot.
Here is a list of things to think about/ ask agents/ householders to ensure have been attended to
- Make sure that the house is generally clean and tidy
- Clear away clutter
- All surfaces clear – kitchen worktops, tables, desks etc
- Light fittings – check that all the lights work, and that the bulbs in a room are all the same type
- Straighten curtains and present nicely
- Bedding nice and neat
- Fresh towels
- Rugs and tables aligned and clear
- Personal stuff on display to a minimum
- Hide bins
- Check the grounds for debris/ gardening tools/ anything that detracts
- Grass cut
- Windows open or closed?
- And here are some seasonal issues
- Swimming pool covers always look awful
- In the winter if there are real fires get them light and roaring!
Basically, a house needs to be as well prepared for a shoot as it would be for a viewing. And this needs to be done by the client not us photographers!
4 External factors
Timing
Sun orientation – where is the sub shining when I get there? I have an app for this. It is called the Photographer’s Ephemeris.
Weather
I try to plan for the best weather, but this is always a challenge, especially here in the UK. I do the best that I can, but sometimes have to do the shoot in the rain, which no one wants. But if there is a pressing timing issue sometimes there is just no choice.
Location
Where is the house? How do I get there? Sure this is easy enough to find out these days but this still needs checking out and the time taken to get there planning into things.
I always arrive early for a shoot, and if I can start early great, if not I work on my iPad sat in my car. If I get there an hour early no sweat, I can try to get the shoot done early or do an hours work in my iPad.
But there is travel stress for me – sweet!
Client in or out?
Is it just me or will the client escort me around? Or will the client be working from home – a very current issue.
If the house is occupied I have to juggle the occupants around my photos which can be a challenge.
If the house is empty I am happy.
Things happening in neighbouring properties
Not a lot you can do about this but if there are major works say going on next door you might have to be creative with your angles.
Parking
Vehicles parked in front of a house can kill a frontage shot, so ask the occupant if this is an issue, and if it is ask if they can help you by having the front of the house clear with no cars in view.
This can be an easy fix to what can be a real problem.
Bin day
Yes good old bin day. To be avoided wherever possible, as this can make a whole street look awful.
5 Preparation – me
I need to prepare me. Here are some things that I am taking more seriously now than ever as I get older
- Plenty of sleep – everything is better after a good night’s sleep.
- Water – drinking plenty of the water the day before and the day of the shoot help keep me bright, fresh and alert. God that makes me sound like a dog! And less/ no booze the night before helps too.
- Coffee – I love my coffee and have a coffee on the way to a shoot to keep me going. Now I know that this is not necessarily a good thing.
- Clothing –comfortable clothing to keep me cool and relaxed throughout the shoot as it can get a bit hot and sweaty!
- Prepare the wheels – I make sure that my car has fuel, screen wash, and that the tyres are checked. And that there is no food debris….
- Satnav – the address is in the Satnav the day before, which is actually on my phone.
- Traffic – I check the time it takes the day before which gives me an idea of getting there at that time of day, and of course check the morning of the shoot.
- Timing – checked more times than I care to admit – I hate being late and love being early as I said before
Alarms
Alarms a plenty set so I am up nice and early.
Does this sound like a lot?
Well it is not as bad as it sounds. It does sound a lot but I have broken this down into quite a lot of detail. I really do all of these things but they all help to make the shoot go smoothly which saves me and the client time, saves me stress and worry and gives a much greater likelihood of the client getting the shots she/ he want.
Do you want to know more?
You do? Great. Then check out my real estate photography page where I have put all my real estate stuff together in one place to make it easier for you to find more good related stuff.
And for everything else just head over to my Start Here page where I will pont you in the right direction.
Enjoy!
Let’s not forget the video!
Video coming soon
Photography Explained Podcast
Yes I have my own podcast, the Photography Explained Podcast where I explain one photographic thing per episode in plain English in less than 10 minutes without the irrelevant detail.
Check it out – it won’t take more than 12 ¾ minutes for the average episode!
Preparation checklist
I am going to come up with some checklists for preparing buildings for real estate shoots. And thinking about it I am going to do one for houses and one for commercial premises. And while I am at it one for construction sites.
I have added this to my list of things to do.
Related reading
If you want to know more about real estate photography check out my real estate photography page.
If you want to know more about me, and for everything else just head over to my Start Here page.
And you can watch the video here on my You Tube Channel.
Photography Explained Podcast
Yes I have my own podcast, the Photography Explained Podcast, which is very good, even if I do say so myself! Photography things explained in less than 10 minutes (ish) without the irrelevant details.
I am done
Thanks for reading this post, which I hope you found interesting and informative, and I will see you on the next one
Please, any questions get in touch via my website. Cheers from me Rick