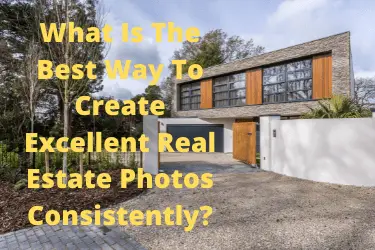
Another post in my series of articles all about real estate photography which I hope you are enjoying as much as I am?
The best way to take consistently excellent real estate photos is to have well practised, highly refined image capture, image processing and data management workflows. These will help you to efficiently take high quality real estate photos time after time to the same high standard and with the same look with data secure and properly managed.
OK – that is the answer, and now I want to dive into this in much more detail.
This post is not about taking photos per se, it is more about the workflows that you need to adopt. I have spent years refining my workflows to enable me to consistently create high quality real estate photos.
This is what I do, and how I work, and I wish someone had told me this years ago! So let me share with you what I know, which will help you to take create great real estate photos every time.
There are three main areas that I will explore in this post
- Image capture workflow
- Image processing workflow – an introduction
- Data management – what I do
I will link to other posts that I have written as I have created lots of articles on this subject, and principles that I apply to my architectural photography work are exactly the same for real estate photography – they are the same work done for different markets with different end uses of the photos.
Photos of buildings are photos of buildings let’s not forget, in a keep it simple kinda way!
Image capture and real estate clients
When you are working for real estate agents they want to know that you will consistently produce high quality images. This means they have one less thing to worry about. The real estate business is a pretty fast paced, competitive market, and if the real estate agent knows that they have a reliable photographer it is one less thing for them to worry about, and one less thing to do.
Here to help
Your number one focus as a real estate photographer is to help your clients by working effectively, efficiently and providing consistently high quality images on time every time.
Blimey – put it like that and it sounds a little daunting.
But seriously you and I are here to help – so we need to get that into our heads and stick this right to the front of our thinking.
Practise
Practise. Practise. Practise. The number 1 way for you and me to improve our photography is to practise. And I mean taking photos, which in this case is photos of buildings.
And the good news is that if you live in a building you have your first location to practise on. And if you know someone else who lives in a building that is your second location.
Ok – you get the point.
How do I take consistently excellent images? Well I do the same things every time. I will go onto these in a separate post, but these are the things that I am talking about.
My approach to taking the photos
The brief
You agree a brief with the client, which gives you a shot list, and you deliver the brief. That is it. Deliver the brief. If you want to take some additional funky photos then go for it, but get the shots in the brief first.
Composition
Remember the photos that you saw on the real estate agents website? Unless they tell you otherwise, this is what they want. So replicate those photos in the new property that you are photographing and you should be just fine.
I use the rule of thirds to help me get my composures which has served me well for my architectural work. I might have to get slightly closer in for real estate work, or crop the images later, as they need to be a bit more prominent, as people are looking at photos online, a lot of the time on mobile devices, so we need the building in the photos to be nice and prominent.
And for interiors I take photos from opposite corners to get everything in, using 17mm which works nicely.
Remember – composition is king!
Camera set up
One for another post – all I want to say here is that I use the same settings pretty much on every shoot, so this is all set up before I start, meaning I do not need to think about this too much which is good!
This means I can concentrate on the important thing, which is what is in each photo – yes, the composition.
Composition is king!
Tripod
Yes, I use a tripod for every photo. More on gear in a future post, but I seriously use a tripod for every shot unless there isn’t physically room for it.
And if there isn’t enough room to get my tripod into then I have other things that I use, with handheld being my last resort.
Why? Well I find that I get much higher quality compositions, and get the technical side of things nailed down when I use a tripod. If I don’t have to fiddle around in Lightroom getting things vertical and level I am happy.
Composition is king!
Camera settings
- F8 or F16, ISO100, shutter whatever.
- Photos taken in AV mode, where I choose the aperture and camera chooses the shutter speed.
- Lens normally at 17mm.
- Camera on a tripod, 10 second self-timer.
These are the basic settings that I use.
HDR – yes really!
I take threes photos and chuck them together in Lightroom, getting more of the highlights and the shadows than I can get in one photo.
And no they do not look like HDR photos. HDR is a way of capturing a wider dynamic range in a photo.
Is it OK to use HDR?
Yes it is, it speeds up my image capture and gives me better results, and that is what matters. There are people who say HDR is cheating – I say it is a smart way to get the best out of the technology we have.
Exposure
Has to be right, although I do get a lot of latitude using HDR.
Focus
About a third of the way in works for me for most shots.
OK – there is lots more to say but having your own system, settings and approach that you can apply consistently from one shoot to the next is what I wanted to get over here.
Isn’t this boring all these things being the same?
No it is great to have all this sorted. I know what I am doing, and how I am doing it, and I know that it works. I have a repeatable image capture workflow that lets me concentrate on the composition and has taken any technical worries away.
How can that be a bad thing?
As I said, how I take the photos is going to be a separate post all of it’s own, I want to have the time and space to tell you everything that I can to help you.
Image Processing Workflow
I will mention how I manage the data in a bit, and I will go into how I edit photos in much more detail. So what do I want to mention here?
I use Lightroom to process my images. And if I need to I use Photoshop to remove stuff. And if I need to replace the sky I use Luminar.
And this is the point. My workflow has been built around this – I do most of the work in Lightroom, and use Photoshop and Luminar for specific things.
And that is it.
Why Lightroom?
I am not saying use Lightroom, far from it. I am a paying customer happily paying my £9.98 per month to Adobe for Lightroom and Photoshop.
But this is my software of choice, which I have been using since 2007
Learn what you have
Whatever your preferred software is, learn it inside out. That is the point. I used to have loads of different software, and dabbled with them all the time. Not any more thankfully.
So I have learned Lightroom inside out over the years, and this has paid me back over and over again.
Use whatever you want, whatever works for you, but learn how to use it properly.
OK – let’s move on to the dull but important bit.
Data Management workflow
I know, this sounds dull, but this is really important. We need to look after that precious data, which is the photos that we take. If you are operating commercially you have to apply professional standards to this, and take it seriously.
I am going to tell you exactly how I do this.
My data workflow
This is going to sound so pedantic but this is how I manage my data.
Memory cards
First things first, I use 16GB and 32GB memory cards. That is all. Nothing too big. And I use 1 or 2 cards per shoot. This way I am reducing the risk of the impact of a card failure. And the way I look after my memory cards further reduces the risk of a memory card problem.
My data management workflow start to finish
- I format memory cards in my Canon 6D (see the end for when).
- Blank, formatted memory cards are placed in a hard, waterproof case with a yellow stripe which I put inside pocket in my camera bag.
- I take the case on a shoot with 8 memory cards in, all blank and freshly formatted.
- I use 1 or 2 cards on a normal shoot. On a larger shoot I may use more cards to spread the risk.
- I place the cards with photos in a hard, waterproof case with a red stripe. I place this case in the secret pocket in my camera bag.
- When I get back to my office, I import the photos directly into Lightroom. The photos are imported onto an external hard drive.
- I make a duplicate set which are stored on my PC hard drive.
- I also have a cloud back up running constantly.
- Once the photos are imported to these three places, I put the memory card in a soft case which I store in my desk.
- Once a month I take the new photos and transfer them to a separate external drive, which is stored off site. Once this is done I delete the duplicate set on my PC hard drive.
- Only then do I format the memory cards and place them back in the yellow case, back to the beginning of the process.
My photos are in three places.
- Lightroom on my external hard drive.
- In the cloud.
- Off site on a hard drive.
This is what I do, and it works.
OK – dull but important stuff out of the way.
Next post will be all about the gear that I use – now that sounds a bit more exciting doesn’t it?
If you have just come across this post I would like to direct you to the first post in this series, Step By Step Guide – How Do You Become A Real Estate Photographer? I tried covering this massive subject in one post, which I quickly realised was not going to happen!
Related reading
If you want to know more about real estate photography check out my real estate photography page.
If you want to know more about me, and for everything else just head over to my Start Here page.
And I have also recorded a video of this blog post which you can watch on my You Tube Channel.
My Photography Explained Podcast
Sorry but I can’t finish without mentioning my very own Photography Explained Podcast where I explain one photographic thing per episode in plain English in less than 10 minutes without the irrelevant details.
Snappy I know!
Thank you
Thank you for reading this post, and I hope that you find lots more of interest to inform and maybe even entertain?
Please, any questions get in touch via my website. Cheers from me Rick


