This one of those things that is often misunderstood that I want to clarify once and for all, so we all know the difference, and can get on with taking photos how we want to, without being criticised!
HDR is High Dynamic Range. A high dynamic range is an extended range of tones from lights to darks. HDR is a technique used to get correct exposures in complex lighting situations.
Bracketing, also known as auto exposure bracketing, or AEB, is the process of automatically taking successive shots, of the same subject, with different exposures. Bracketing is a technique used to get correct exposures in complex lighting situations.
Bracketing is the actual process of taking successive photos at different exposures, HDR describes a process where photos with different exposures are combined to give a photo with a broader tonal range than you can get in a single image capture.
OK, looks like they are rather similar? Well that can’t be right can it?
Let me explain.
Who am I?
I am Rick McEvoy, an architectural, construction and real estate photographer based in the UK. I specialise in taking photos of buildings, and I use HDR/ bracketing all the time.
And I am the creator and all things at the most splendid Photography Explained Podcast.
I am professionally qualified in photography and construction, so I know this stuff ok?
Oh yes, I forgot. I explain photography stuff in plain English without the irrelevant detail – I tell you what you need to know and no more to help and me with our photography. What is not to love eh?.
What is HDR?
HDR is High Dynamic Range.
Dynamic range put simply is the range of tones from light to dark in what you are looking at or photographing.
A camera can capture a limited dynamic range in a single image capture. Look into dynamic range and you enter a world of complicated numbers and opinions. I am not going there, there is no need. I do, after all, explain photographic stuff in plain English, without the irrelevant details.
No, dynamic range is the range of lights and darks. Nice and simple
Is this the same as HDR on a TV?
Great question Rick. This is the Google answer to the question “What Does HDR Mean On A TV?”
“HDR (High Dynamic Range) improves the contrast between very dark and very light colours on a TV screen. HDR technology means you can see everything happening on screen the way it was intended, with true-to-life colours, shadows and detail – giving the ultimate TV viewing experience.”
OK, so yes the same but in a different context. But the words are interesting aren’t they?
“See everything.. the way it was intended” – hold that thought.
Back to HDR in photography – why does this matter?
Simple. The range of lights and darks that the human eye can see is, quite frankly, remarkable. And the range of lights and darks that we can capture with a cameras is less than the human eye can see. Not as remarkable.
So there is a problem, we cannot photograph what we can see.
We will be able to one day, just not yet.
Let me give you a practical example that we can all understand
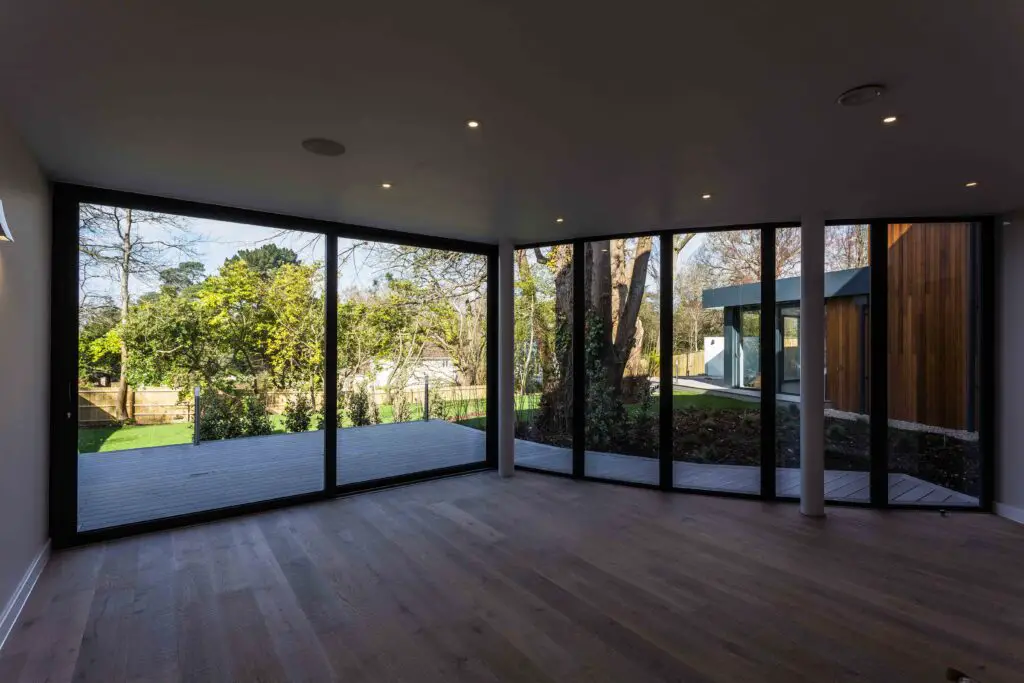
In your home, look at a room on a bright sunny day. Look at the window. Everything looks ok. Sure, what is in the window is brighter than the inside of the room, but you would expect that right?
Look around the room, you can see in the shadows too. And this looks completely normal to you, this is how we are used to seeing the world.
Take a single photo of the room and what happens?
What does your camera do? It will, with the camera default settings, and no adjustments made, expose for the average light levels in the room based on the camera metering bias. The window will be overexposed. It will be too light, and it will not record all the data for the content of what you can see in the window with your own eyes.
If the camera does not record that data, that is that. You cannot get it back.
- The window is overexposed.
And the shadows?
Same but in reverse. They are too dark. There is a loss of data in the shadows.
- The shadows are underexposed.
And the bits in the middle. Well they are probably ok.
Taking a single photo of a room on a bright sunny day will result in overexposed and underexposed parts of the photo, which is not what we want.
The camera has captured the dynamic range that it can capture. And that is not enough in this situation. The dynamic range of the scene you are trying to capture is larger than the dynamic range that your camera can capture.
So what do we do about this?
Again, simple.
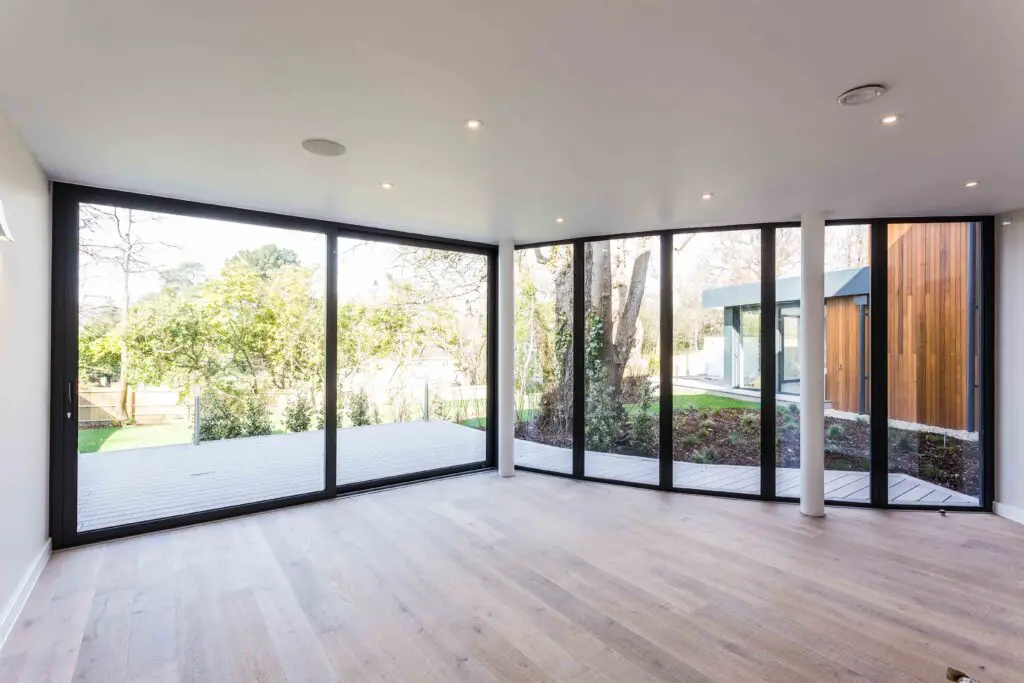
First, take a photo using the suggested camera settings. This will give you a general exposure which is correct for the majority of the room, but we lose the lightest lights and the darkest darks. We know that. Don’t worry – we can fix this.
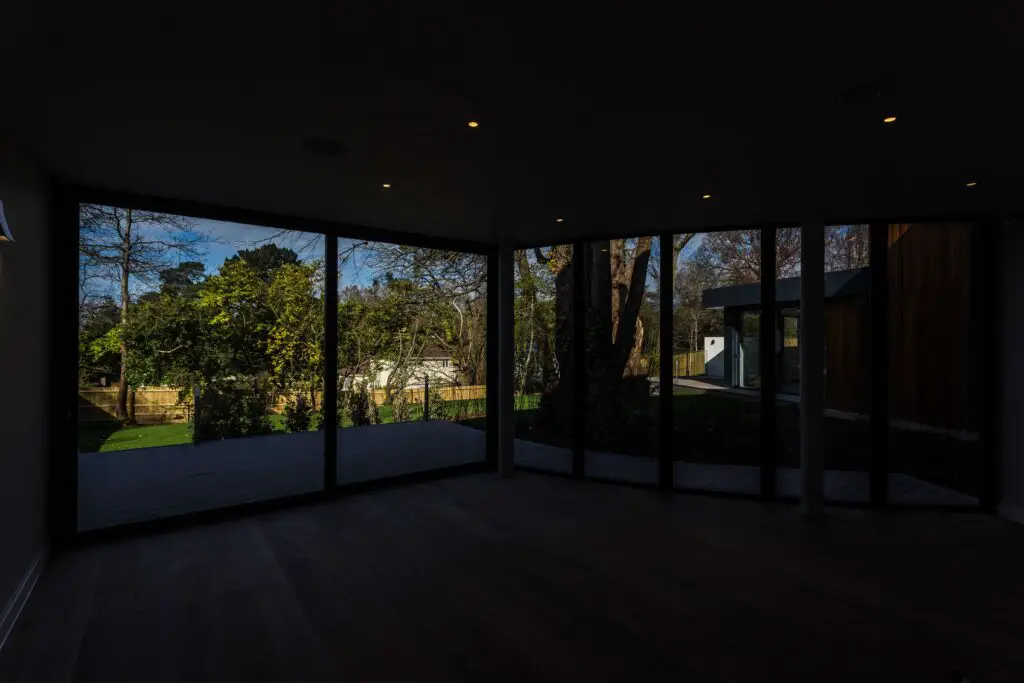
Next, take a photo, but this time meter for the window. Change the camera settings so you get the correct exposure for the window, or should I say what you can see through the window. The rest of the photo is underexposed, too dark. But you have got the content of the window correctly exposed.
Finally, take a third photo, but this time meter for the shadows. Take a photo so you get the shadows correctly exposed.
That is HDR Photography.
In taking the three photos as I have described above, you have captured a higher dynamic range in the three photos than you have in the single image capture.
Yes, that is pretty much HDR photography. See it’s not that complicated is it?
Remember what I said
“A high dynamic range is an extended range of tones from lights to darks. HDR is a technique used to get correct exposures in complex lighting situations.”
Taking a photo of a room on a sunny day is a complex lighting situation. This might sound odd, as after all it is just a room, it is something we see many times, every day of our lives.
But to a camera it is a complex lighting situation.
What is bracketing?
Well bracketing is known in the Canon world as Auto Exposure Bracketing (AEB).
Here is an extract from my Canon 6D camera manual (see I am not making this stuff up!)
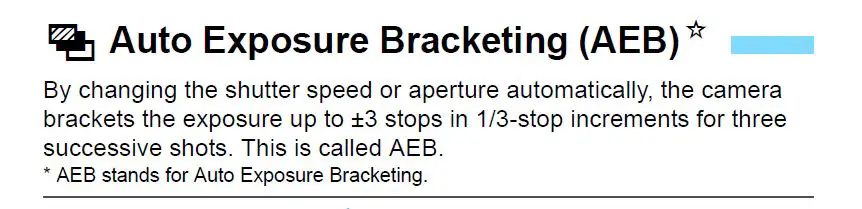
Basically, using AEB on my Canon 6D, I can take three photos when I press the shutter release button once, with different exposures.
I can set the different exposures in increments of 1/3rd of a stop, from +1/3rd of a stop to +3 stops, and from -1/3rd of a stop to -3 stops.
The sequence works like this.
- First photo – the correct exposure.
- Second photo – underexposed by X stops
- Third photo – overexposed by X stops
That is AEB, auto exposure bracketing, or bracketing.
Here is an example. First is the final, edited photo.
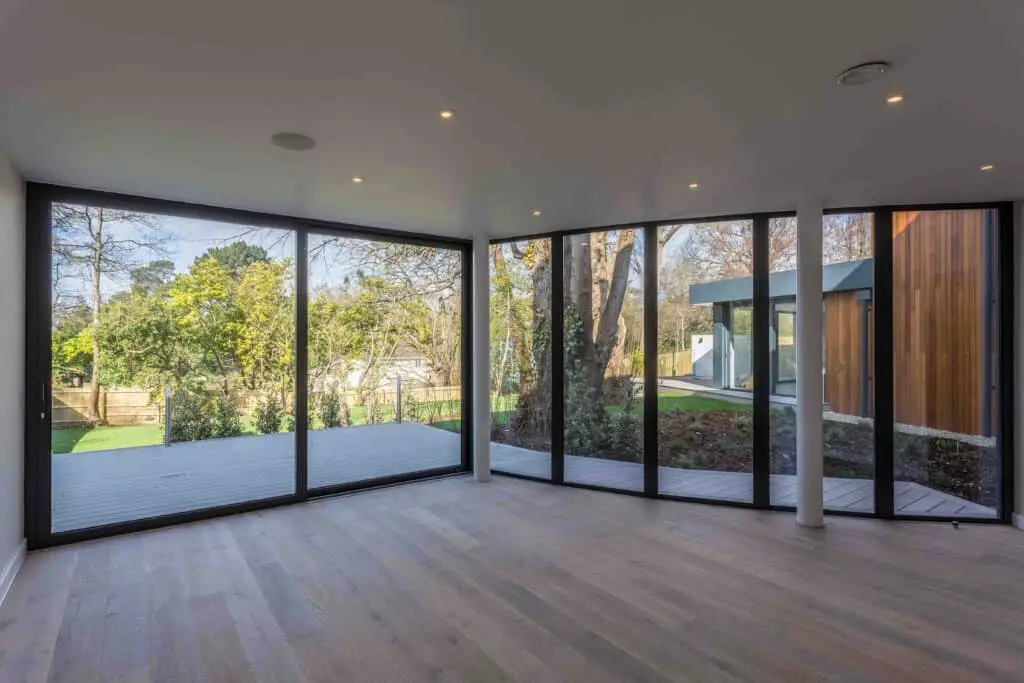
Next, the “correct exposure” as thought by the camera.
Next the two stops underexposed photo.
And finally the two stops overexposed photo.
See – this is what I am talking about.
What is the difference between bracketing and HDR?
Well, as you will see, they amount to pretty much the same thing. They are just different terms describing using more than using one photo to capture a wider dynamic range than you can get in a single image capture.
Bracketing is the actual process of taking successive photos at different exposures, HDR describes a process where photos with different exposures are combined to give a photo with a broader tonal range than you can get in a single image capture.
What do you use them for?
Well I have told you what I use them for. Interiors. Any time where there is a range of lights and darks that I cannot get in a single photo.
Let me give you some examples.
- A room on a sunny day.
- A building with a bright sky.
- A steel column on a construction site.
- Any scene where the range of tones is broader than you can capture in a single image.
How do I do this?
Bracketing – using your camera settings
Bracketing is a setting on my Canon 6D. I also have this on my Olympus EM5. So your camera should have this setting somewhere.
Bracketing – manually
You can do bracketing manually, using any combination of exposures that you want to. Just head over to manual mode, take one photo with the suggested camera settings, and then take a photo with whatever settings you need to get the lights (underexposing), and then a third photo getting the darks (overexposing).
In camera HDR
On my Canon 6D the in-camera HDR gives me a JPEG file – I do not want that, so I do not use it. I want RAW files.
But there will be in-camera HDR modes that give you RAW files. They are after all doing the same thing, taking photos of the same thing at different exposures.
And all they are doing is changing the exposure just as you are with bracketing.
Aligning the images
Now you need to be aware of this. If you take the photos using manual mode, you will definitely need your camera on a tripod.
If you are taking photos using auto-bracketing hold your camera nice and tight so the photos can be merged together later. Or just your camera on a tripod, and that is that sorted.
But if you are using in camera HDR, you might find that the camera does all this for you, and even serves you up one file that is the HDR file, with the photos already put together in camera.
Marvellous what cameras can do these days.
Isn’t HDR bad?
No. Call it bracketing and everyone is fine with it. Say that you do HDR photography and the pitchforks will be out. Just send people my way if they do, and I will sort them out ok?
Can I bracket on any camera?
Yes, manually, but I am pretty sure most cameras have a bracketing mode.
What about my phone?
HDR is an option that you can turn on an forget. That is what I have done.
What do I do with the three photos?
If you have done in camera HDR you might have the option for the camera to do all the work for you.
But if you have taken a bracketed set you will need to merge the photos together. I do this in Lightroom, which is a straightforward process.
What do I do?
I use auto exposure bracketing with the camera set to take a correct exposure, a 2 stop under exposed photo and a 2 stop over exposed photo.
I merge the three photos together in Lightroom using the HDR Merge tool, and work on the newly created HDR image.
Related viewing
I have created a video for this post which you can watch on my You Tube Channel.
Related reading
Well there are a few blog posts that are related to this one which I would like to tell you about.
How Do You Take Good Pictures Of A Building? 25 Tips To Help You!
Lightroom Workflow 2022 – How To Work Like A Pro – Like Me!
How do you take good architecture photos? 11 Things For You To Think About!
What Is The Best Way To Create Excellent Real Estate Photos Consistently?
50 Essential Photography Tips For Beginners Who Want To Photograph Buildings
And there is my course
“How To Become A Real Estate Photographer – Straight Talking Advice For Beginners To Get You Making Money Quickly And Build A Career” is my course – find out more on my courses page.
Get a weekly email from me to you
Yep, if you want to receive an email from me every week then fill in the form on this page – there will be one somewhere. And in return I will send you a splendid Lightroom thing, and you will receive my thoughts straight to your inbox on a Friday afternoon. Which is nice.
OK – how can I find out more about this stuff?
Simple.
Get in touch with me – email me – sales@rickmcevoyphotography.co.uk
Check out my website Rick McEvoy Photography
Check out my splendid Photography Explained Podcast
Get in touch, ask me a question that I can answer on my blog or podcast, or just say hi – it would be great to hear from you.
Thanks for visiting my small but perfectly formed website, and I look forward to hearing from you.
Cheers from me Rick