You want to take great sunrise photos? So do I! And I don’t blame you – one my favourite things to do is to photograph is a sunrise. But, to get great sunrise photos, you and I need to know what camera settings we need right?
So I will tell you what the best camera settings are, and then show you some of my sunrise photos, and the settings that I used to get them
The best camera settings for sunrise photography are
- Aperture – f8/ f16
- Shutter speed – well it just depends
- ISO – 100
- Camera Mode – Av
- File format – RAW (not JPEG)
- White Balance – Auto
- Auto bracketing – +/- 2 stops
- Back-button focus
- How I get the focus right
- Camera on a tripod
- Self-timer set to 10 seconds
- Focal length – as wide as you want
There are other camera settings but these are the main ones that I use to successfully photograph sunrises.
And yes I will tell you the actual camera settings I used to take the 5 sunrise photos included in this post.
Yes, there are some actual photos in this post!
Before I go on – I must explain this
In this post I am explaining the camera settings that I use to photograph sunrises. They work for me and allow me to concentrate on the sunrise itself and not fiddling around with my camera. This is not a technical article, I am explaining my sure-fire way of getting great sunrise photos every time using tried and tested camera settings.
There are those who will not agree with my approach – that is absolutely fine – this is how I do it.
The basics of taking photographs – the exposure triangle.
First things first. Every time you take a photo there are three elements that have to be set to ensure a correct exposure.
These are
- Aperture
- Shutter
- ISO
These settings apply to any camera, and are what I will start with.
Aperture
F8/ F16. F8 is the sweet spot on my Canon 17-40mm lens, and also my Canon 24-105mm lens. This is my starting aperture every time I go out to shoot. By sweet spot I mean that I get the sharpest images with the minimum optical errors.
When do I vary from this?
When I want to change the depth of field, i.e. how much of the photo is in focus. If there is something in the foreground that I want in focus then I might need to change from F8 to F16. F16 is my aperture of choice if I want the maximum depth of field without getting lens induced errors.
If I am shooting straight into the sun and I want a starburst effect I will go to the minimum aperture of F22 on my Canon 17-40mm lens.
So, the aperture is determined by the composition and what is going on in my head at the time!
Shutter speed
I use AV mode on my Canon 6D. AV stands for Aperture Value. In AV mode I select the aperture and the camera sets the shutter speed for the correct exposure automatically. More on that in a bit – hold that thought for now.
ISO
I use ISO100. This is the lowest native ISO on my Canon 6D. The lowest ISO produces the highest quality images with the lowest amount of noise and other bad digital stuff that creeps in when you use higher ISOs.
I will sometimes go to ISO400 if the conditions require, which is normally if there are fast moving clouds or trees blowing around and I need faster shutter speeds.
Back to shutter speed
I always use a tripod, so shutter speed is not a concern with regard to camera shake. The only relevance here is if there is something moving in the scene, typically the sea, clouds or trees.
Now I like a bit of movement on my sea, so I don’t worry about this. A long shutter speed is just fine, anything up to a couple of seconds. I just let the camera select this for me.
If I am shooting handheld though, that is another matter, but as my focal length of choice is 17mm I am fine handheld down to 1/30th second – as long as I am careful that is!
Camera Mode – AV
I use AV Mode. Aperture value, aperture priority, AV Mode, call it what you want. I set the aperture and the camera sets the shutter speed for the lighing conditions.
Yes, it is that simple.
File format – RAW (not JPEG)
I only ever shoot in RAW, never in JPEG. RAW gives me the maximum data to work with in Lightroom. Check out this post for lots more about this – RAW vs JPEG – Why I Shoot in RAW and Share in JPEG. But basically, using RAW the camera does no processing other than creating the image.
If you take photos using JPEG then there is an amount of processing done by the camera which you cannot undo. And I don’t want that!
Auto white balance
As I shoot in RAW I can use Auto White Balance – I don’t need to worry about this till later. Am I being lazy? I would rather say smart – this gives me one less thing to worry about.
And yes I could set it manually, but I can adjust it later so do not need to. As for all those people who say I should be getting this right in camera you are of course correct, but I want to concentrate on getting a great composition and let the tools that I use help me to do this.
Auto bracketing – +/- 2 stops
When I am photographing the sunrise, I use auto exposure bracketing, where I take three exposures.
- The first exposure is the correct exposure – the one that the camera tells me is the correct exposure.
- The second exposure is two stops under exposed (darker)
- The third exposure is two stops over exposed (lighter)
As I am using AV mode the camera works this out for me by varying the shutter speed.
If the shutter speed for the correct exposure is 1/1000th second, the second shutter speed is two stops faster, (1/4000th second) letting less light in, creating a darker image. The third exposure is two stops slower than the first exposure, (1/250th second) which is lighter.
This is what they look like in Lightroom.
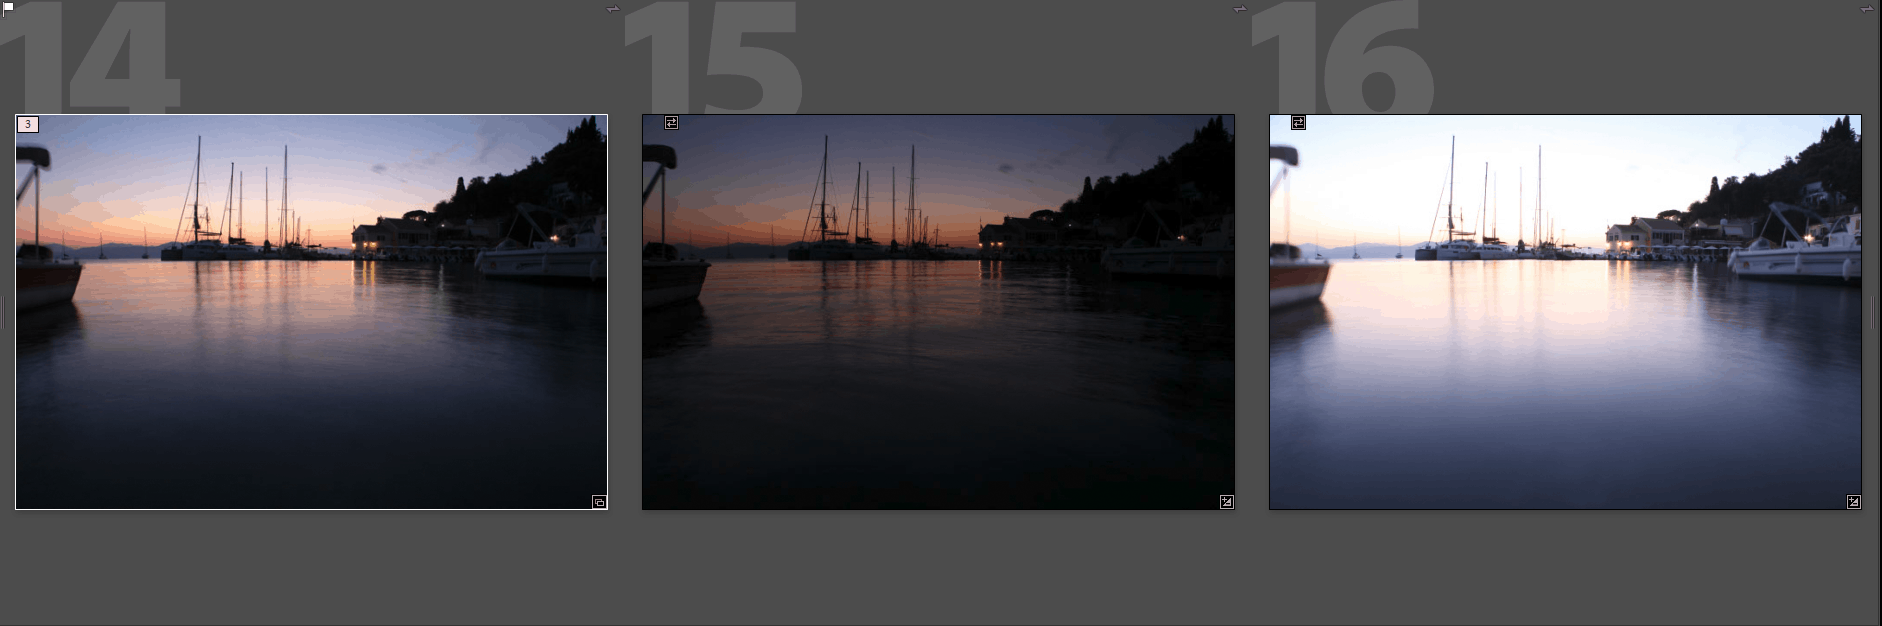 Auto bracketing images viewed in Lightroom
Why do I take three photos?
I take three photos which I merge together in Lightroom later. This is called HDR photography. HDR is High Dynamic Range.
Basically, I get more of the lights and more of the darks than my Canon 6D can capture in a single image, which I can merge together in Lightroom.
And yes this is fine to do. Call it auto-bracketing and everyone is fine with that – call it HDR and erm, well let me point you in the direction of my Photography Explained Podcast, and episode 112 – Is HDR Photography Bad? Is It Ok To Use It? Or Is It Cheating?
And also this blog post – Do You Want To Know What’s The Difference Between Bracketing And HDR?
Back button focus
This is a custom function setting on the Canon 6D. Basically I focus using the AF-ON button on the back of the camera rather than by pressing the shutter release.
How I get the focus right
First off I use a combination of Live View and the viewfinder to compose the image – it just depends. When I have that sorted as a rule of thumb I focus one-third into the scene, using either Live View or the viewfinder.
Once I have focussed I can take as many photos as I like as exposure and image capture are separate from focussing.
That is the point of back button focus.
Camera on a tripod
I have a few tripods, normal Manfrotto tripods, a tiny Manfrotto Pixi and also a Platypod which is basically a metal plate which I can fix my camera to, and place it on the ground to get a great low viewpoint.
I change the shutter speed by varying the ISO after I have chosen the aperture for the composition.
If you want to buy any of the gear that I use and help me there are some links at the end of this post.
Focal length
17mm. Super wide which I love. I sometimes change this, but not that often as I just love this focal length.
Self-timer – my secret weapon!
I use the 10-second self-timer built into my camera. I used to use a remote release, but much prefer doing this as it works a treat and means I have one less thing to carry, go wrong and to get batteries for.
And using the self-timer means that all I need to do is press the shutter release button whenever I want to take a photo – I am not sat behind my camera peering through my viewfinder – I am normally sat on the floor next to it.
Some other camera settings for my Canon 6D
Drive Mode
As I am auto-bracketing and using the 10 second-self timer that is sorted.
Metering
I use Evaluative Mode most of the time
Focus Mode
Most of the time I use AF Mode One shot
My workflow and making life easy
My workflow has evolved over the years to make taking photos as easy as possible. With the settings I have described here and the techniques I use I am able to concentrate on what I am taking a photo of.
All I need to think about with the camera settings is
- The aperture, which is normally F8 or F16
- Where I focus
- Everything else is set before I take a photo.
Another word about HDR
HDR photography gets more information from a scene recorded by the camera. And there is another benefit – I don’t need to worry about the exposure of the image capture – I have so much built-in latitude this is no longer an issue?
Some purists might see this as being lazy – again I think this is a smart way to work, which helps me take better photos and enjoy myself much more than I would if I was fiddling around with camera settings.
And this is what I did for years until I thought about it all.
Remember that my workflow is an evolution of a lifetime of practising and learning about photography – a process that is an ongoing one – learning for me never ends!
How many photos?
I aim to get one photo of a sunrise. I get the composition that I want, and then take a range of photos. I am going to write about this in a future post – well why not eh?
And with that lets look at some sunrise photos that I have taken, and the settings that I used to get them.
Here are five sunrise photos that I have taken, along with the camera settings used. All five photos were taken with my Canon 6D and Canon 17-40mm, 24-105mm or 70-200mm lenses using the settings mentioned above. The only variables are the aperture, shutter and ISO which of course vary depending on the light in the scene I am photographing.
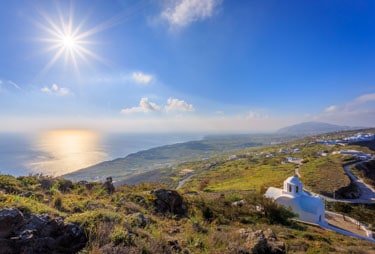
Santorini sunrise photo from the top of the caldera
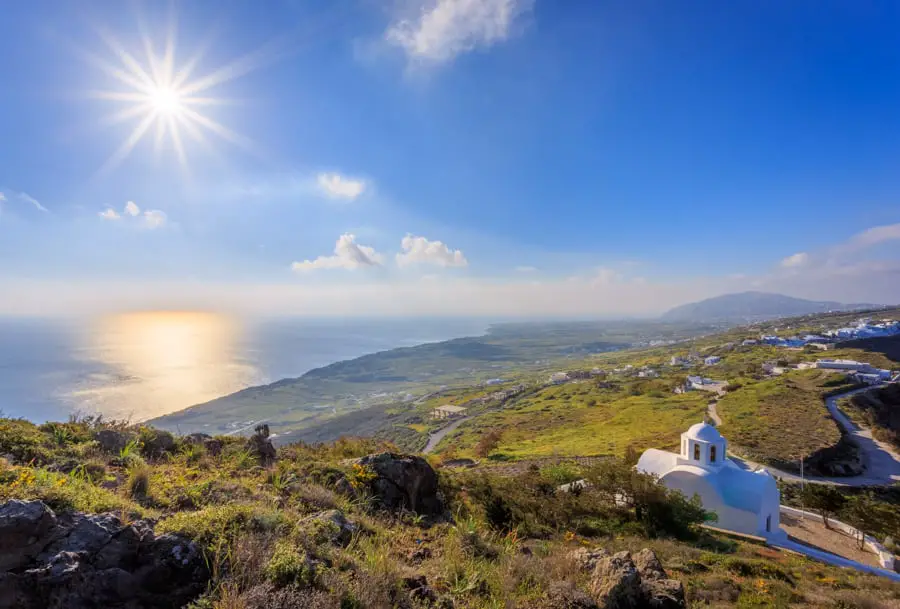 I N Ayiou Mapkou church after sunrise with a spectacular view of the island of Santorini
Sunrise for me starts well before the sun rises, and ends some time after the sun has appeared over the horizon. This photo demonstrates the point I made about the use of the minimum aperture on my Canon 17-40mm lens – this is how I get the sun looking like this.
And using auto-bracketing I can shoot straight into the sun and not have a wildly incorrect exposure.
A word of caution here – be careful photographing straight into the sun! Protect your eyes.
Camera settings
- Aperture F22
- Shutter Speed 1/500th second, 1/2000th second and 1/125th second
- ISO 400
Why ISO 400? In this scene the clouds were moving very fast so I didn’t want a shutter speed slower than 1/125th second.
Sunrise in Loggos on the Greek Island of Paxos
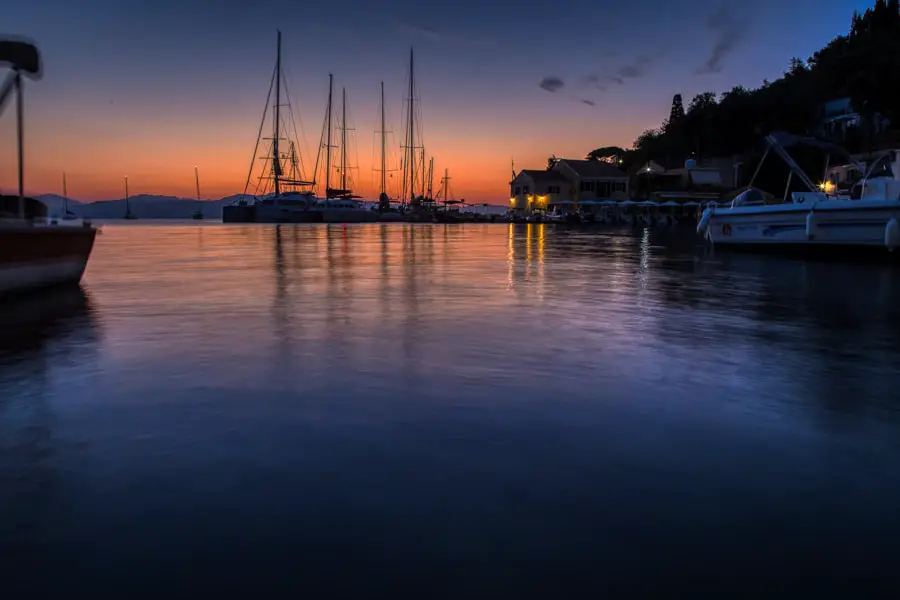 Sunrise in Loggos on the Greek Island of Paxos
Camera settings
- Aperture F16
- Shutter Speed 1.6 seconds, 0.4 seconds and 6 seconds
- ISO 400
Yes – long exposures still work with auto-bracketing. And check out my Paxos Travel Guide website to find out more about this wonderful Greek Island.
Sunrise view of Navarone Bay looking towards the Acropolis of Rhodes
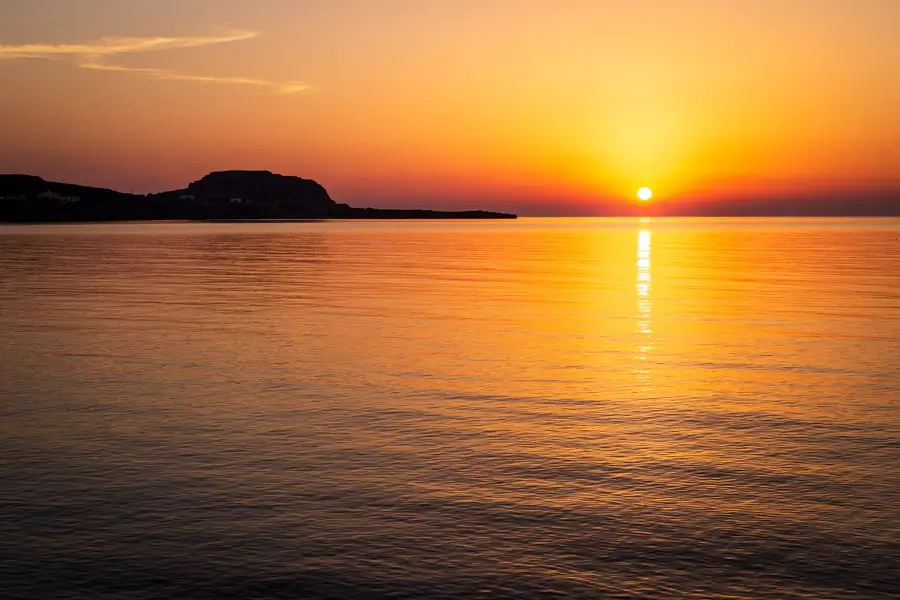 Sunrise in Rhodes – Travel Photography by Rick McEvoy
Camera settings
- Aperture F16
- Shutter Speed 1/25th second, 1/100th second, 1/6th second
- ISO 100
Sunrise at Cap Negret Spain
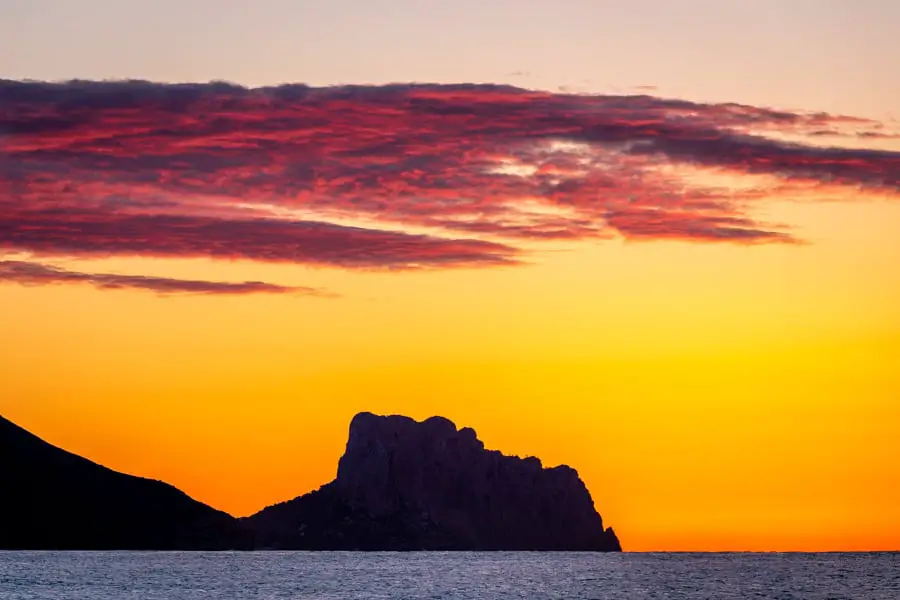 Stunning sunrise colours in Altea, Spain
Camera settings
- Aperture F8
- Shutter Speed 1/40th second, 1/160th second, 1/10th second
- ISO 100
This photo was taken using my Canon 70-200mm lens!
Sunrise street scene in Altea Spain
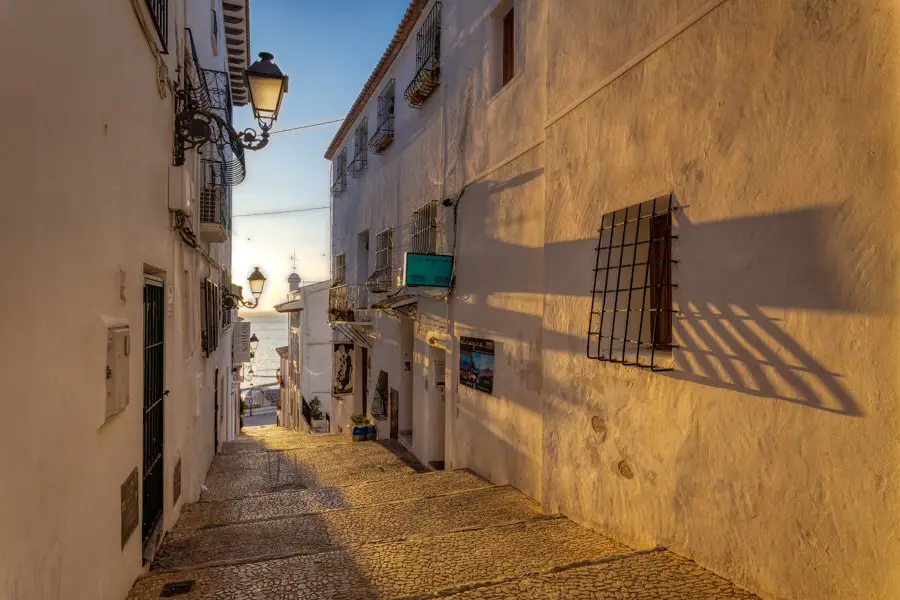 Sunrise in Altea by travel photographer Rick McEvoy
Camera settings
- Aperture F9, F13 and F6.3
- Shutter Speeds 1/160th second, 1/320th second, 1/80th second
- ISO 400
Just to disprove a point this photo was taken with my camera in Programme Mode. This was a mistake. I had been shooting video and forgot to change back to AV Mode. But you can see how the camera has still managed to capture all of the scene!
A word on processing my sunrise photos
All the photos I take are added to a single catalogue in Lightroom.
On import I add an amount of processing to each and every image – this is stuff that I used to do manually to every image I was editing.
My images start off 30% processed when I start to look at them.
HDR Merge
Once I have chosen the images that I want to edit I do a form of batch processing. I carry out an HDR merge on the first set of three images, and if all the settings re ok I select the next batch of three images and use the Lightroom keyboard shortcut Shift Control H. This starts up the HDR merge process. I then move on to the next three, and on and on. I have had Lightroom do 30 HDR merges at once – I go off and do something else and leave Lightroom to it.
This gives me all the HDR dng files to work with, which is an excellent starting point.
I will write another post about editing sunrise photos in a future blog post.
What about sunsets?
Well to be honest I don’t have as many sunsets as I do sunrises. Sunrise is my time – I get up early on my own and get out there and photograph the dawning of a new day. I do not inflict this on anyway else, and that is just fine for all of us!
But sunsets are at a much more sociable time, so I have less of them!
Buy the gear I use and help me
These are all affiliate links. Buy something after clicking on one of these links and I get a commission. You don’t pay any more but you do get my gratitude for helping me.
Canon 6D – so old you can’t buy it on Amazon
Related reading
Well there is so much on my website – here are a couple of related posts.
The exposure triangle explained in plain English
Where Are The Best Sunrise Locations In Rhodes – These Are My Favourite
Related websites
While I am on the subject of travel photography check out my other websites Photos of Santorini and Paxos Travel Guide.
Related viewing
Check out my You Tube channel, where you will find a video that I recorded about the stuff covered in this blog post.
Photography Explained Podcast
Shameless plug time, well why not? I am the creator and all things at the splendid Photography Explained Podcast, where I explain one photographic thing per episode in plain English in less than 27(ish) minutes without the irrelevant details.
Get a weekly email from me to you
Yep, if you want to receive an email from me every week then fill in the form on this page – there will be one somewhere. And in return I will send you a splendid Lightroom thing, and you will receive my thoughts straight to your inbox on a Friday afternoon. Which is nice.
OK – how can I find out more about this stuff?
Simple.
Get in touch with me – email me – sales@rickmcevoyphotography.co.uk
Get in touch, ask me a question that I can answer on my blog or podcast, or just say hi – it would be great to hear from you.
Thanks for visiting my small but perfectly formed website, and I look forward to hearing from you.
Cheers from me Rick

